Hello everyone. And welcome back to another Photoshop tutorial. And in today’s tutorial, you are going to learn how to add sun rays in Photoshop vs luminar Ai, and we are going to do a quick comparison between the two software solutions to find the easiest way to add sun rays.
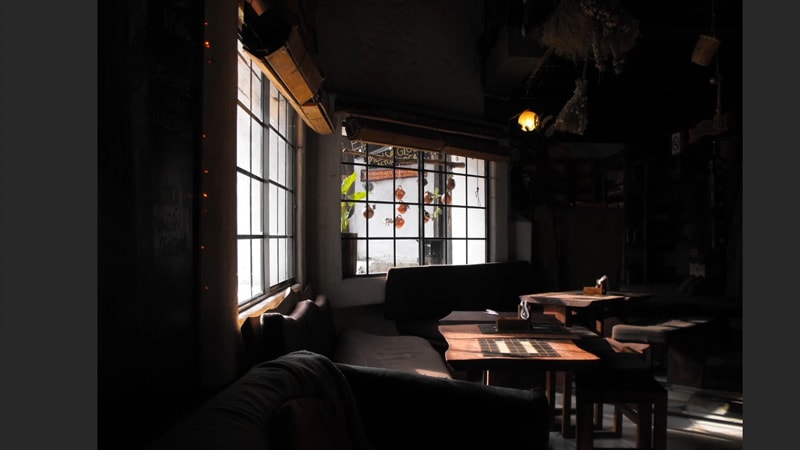
we have an image open up in Photoshop, And I want to show you the easiest way to create sun rays that comes out of the windows.
1 – How to Add Sun Rays in Photoshop
Step 1: Make a Selection of The Light Source
before we apply the effect of the sunrays in our first image example, we need to make a selection of the windows because that’s what the light is coming from And and that will make the sun rays take the shape of the window.
So let’s get started with the tutorial.
Start by duplicating the background image by clicking on ctrl/cmd + J, then desaturate the duplicate layer by clicking on ctrl/cmd + shift + U
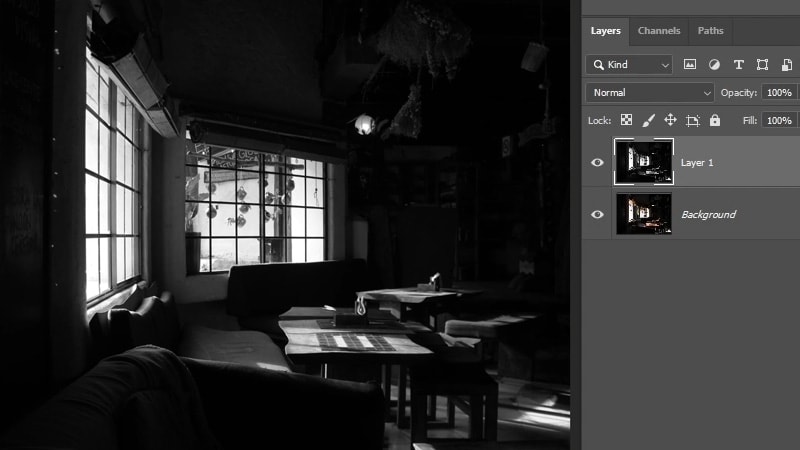
Now you can either make a selection of the window, or you can also add some contrast with a levels adjustment layer by selecting the layer and then clicking on ctrl/cmd + L
then all you need to do is make the shadows darker by dragging the left slider to the right, and you can also drag the mid-tones slider to the right as well, and the highlights slider to the left
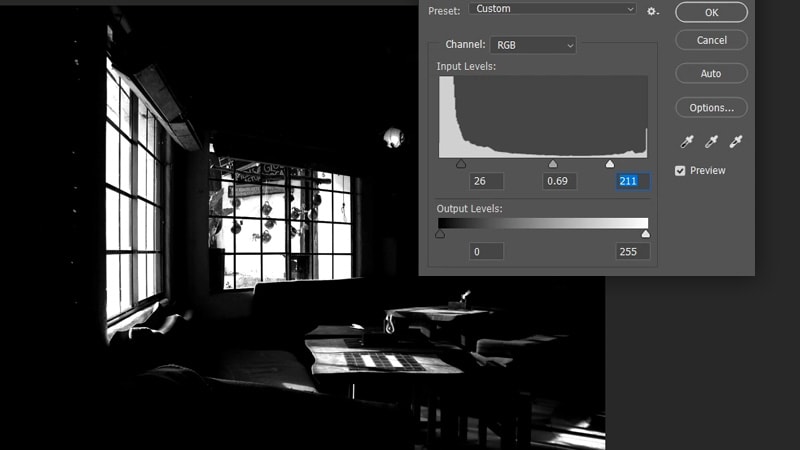
as you can see, most of the room is dark now,
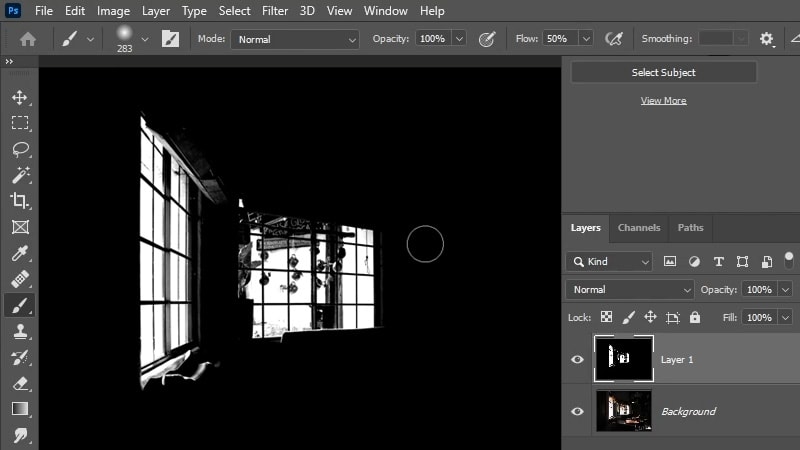
there are some areas left and we can easily remove that using the brush tool.
So with the foreground color set the black, use the brush tool to paint black on the rest of the image except for the windows to eliminate them from our selection like so.
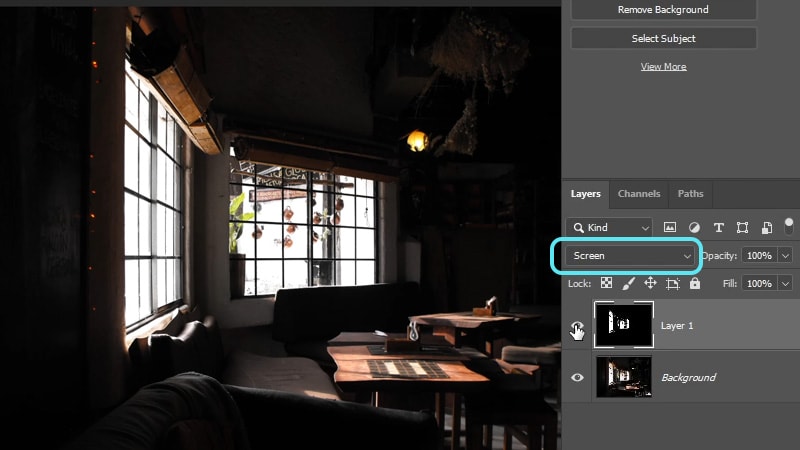
Once the selection is done, change the blending mode of this layer to screen, And with the screen blending mode, only the highlights will now be visible.
Now let’s get to the fun part which is applying the sun rays effect
Step 2: Use The Radial Blur Filter to add Sun Rays in Photoshop
we’re going to be working with filters, and for a non-destructive workflow, you can convert this layer to a smart object so you can edit the effect’s value in the future using smart filters by right-clicking on the layer, and choose “convert to smart object”.
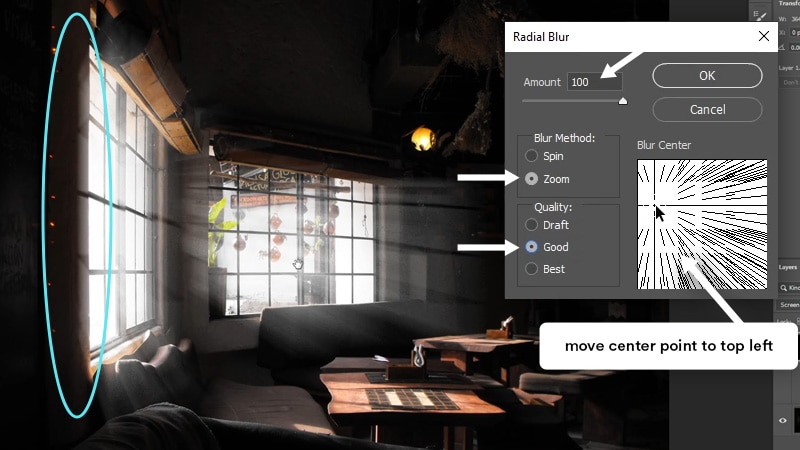
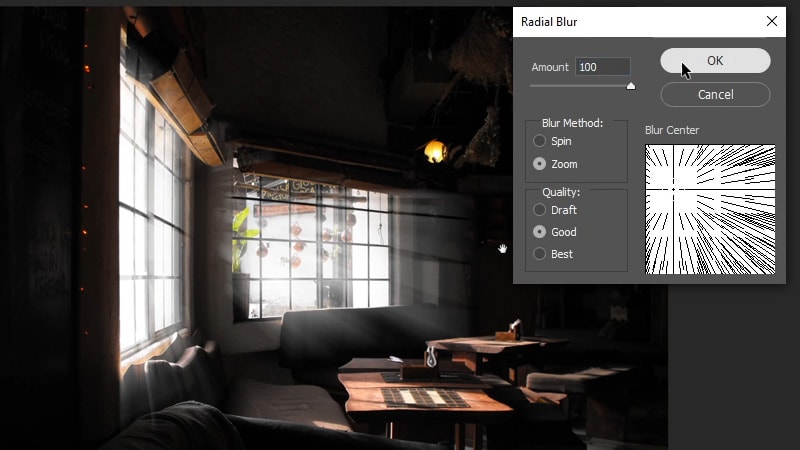
Now, from the top menu, go to filter > blur > radial blur.
this is the filter that’s going to achieve the effect of the sun rays and you can choose the amount of blur using the slider, and you need to increase the value all the way to 100.
this filter can be a little bit slow depending on your image size, so you may want to set the quality to “good” or “draft” for now to preview the effect faster and you can turn it back to “best” later
you can also click and drag on the preview box to set the blur center, in this case, move the center point a little bit to the left and to the top, then click Ok
as you can see, this is pretty much the effect that this filter will achieve, except there is some light bleeding on the left side,
we can fix that by double-clicking on the smart filter And move the center point a little bit to the right.
Now that it’s fixed, and once you’re happy with the direction of the blur, you can double click on the smart filter again and now you can set the quality to “best” and click Ok.
it’s going to be a little bit slower this time, but it will render the best quality.
this is the first result that i got with the radio blur filter, but I don’t really like the end result just yet, I want the effect of the light rays to be a little bit longer and gradually fades, in the room.
So what can be done to fix this is to make multiple copies of the effect’s layer and apply the blur filter again to make the sun rays longer
Here’s how to do it
Start by reducing the opacity of the sun rays layer to 50% by clicking on 5 on your keyboard, and duplicate this layer by clicking on ctrl/Cmd + J
Now you are going to apply the radial blur filter again on the duplicate layer
and to avoid having multiple smart filters on this layer, And what I also found is that applying this filter multiple times works a little bit better on a Raster layer.
To rasterize the layer right-click on it and choose “rasterize layer”, then apply the filter again and don’t change any value from the previous filter
you can also use the keyboard shortcut Ctrl/Cmd + alt + F to reapply the last used filter.
So use the shortcut to apply the filter a couple more times until the effect of the sun rays gets longer
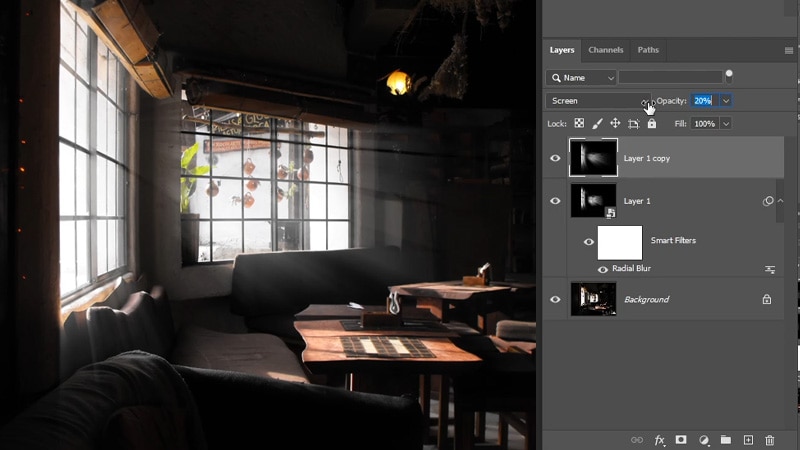
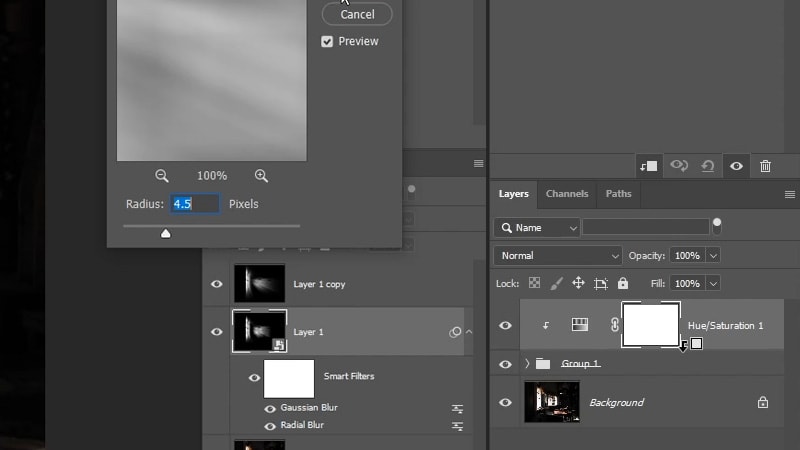
If the effect of the sun rays is a bit harsh, you can reduce the opacity to about 30%, and you might want to also apply some blur to reduce the hardness of the sun rays by going to filter > blur > gaussian blur, then apply a small amount of blur just to remove that harshness of the light rays.
Step 3: Add Color to the sun rays
All right, So that’s everything you need to do to create the effect of the sun rays, the last thing that you might want to do is add some color to the sun rays to match the overall tone of the image.
to do that, select all the layers of the effect by click on the first one, hold shift and click on the last layer and click on ctrl/cmd + G to group all of them.
And now add a “hue saturation” adjustment layer on top of the group, And also create a clipping mask by holding alt/optn and click between the two layers
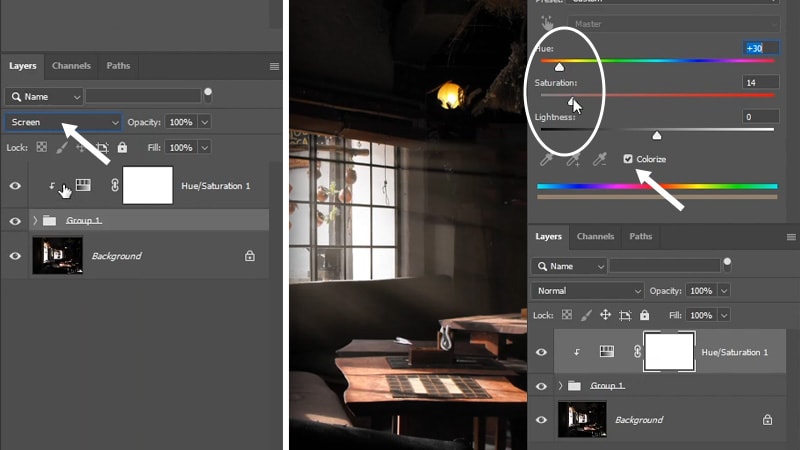
Then check “colorize” and add some warmth to the light rays using the hue slider
this adjustment layer will affect the whole image, and you can fix that by changing the blending mode of the group to screen.
You can also decrease the saturation to make the effect less visible, And that looks a little bit more realistic in my opinion.
So that’s the easiest way to make sun rays in Photoshop, And as you can see, it involved making selections and creating multiple layers to achieve the desired result
But this process can be a lot easier and faster using Luminar Ai, and let me show you how you can do that
2 – How to Add Sun Rays Much Easier and Faster Using Luminar Ai
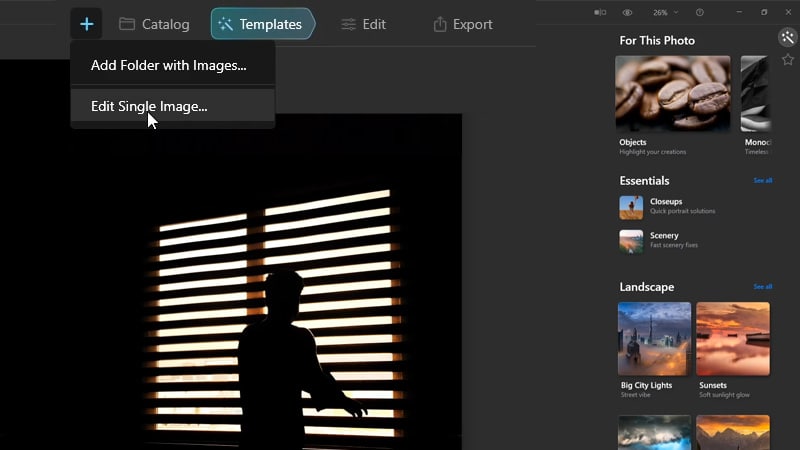
We have another example image open in Luminar Ai, And by the way, you can import an image by clicking on the plus icon, and you can either import an entire folder of images and view them from the catalog tab, or you can import a single image by clicking on edit single image, and then you can import your image from your drive.
The first thing you will is the “templates” view, and there are actually many templates for you to choose from to make processing image much faster,
if you’re not familiar with Luminar or AI, it’s the photo editing software that makes processing images and applying effects a lot faster and easier, And it’s a very useful And time-saving software for a lot of people that don’t want to take the time to learn a software like Photoshop.
And if you are interested to learn more about this software, let me know in the comments below and I’ll make more tutorials about Luminar Ai.
If you don’t have Luminar Ai, you can click here to download a free trial and follow along with this tutorial
Step 1: Use the sunrays panel in the creative module
Now let me show you how you can easily add sun rays,
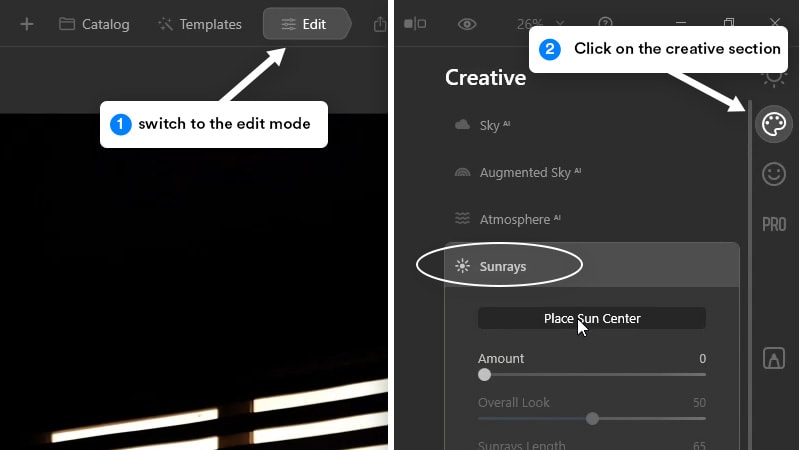
first, you’re going to click on the “edit” tab, then click on the “creative” section, from there you can click on “sunrays” to expand its settings.
Step 2: Add a light source
The first thing you need to do is click on the “place sun center” button, this will add a new control point that will enable you to move the sun rays, you will need to increase the amount first using the slider to see the effect.

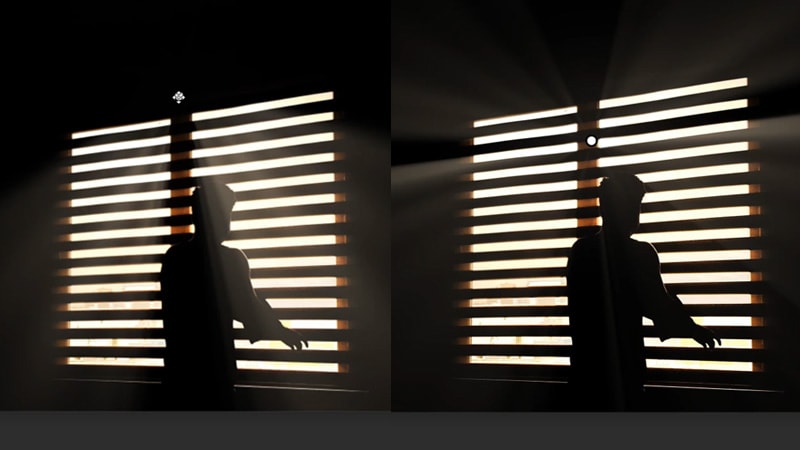
And now when you start moving this control point, you’ll see that the sun rays are actually interacting with the image in real-time, And that’s what I like about this software is that it makes things a lot easier for beginners than Photoshop.
Step 3: Play around with the settings
The next slider is the overall look, and this is basically in like an opacity slider of the overall effect, for this image i added a value of 45%.
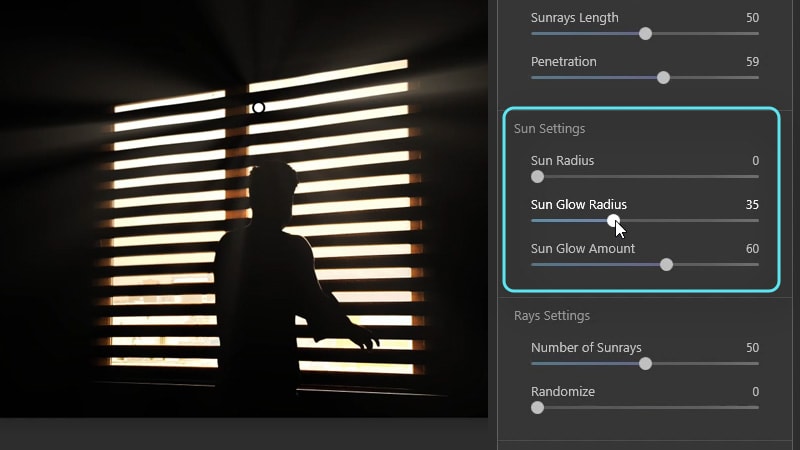
Then you have the “sunrays Length” and this will determine how much of the sun rays will travel throughout the image.
There is also the “penetration” slider, and this is basically how much light we’ll come through, i kept this one to about 60%.

There is still more settings under and you can click on each one to expand it.
So the first one is “sun radius”, which as the name implies will add an artificial sun in the center,
but for the purposes of this tutorial, keep it to 0 because it’s an indoor image and we only want the sun rays to be visible.
There’s also a “sun glow radius” and you can use it to control the sun glow amount, also keep it to 0, We don’t want this one either, these two will react to the first slider, So when you have the “sun radius” set all the way to 0, its related sliders will not make any effect on the image.
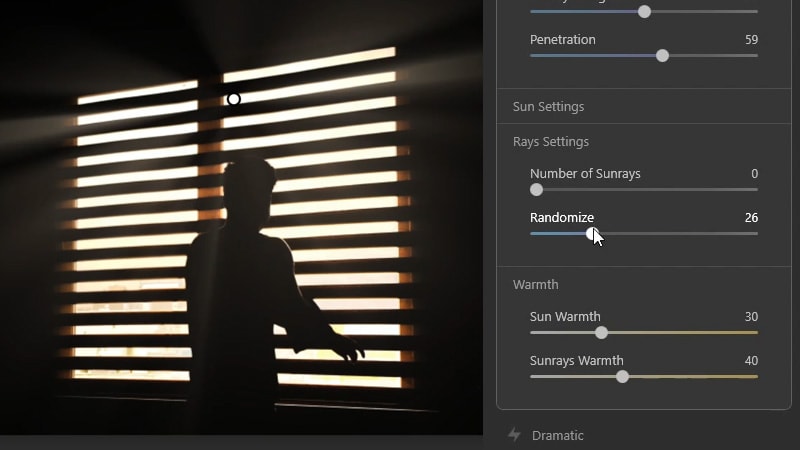
Next, you have the “rays settings”, this will increase or decrease the number of sunrays also for the purpose of this tutorial, I want to keep the number of sunrays to minimal.
There’s also a “randomize” slider, which will randomize the look of the sunrays.
And lastly, the “warmth” sliders.
The first one is for the actual sun and because we made the sun invisible previously, this one is not making any effect, but the next slider is going to increase or decrease warmth to the actual sun rays, keep this one to about 50%. And as you can see, this is how easy it is to create sun rays and Luminor Ai compared to Photoshop.
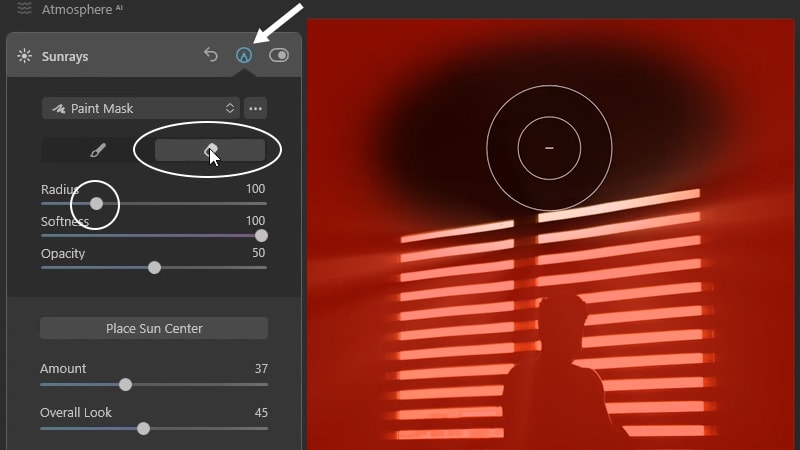
Step 4: Use Luminar Ai’s masking options if needed
There’s also one more thing that you need to know about,
you can click on the pencil icon to reveal the “mask options’’, You can click on the eraser icon, increase the radius of the brush and you can paint on top of the image to remove the effect from a certain area.
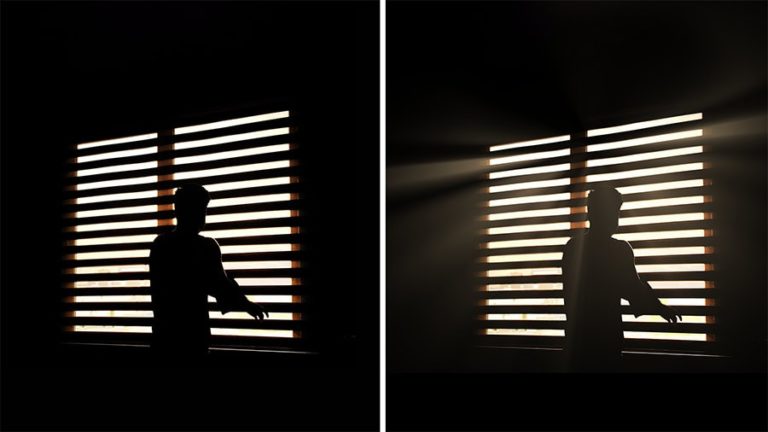
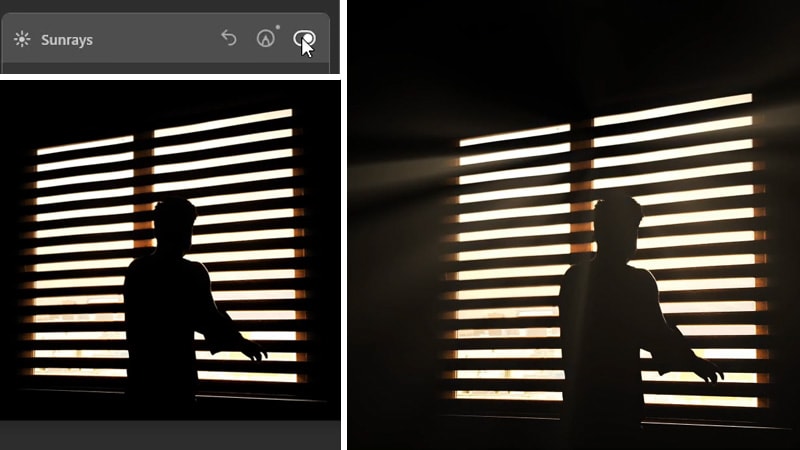
And lastly, you can click on the effect toggle switch to enable or disable the effect to see the before and after. So this is before and after.
So that’s how to create sun rays in Luminar Ai, Let me know in the comments below if you want to learn more about this software in future tutorials.
Other than that, I hope you guys find this tutorial helpful, thank you so much for reading and I’ll see you in the next tutorial. ✌