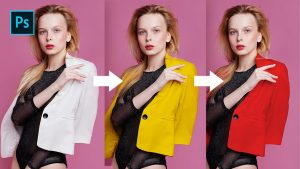
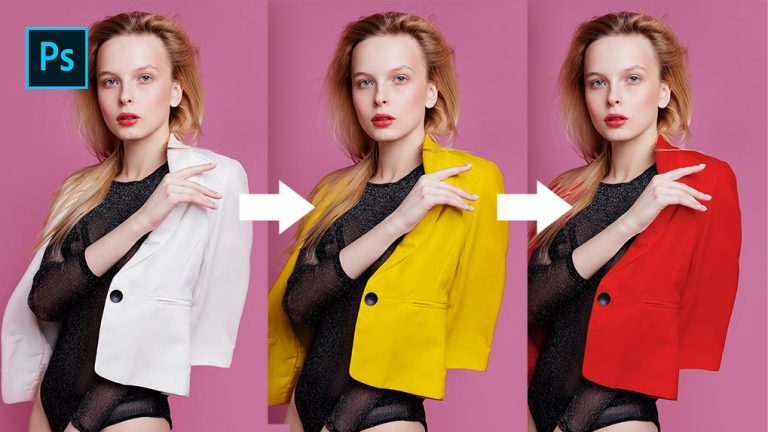
tutorials on “how to change background color in photoshop” are everywhere, and the techniques are effective in most cases, but in many cases only changing background color is not enough to get a realistic result
in this video, not only you will learn how to change background color in photoshop using an easy technique, but also you will learn how to change white background in photoshop using a more advanced technique, retain original shadows and change bounce light color
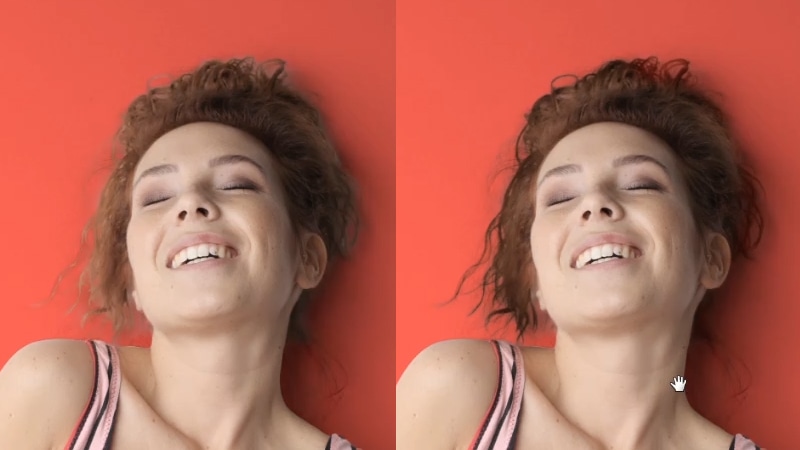
1 – How to change background color in Photoshop using Hue Saturation
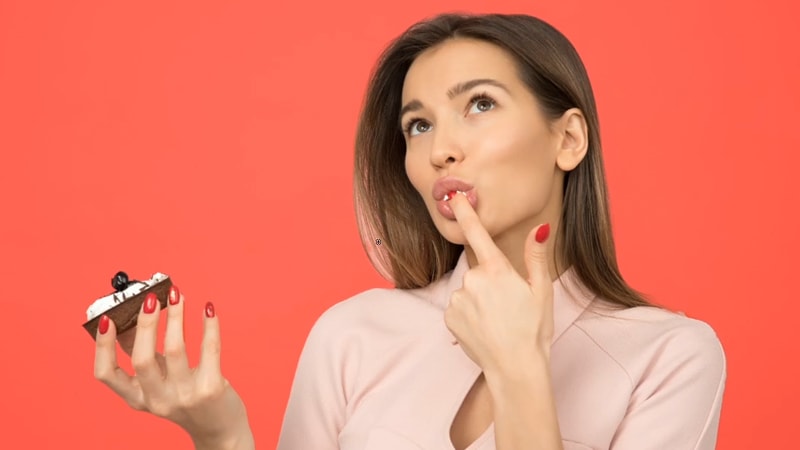
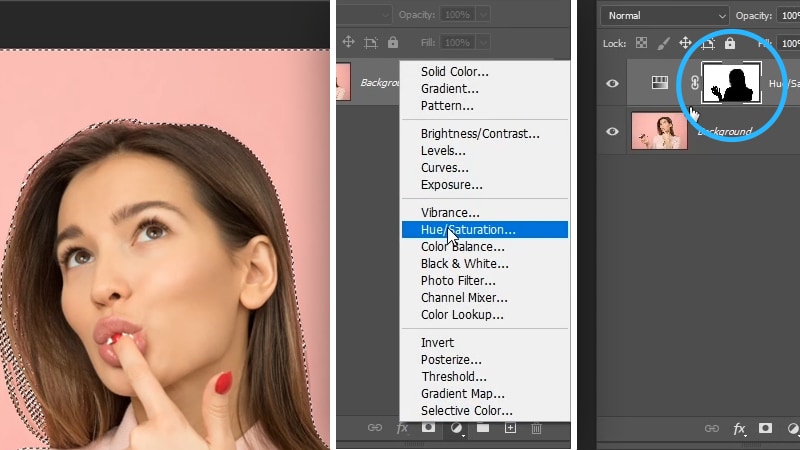
we’re going to start with the first example image, and to change the background color in this image, we need to first select the subject, and to do that, you can take the “quick selection tool”, and then you can make a selection around your subject like so
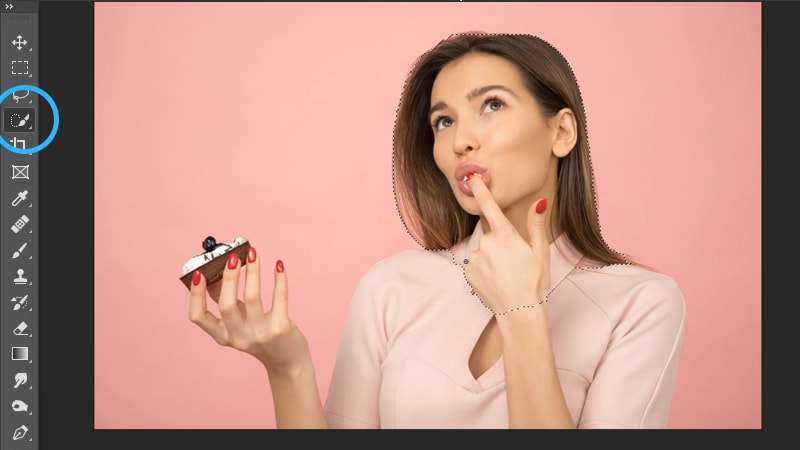
if you are in a newer version of Photoshop, you can click on the “select subject“ button and Photoshop will automatically select the subject for you Using artificial intelligence.
You can see that Photoshop did miss some areas. And we can fix that by using the quick selection tool, And you can use alt or option to add or exclude some areas from the selection and I’m going to exclude these areas of the background inside her hand
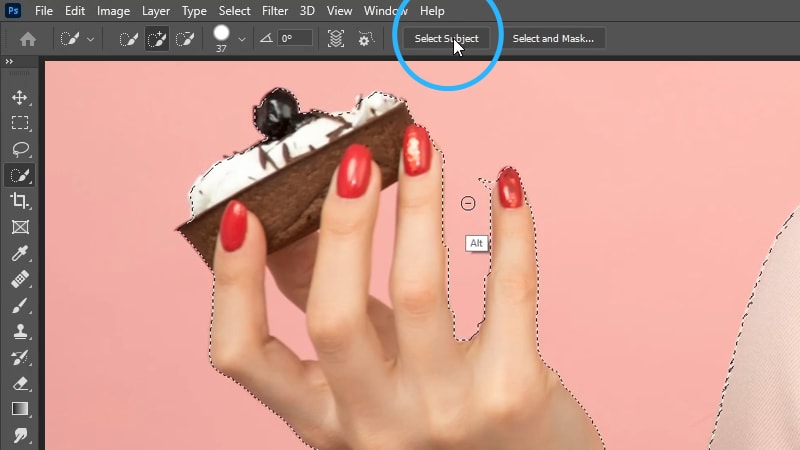
once you have your subject selected, you can also click on Q to enter the “quick mask mode”. And as you can see, we still have to exclude some areas of the background inside the hair.
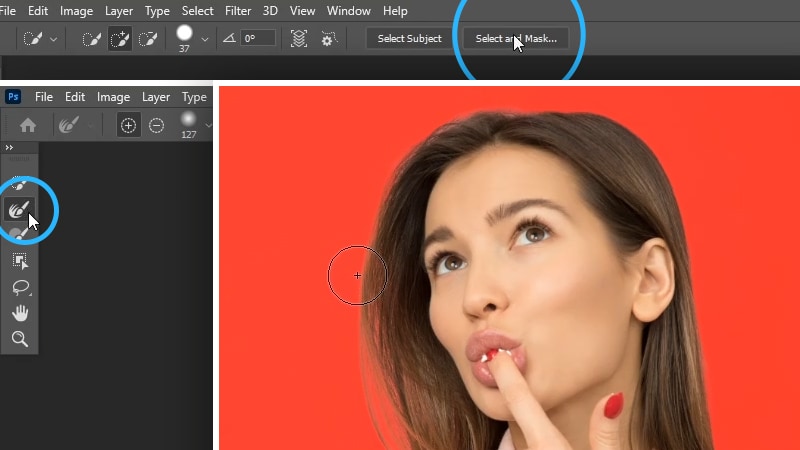
So to fix that, click on the “select and mask” button to enter the select and mask panel. And from here, you can take the refine edge brush and then paint on top of the hair to remove the background and fine-tune the selection
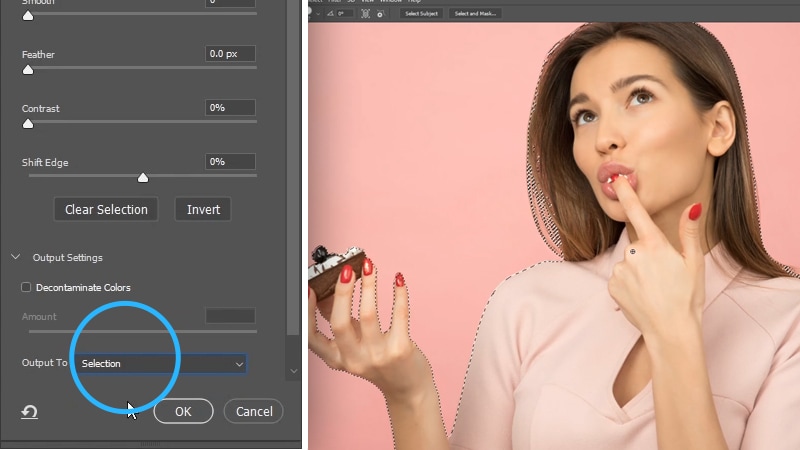
and then once you’re happy with the selection, you can choose the output mode and I’m going to choose “selection” and then click ok
Now we need to invert the selection because we have the subject selected and we want to select the background. So to invert the selection, click on ctrl/cmd + shift + I And now we have the background selected.
Next, add a “hue/saturation” adjustment layer, And once you do that, the selection will be automatically applied to the layer mask.
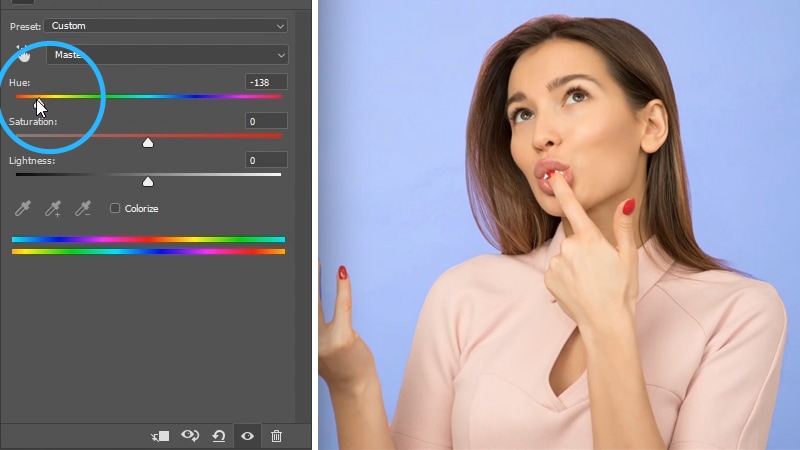
And now to change the background color, you can simply use the hue slider to change the color to whatever you want.
And as you can see, that was really easy to do. Once you have a good selection of your subject.
2 – How to change white background color using a solid color
So that’s the easy method to select and change background color in Photoshop, in the next example, we have a little bit more complicated image.
We have the subject closer to the wall and we have a shadow behind her, And also the background is white, so we cannot use hue saturation to change the color because we don’t have color information to change in the first place.
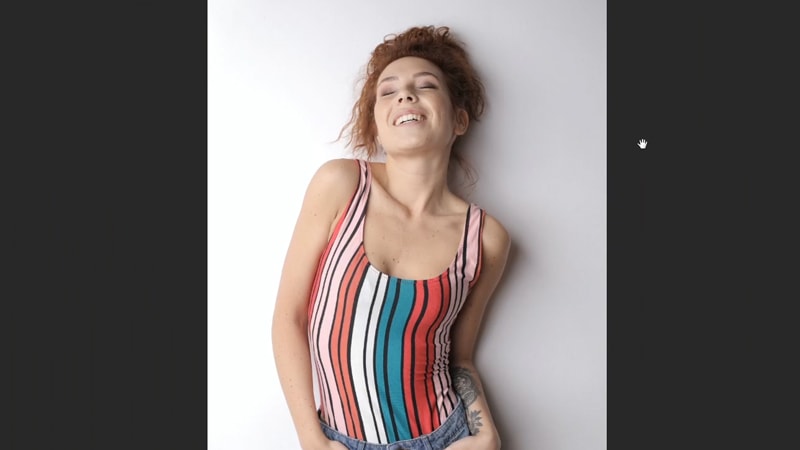
So I’m going to show you a different method to change the color of your white background.
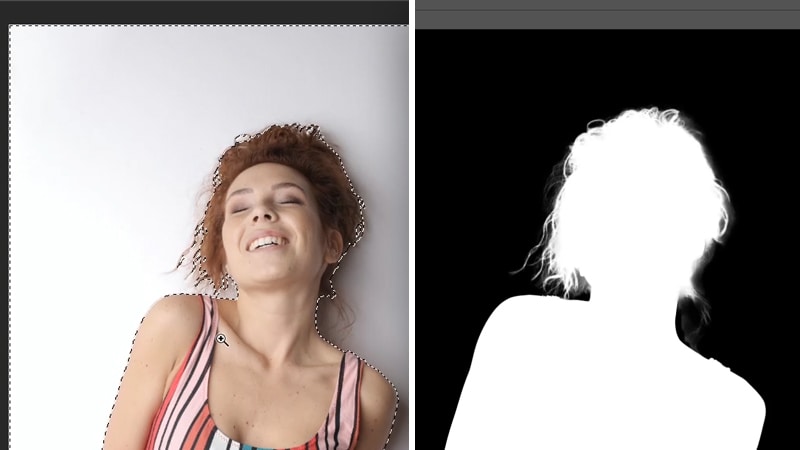
first, we need to select the subject, and just like before, use the quick selection tool or the “Select Subject” button to make a selection around the subject, then click on the “select and mask” button and use the refine edge brush to fine-tune the hair and get a better mask, then invert the selection to select the background
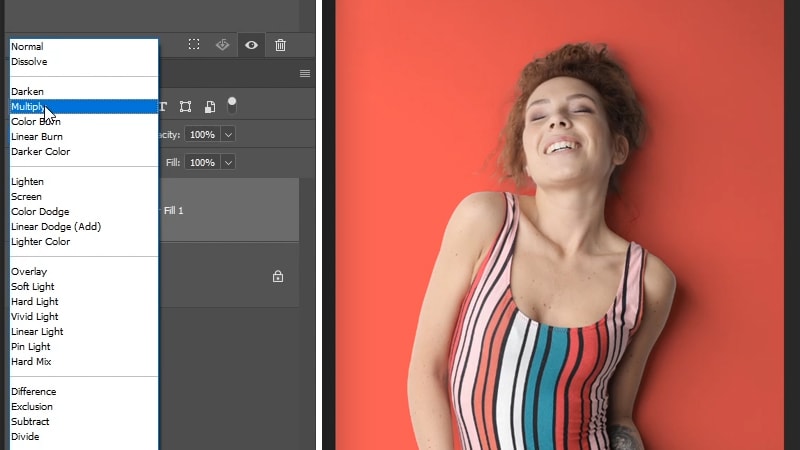
Once you have a selection active, this time you’re going to add a “solid color” instead of “hue/saturation”, and as you can see, the color of the background is changed, but we need to bring back that shadow

we can do that by changing the blending mode of the solid color to multiply, And now we have the shadows back and the image looks more realistic now. But we still have some problems to fix like the hair.
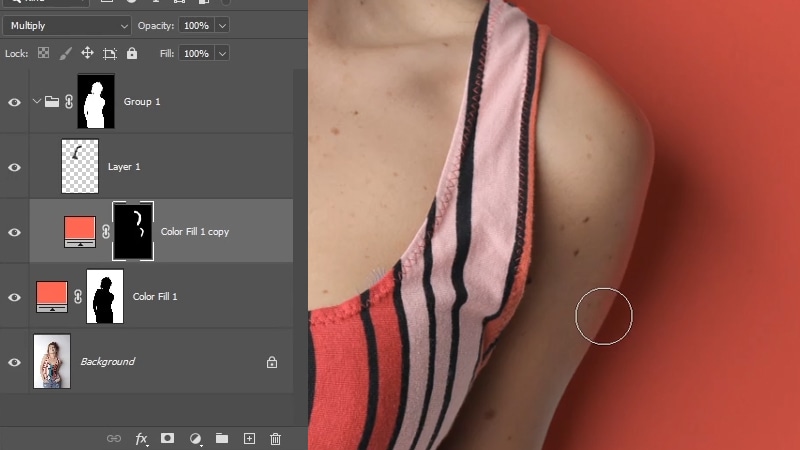
3 – Remove and Fix color Fringing From The Hair
Ok, let’s fix the edges of the hair, we need to give it some of that color of the background in order for it to look realistic.
So her’s what you need to do:
duplicate the solid color by clicking on Ctrl + J and then group the solid color by clicking on Ctrl + G, and then to click and drag the mask to the group to apply that layer mask to the whole group.
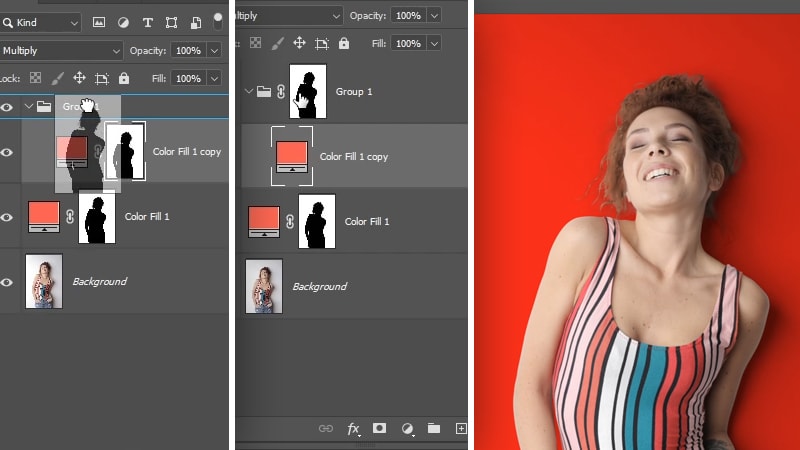
we want this group to affect the subject, So invert the layer mask by clicking on Ctrl + i
basically what we did is, everything you add inside that group will only affect the subject because we have a selection of the subject applied to the group as a layer mask
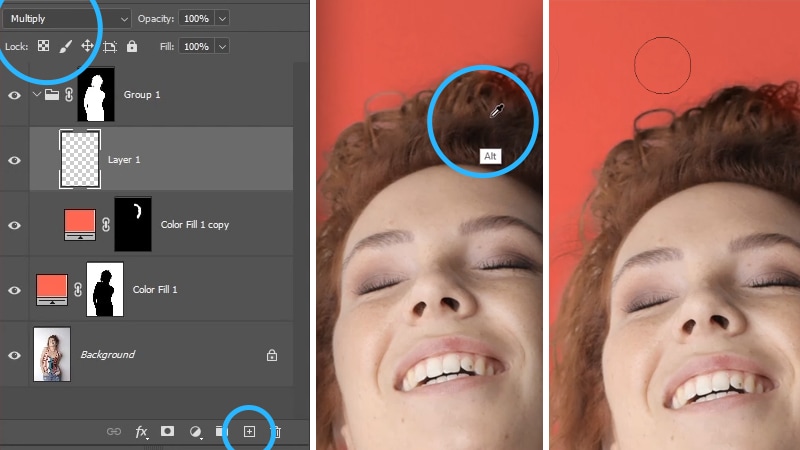
So now we are left with a solid color applied to the subject, now you need to add an inverted layer mask by holding alt or option, and then click on the layer mask button

now we can take the “brush tool”, and paint on the edges of the hair to add some of that solid color to the hair and remove that color fringing.
What you can also do is add a new layer on top of the solid color, then also change the blending mode to multiply, And then you can sample the same color of the hair and paint on top of the hair to remove that fringing as well, you can reduce the opacity and the flow to 50% to paint the color slowly and get a better result
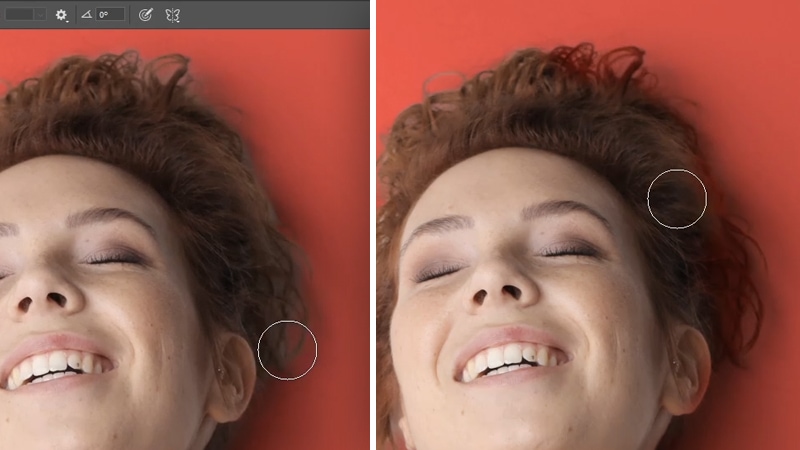
And as you can see, this makes the color look a lot more realistic. And we got rid of that fringing as well, her is a before and after.
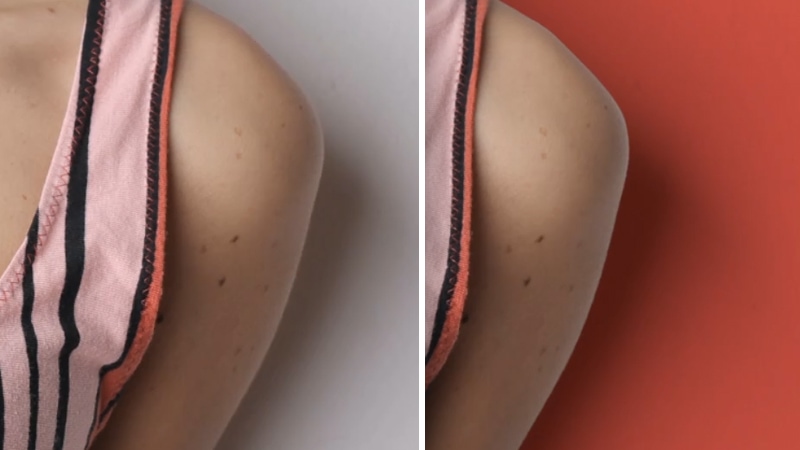
4 – Add Color Bounce Light to Your Subject
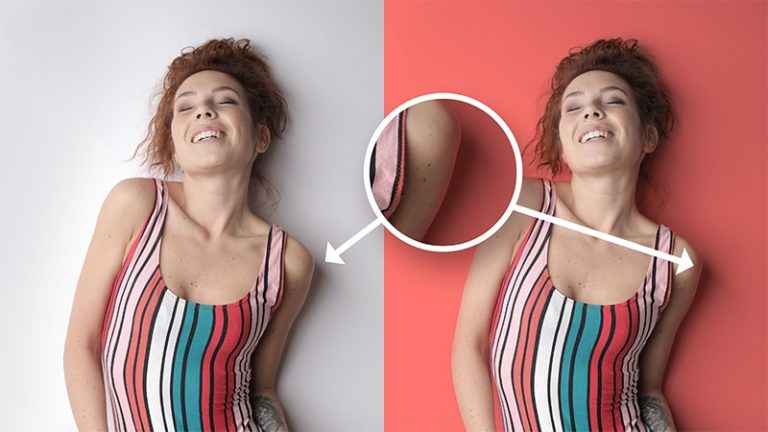
So now that we fixed the hair, we also need to pay attention to another thing, And that is the reflection of that color on the wall, on her skin.
if you zoom in on the left hand, you will see that there is some light reflection on the edges of her hand of the original color and that is called the bounce light.
So basically the light will hit the wall and then it bounces back on the skin, And that’s what creates the balanced light. So we need to replicate that with our new color in order for the image to look realistic.
So here’s what you need to do:
On the same layer mask of the solid color, take the “brush tool” and change the foreground color to white, (you can use x to toggle between the foreground and the background colors) and then you’re going to simply paint on the edges very gently and with a very low opacity and flow to create that bounce light on the edges
use a longer brush stroke to make that light look realistic, and this way you won’t get some round spots in one area, and the color is going to look a lot more realistic.
If you make a mistake, you can easily switch to black using x and remove it with the “brush tool”
Another thing you need to pay attention to, is that you don’t need to paint the bounce light everywhere, And with the same intensity because if you look at her left arm, it’s is closer to the wall, which means the bounce light color will be stronger on her left arm and not on her right arm. So in those areas make sure to paint with a lower opacity
And here’s a before and after of the subject with and without the bounce light painted on top
you can see that that bounce light color made the image look a lot more realistic than before,
And if you want to change the color in the future, you have solid color adjustment layers, and you can simply double click on them and change the color to anything you want, just make sure to change the color of the bounce light solid color layer as well.
So that’s how to change the background color in Photoshop, and also retain the shadows and the bounce light.
Now it’s your turn to tell us what you think of these techniques? Did you learn something new today?
If you know of any other technique you can share it with us in the comments below
you can also benefit from These free 20 Lightroom Presets For Portraits from PhotoWhoa to improve your images and turn them into a portfolio-worthy picture
Thank you so much for reading, and I’ll see you in my next tutorial. ✌