in this tutorial you are going to learn how to change the color of anything in Photoshop, we are gonna tackle four different scenarios of changing color and making targeted adjustment and selections and even changing white to any color you want, so without any further ado, lets get started
First Example image
Second Example image
Third Example image
Fourth Example image
- Masterclass
Learn how to match any subject with any background
Discover the secret Techniques to creating realistic composites in photoshop
we are gonna start with the simple and easy way to change color and progress as our images gets more difficult
so in the first example we wanna change the color of a shirt and to do that we need to make a selection around the shirt, so we can use the quick selection tool, and you just wanna click and drag around the area that you wanna select and this case its easy to do because there is a contrast between the subject and the background
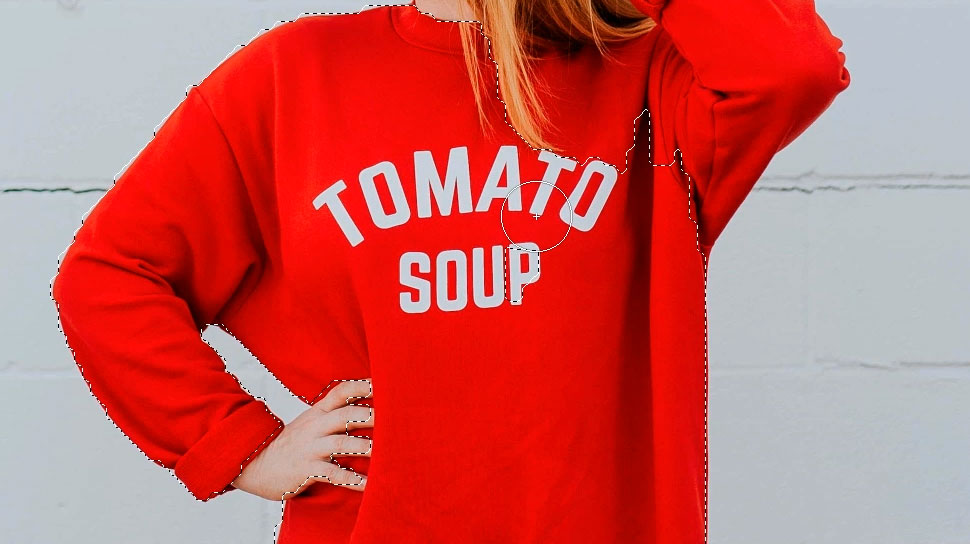
you don’t have to worry about the hair for now because we are gonna be using select and mask for that, if you want to exclude an area from the selection you can do that by holding alt or option, you will see the plus icon become a minus and now you can click and drag on the area that you wanna exclude from he selection
ok so now we have a selection around the shirt, now you need to click on the select and mask button to get to the select and mask panel and then take the refine edge tool and start painting on the hair to include it in the selection
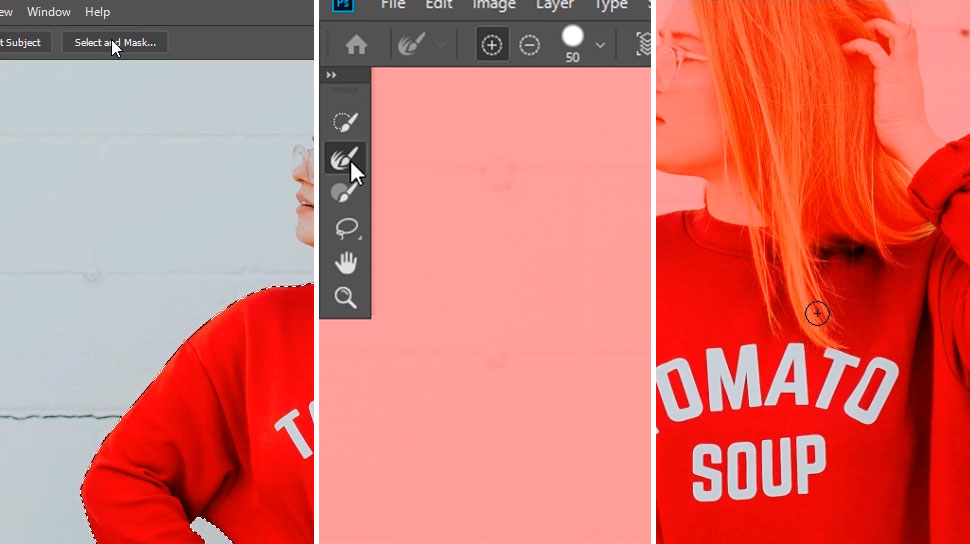
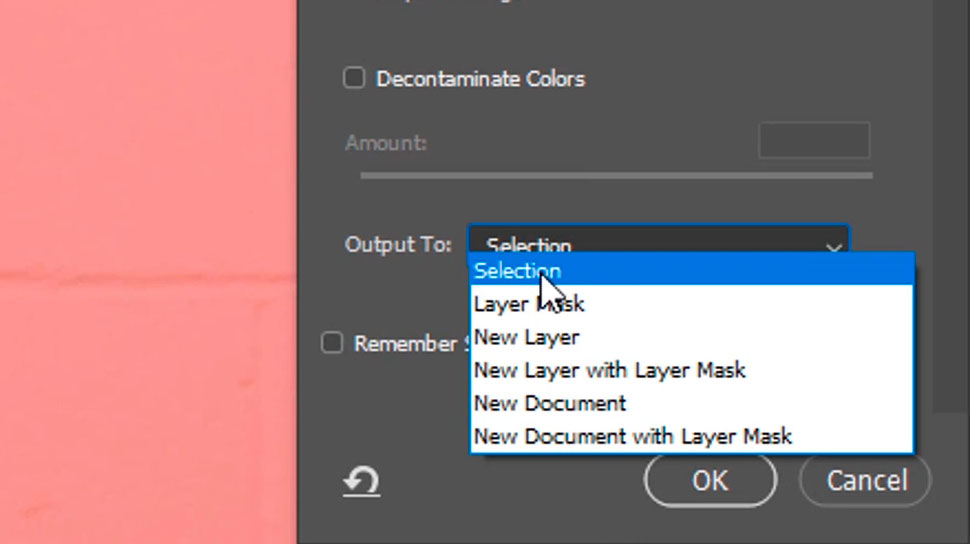
now we need to export it into a selection, so from the output options you are gonna choose selection and click ok
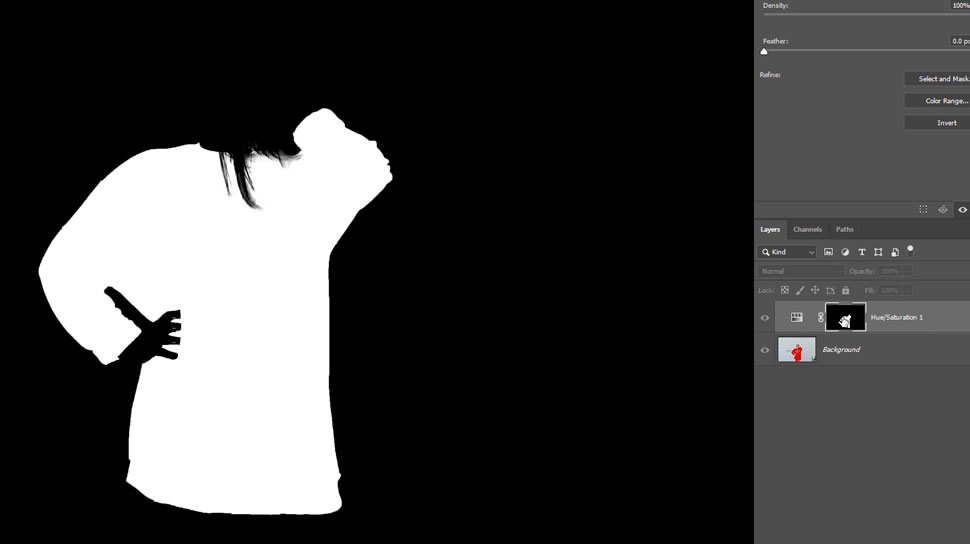
with the selection active, create a hue saturation adj layer, and by doing so the selection will be automatically added to the layer mask, and if you hold alt or option and click on the layer mask thumbnail, you will be able to see the selection
now in the mask view you can take the brush tool, and paint with black to remove any unwanted area
then you can alt or option click on the mask thumbnail to go back to the normal view
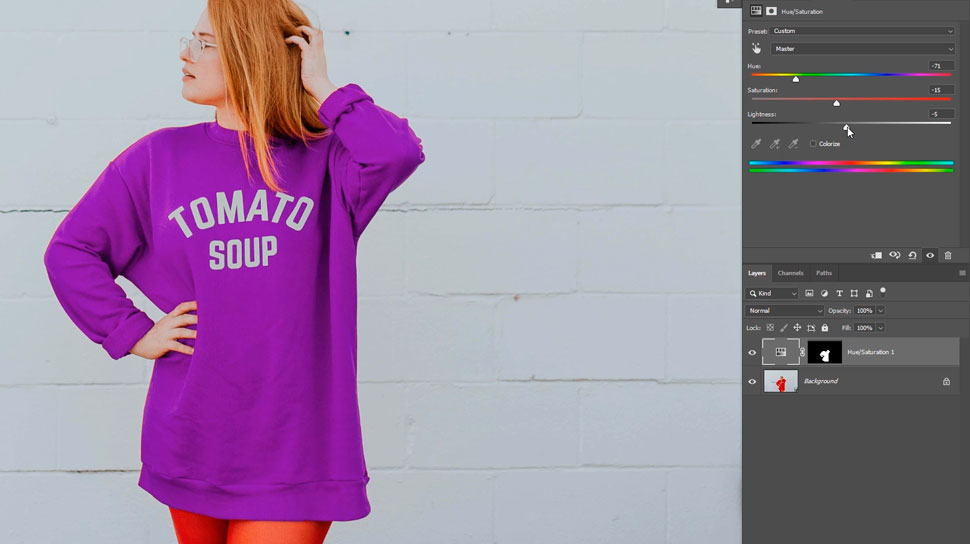
and now you can use the hue slider to change the shirt to any color you want, you also have the saturation and the lightness sliders and you can use them to fine tune the color and get exactly how you want and im just gonna change the color to violet
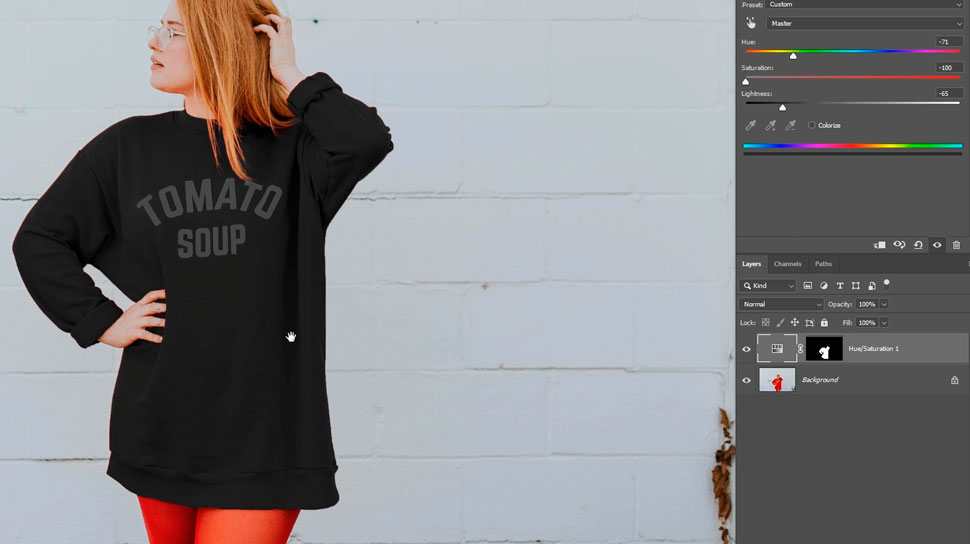
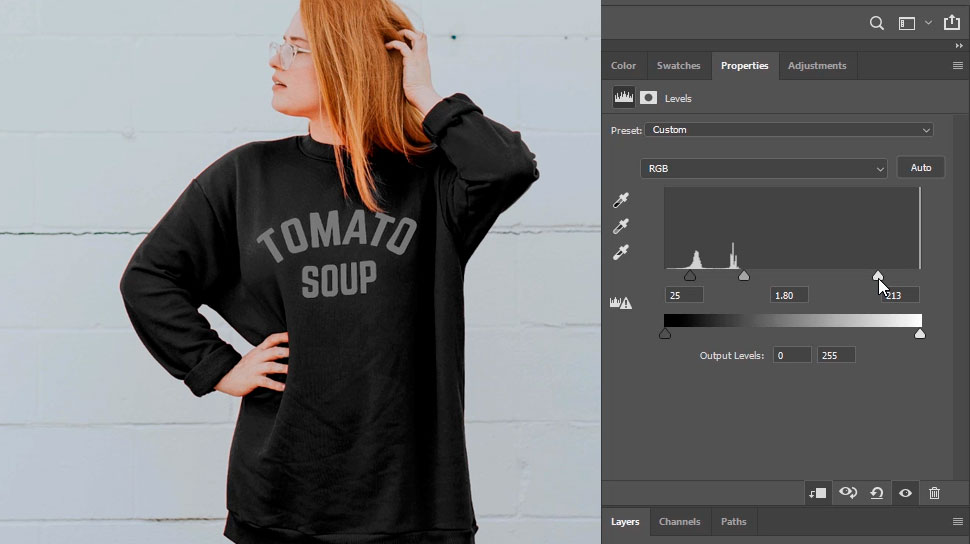
now in some cases you may wanna change the color to black and in that case you can do that by taking the saturation slider all the way to the left and also decrease the lightness until you get a black color, but you dont wanna go too far because you are gonna loose the highlights that defines the shirt, but also this color still doesnt look realistic so we are gonna have to create another adj layer to bring back the highlights
so create a levels adj layer, then create a clipping mask by holding alt or option and clicking between the two layers, this means that the levels adj layer will only be visible where the hue saturation layer is
and now you just need to darken the shadows and the midtones and increase the highlights to bring back the contrast
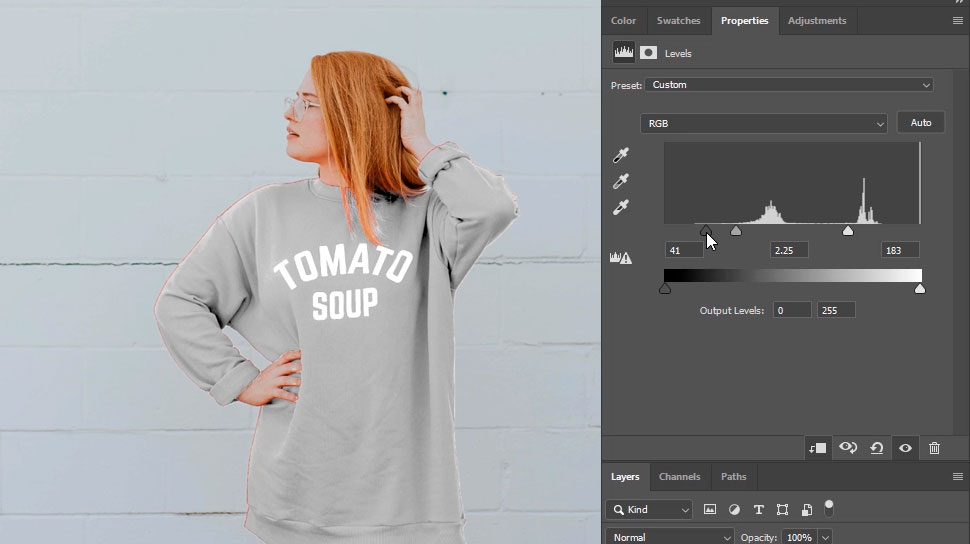
thats how you make a black shirt, if wanna turn it to white you can also do so by increasing the lightness this time and then you can adjust the contrast accordingly to get a white color
so that’s one way to change color by making a selection around you subject, lets move on to the next example
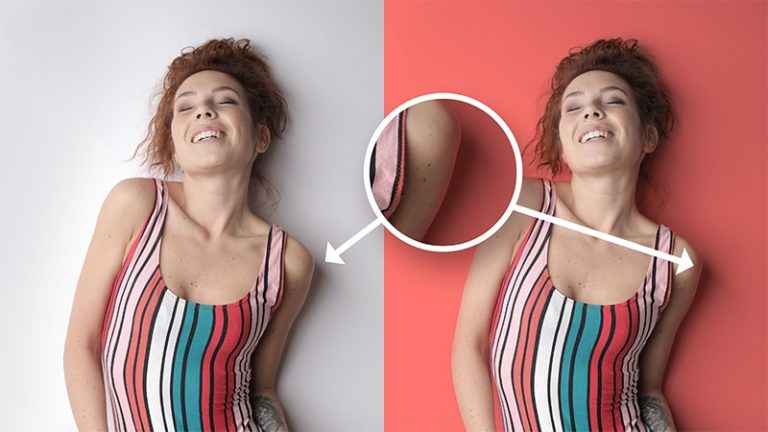
in this example you may have a subject that is hard to select or simply you don’t wanna spend so much time making a selection around your subject,
im going to show you a faster method to target the color and change it really easy
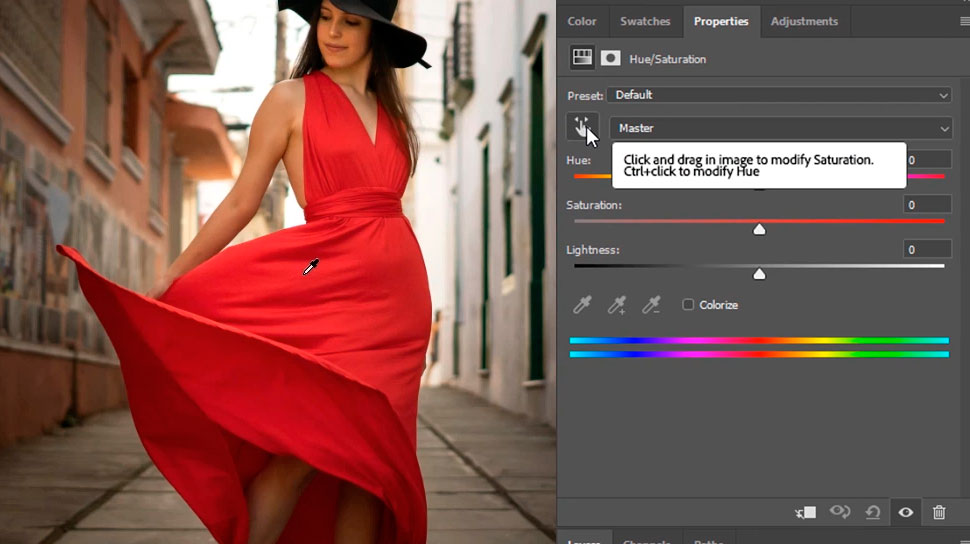
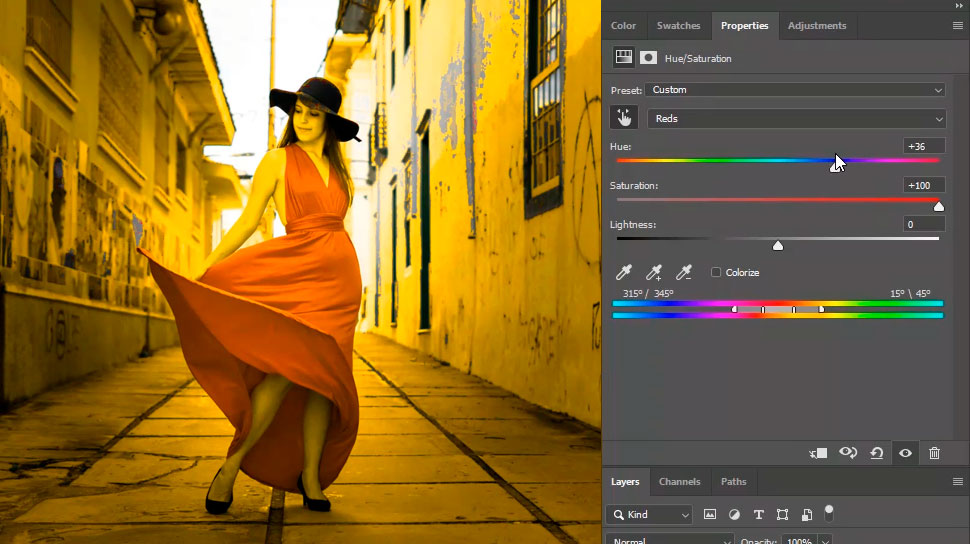
so create a hue saturation adj layer, and then what you need to do is click on the targeted adj icon and then click on the color that you wanna change to select that color
you can see in this example that it automatically changed the color to red and also in the range slider
and now when i move the hue slider the color of the dress will change, but also changing the color of the wall is changing too and that’s because the wall also has some red in it, so we need to narrow the range of the red to only the dress
so to see the the range of the color better you can increase the saturation all the way to 100, and you can see that not only the dress is red but also her skin and most of the background has red in it
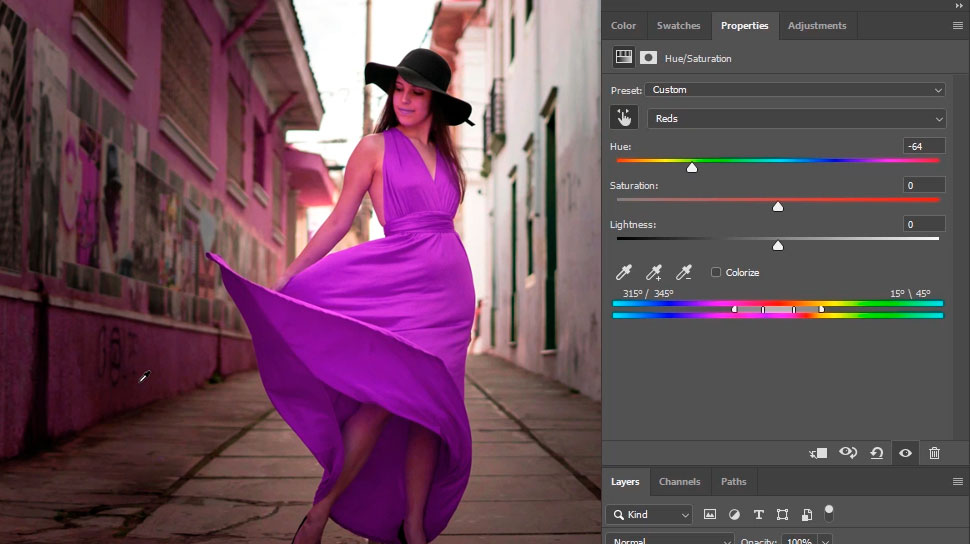
so the slider in the middle is going to allow us to control the shade of red and the range and the sliders on the left and right will make a transition of the color, so you need to push the slider inside to narrow the color to only the red in the dress, now you are just gonna push the slider inside until you have only the dress selected
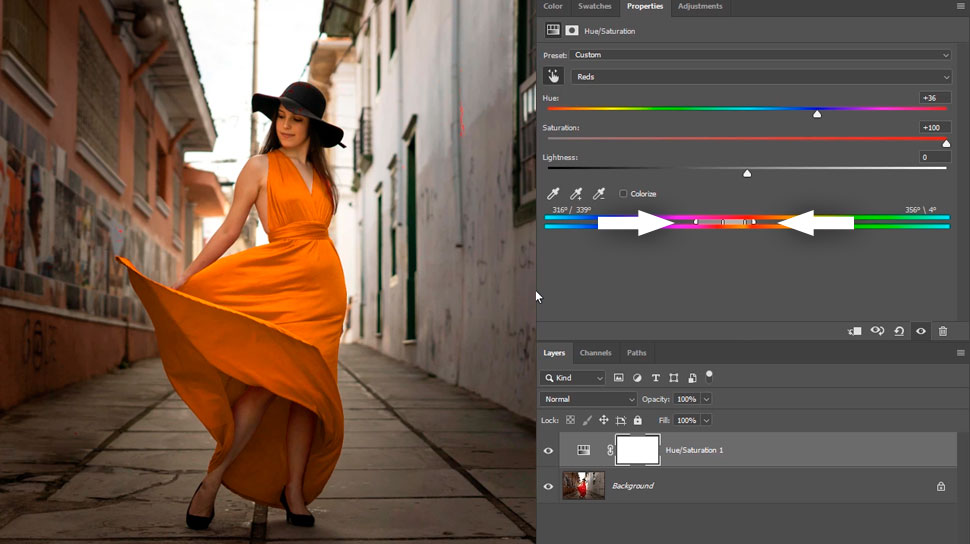
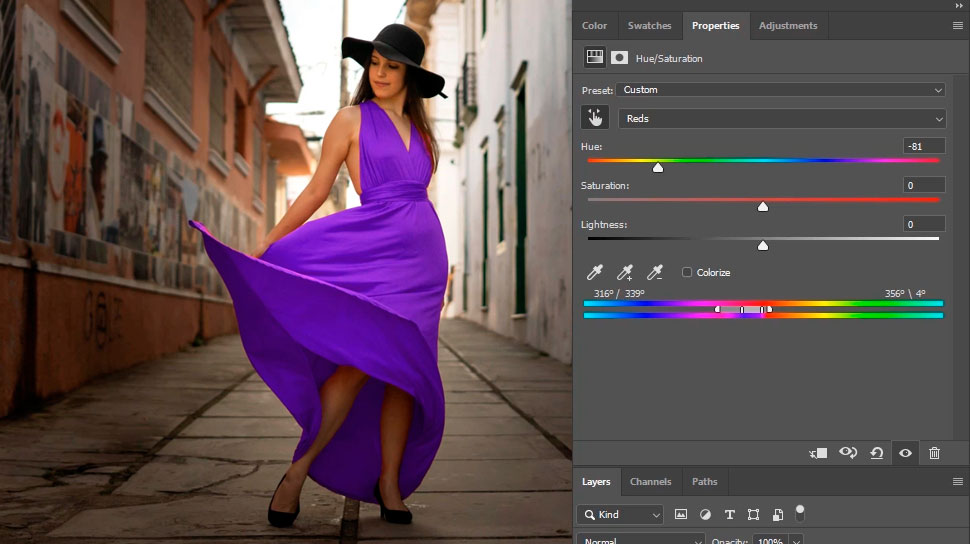
now you can reset the saturation back to 0 and can change the color to whatever you want and only the dress will be affected and that’s a really useful technique to quickly select and change color
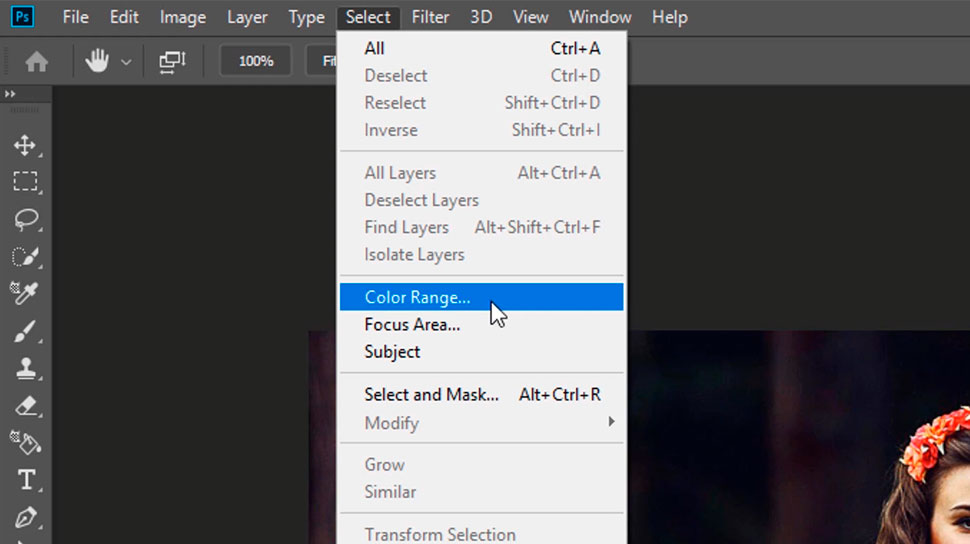
ok so lets move on to the next example and in this example im gonna show you another technique to make very accurate selections, in this case we have a good contrast between the model and the background but it’s hard to make a selection around the hair with something like the quick selection tool,
we are gonna use color range to make an accurate selection, so go to select, color range
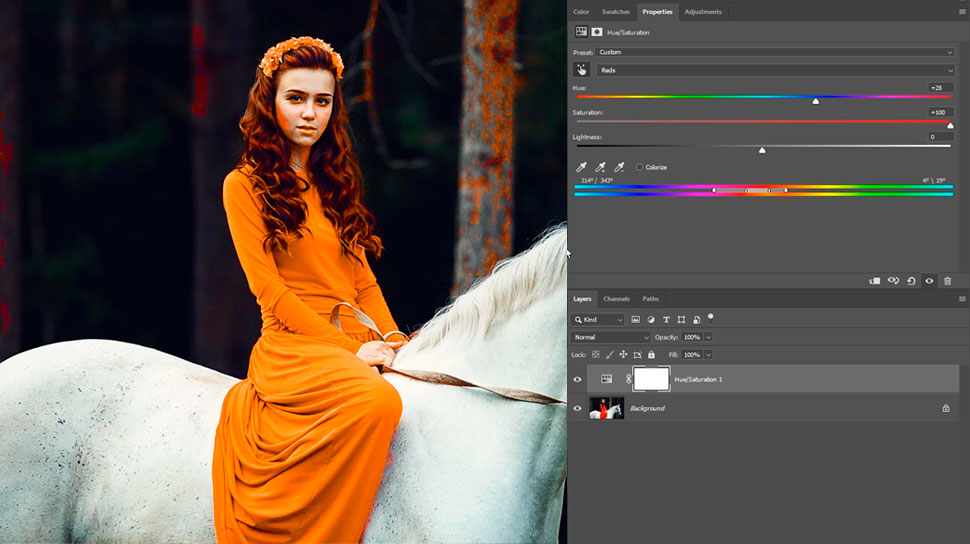
color range will allow you to make selections based on color, and with the eyedropper tool you wanna click on the area that you wanna select, if you hold shift you will see a plus icon next to the eyedropper and now you will b able to add more areas to the selection, so keep clicking on more areas until you have your subject selected
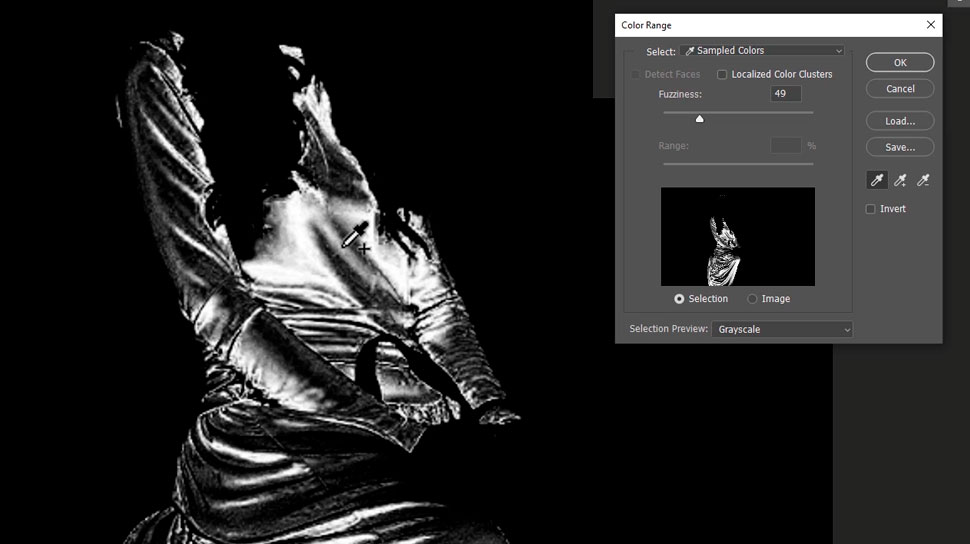
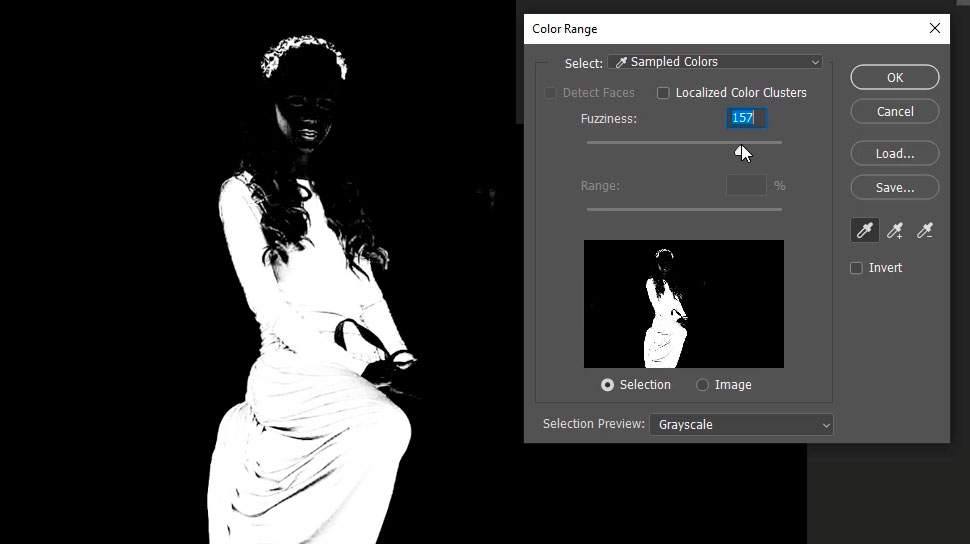
you also have the fuzziness slider and that’s gonna increase the range of the selection and give you a smoother transition, but if you go too far you will see that more areas starts to get selected, so you gotta find the sweet spot that works for your image and if you select an area accidentally you can click ctrl z to undo that last step,
when you are done click ok, and that’s gonna turn it into a selection and now you can create a hue saturation adj layer, and then i’ll hold alt or option and click to see the layer mask,
so you can further refine the layer mask by painting with black with the brush tool on the areas that you want it to be visible in, and you can also change the blending mode of the brush to overlay and with a black or white brush start refining the layer mask, this is going to work like dodging and burning, white gets whiter and dark gets darker and that’s gonna allow you to refine the layer mask without exceeding the boundaries of the selection
there will be some areas like here that wont be removed with the overlay blending mode because they are pure black and in that case you can bring back the blending mode to normal and remove them
you can alt click on the mask thumbnail again to go back, and now you can change the color to whatever you want and you have a very accurate selection around your subject and you can see now that the color of the hair did not change because we spent the time to mask it out of the dress
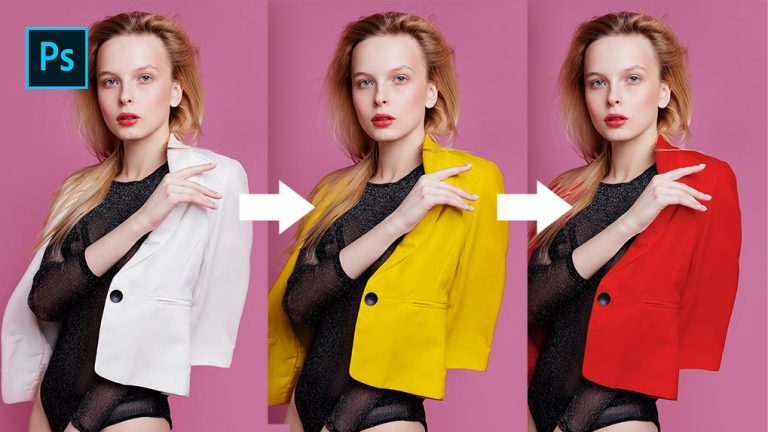
alright in the last example we have a picture of a model wearing a white jacket and you may be in a similar situation and you wanna change the color of the jacket to something else
in this situation using a hue saturation adj layer will not change the color of the jacket because there is no color information to work with in the first place
so the best way to change the color in this situation is to create a solid color and i’ll choose a yellowich color for this example, and what you need to do now is change the blending mode to multiply,
and you can see now that the color is applied to the jacked because the multiply blending mode will preserve the shadows
we still need to bring back the highlights to get it to look realistic and you are gonna need to add another adj layer for that, and this time choose a curves adj layer and you will know why in a bit
first we need this adj layer to only effect the jacked so hold alt or option and click and drag the solid color mask to the new adj layer and that will replace the mask, this layer is going to be for the highlights so increase the highlights all the way
now obviously we don’t want this to be visible everywhere so we are gonna use something called the blend if to hide this in the shadows, and you can access the blend if by double clicking on the layer, and at the bottom you have the option to hide the effect on this layer or the underlying layer, and we are gonna tell Photoshop to hide this layer from the shadows of the underlying layer by dragging the shadows slider to the right
and as you can see it’s starting to fade away from the shadows but this is looking very harsh so hold alt or option and click on the slider and now you will be able to make a transition and make the effect softer, and you can see the difference this layer makes
okay now we need another layer for the shadows and you will simply duplicate the curves adj layer by clicking on ctrl + j, but instead this time you are gonna increase the shadows, and also double click on the layer and change the blend if slider to be only visible in the shadows by dragging the highlights slider to the left, and again hold alt or option to split the slider and make a trasition
now if you wanna change the color to something else you can double click on the solid color layer thumbnail and in the color picker change the color to your liking , and of course if you choose a darker or lighter color you are gonna need to go back and fine tune your shadows and highlights layers
alright that’s how to change the color of anything in Photoshop, let me know in the comments below if know of any other technique of changing color,