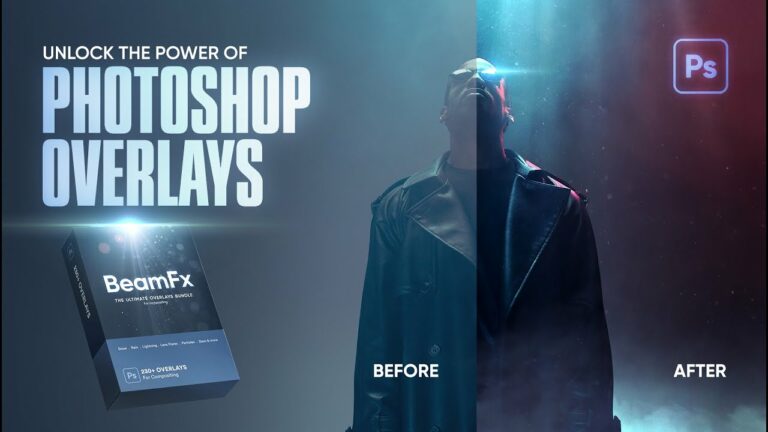
If you’ve ever wondered how to make your images truly stand out, I’ve got some exciting news for you. Get ready to unleash your creativity with the power of Photoshop overlays.
I’m here to guide you on an exciting journey into the world of Photoshop overlays and show you how they can transform your ordinary photos into extraordinary works of art. Trust me, once you discover the magic of overlays, you’ll wonder how you ever edited without them.
Intrigued? I thought you might be!
In this comprehensive guide, we’ll explore everything you need to know about using Photoshop overlays to enhance your images. From adding light rays, fog to adding fire effects and enchanting snowscapes, the possibilities are endless.
By the end of this article, you’ll have the knowledge and tools to bring your artistic visions to life.
Are you excited? I know I am! Let’s get started with supercharging your images with overlays. Your photos will never be the same again!
1 – How to use Photoshop Overlays
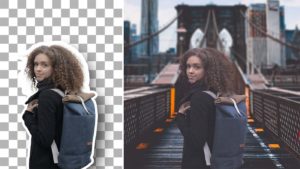
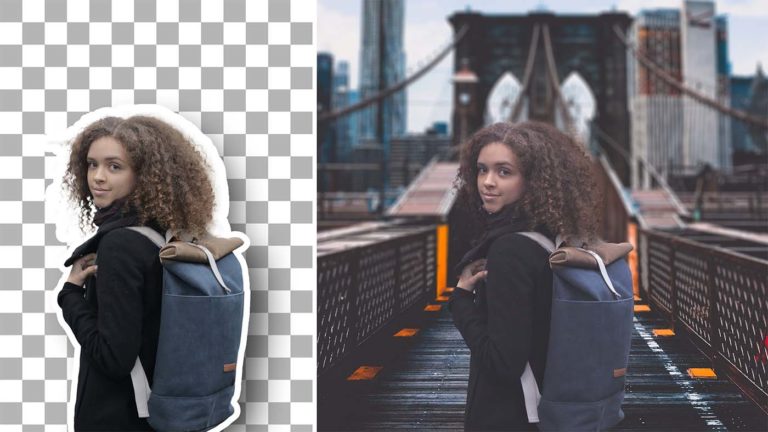
Applying an overlay in Photoshop is super easy at the basic level, it could be as simple as importing an image and changing the blending mode, but it’s also much more than that, here is a quick step-by-step guide on how to apply Photoshop overlays if you want the short version, then we can dive deeper later in this article
Step 1: Prepare Your Image
Open your desired image in Photoshop and make any necessary adjustments or edits before applying overlays. This ensures a solid foundation for your creative enhancements.
Step 2: Choose your Overlay
Browse through your collection of overlays and select the one that best suits your vision. Whether it’s dreamy light rays, enchanting fog, or sparkling particles, there’s an overlay for every mood and style. If you don’t have overlays you can check out my Photoshop Overlays Bundle
Step 3: import the Overlay in Photoshop
Drag and drop the chosen overlay onto your image. Resize and position it according to your preference. Experiment with blending modes and opacity to achieve the desired effect. Don’t be afraid to get creative and try different combinations!
Step 4: Refine and Blend
To seamlessly blend the overlay with your image, use layer masks and brushes. Erase unwanted areas or apply selective adjustments to create a harmonious integration. This step allows you to have full control over the final outcome.
Step 5: Fine-Tune the Details
Take your time to refine the finer details. Adjust the overlay’s brightness, contrast, or color if needed. This customization ensures that the overlay perfectly complements your image and enhances its visual impact.
Step 6: Experiment and Play
Don’t be afraid to explore! Try different overlays, blend them together, or even create your own unique combinations. Photoshop offers a world of creative possibilities, so let your imagination run wild and see what magic you can create.
Step 7: Save and Share
Once you’re satisfied with your masterpiece, save your edited image in your preferred format. Now it’s time to share your creation with the world! Show off your skills on social media, impress your friends, or use it in your professional projects.
Congratulations! Now you know how to enhance your images using Photoshop overlays.
Now let me show a few different overlay examples, their use cases, and more advanced ways on how to apply them properly
2 – How to Apply a Light Ray Overlay
in this first example, we have an image with some sunlight shining on some stairs and we could really enhance this image by adding some light rays
so this light gray will work very well for this image we’re just gonna drag it and drop it inside of Photoshop
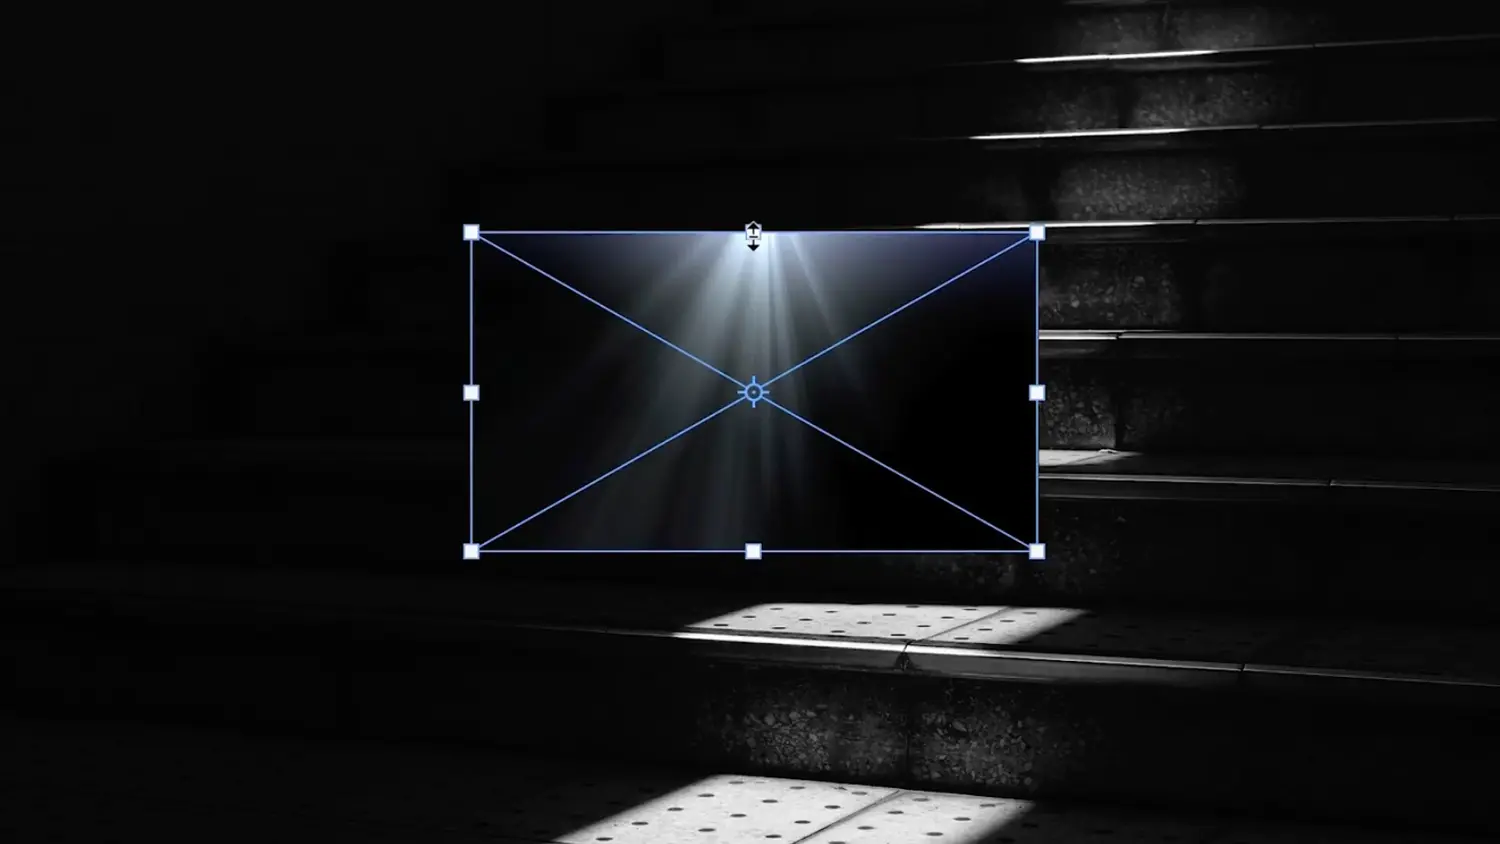
then I can flip this one horizontally and I’m just gonna rotate it to match the angle of the sunlight
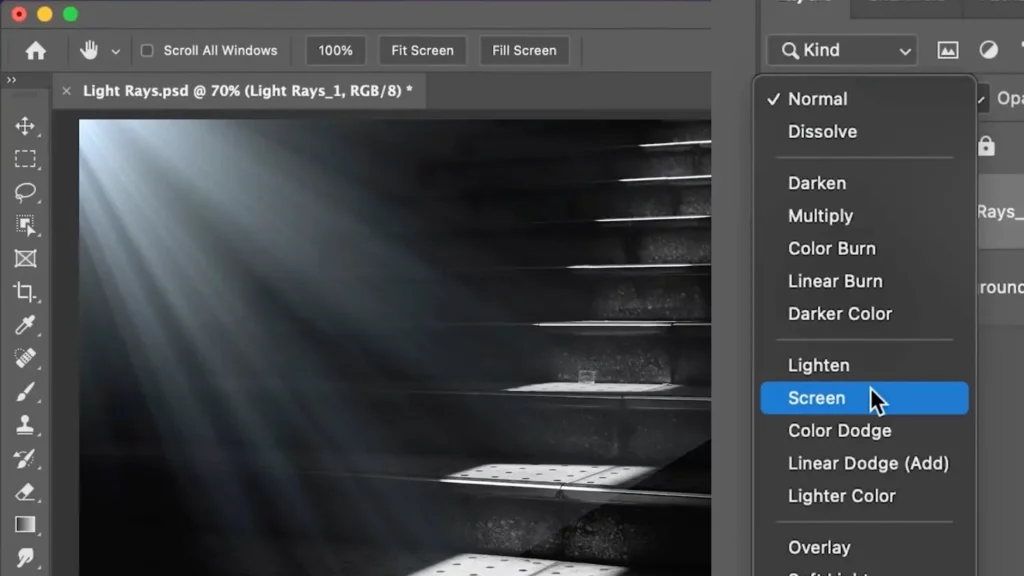
then we can simply change the blending mode to one of the lighten blending mode Group which is “lighten”, “screen”, “color”, “Dodge”, “linear Dodge” and “lighter color”
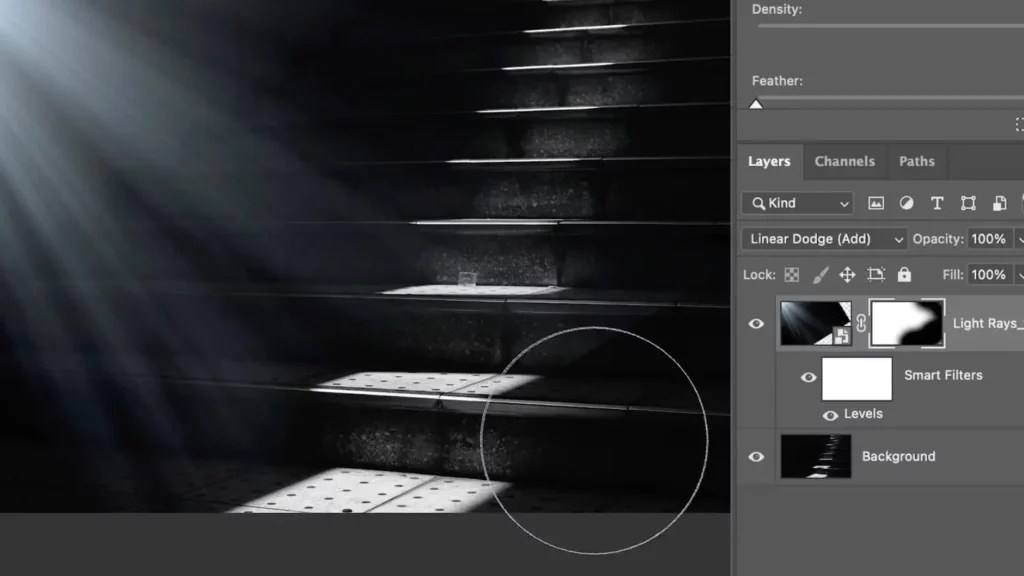
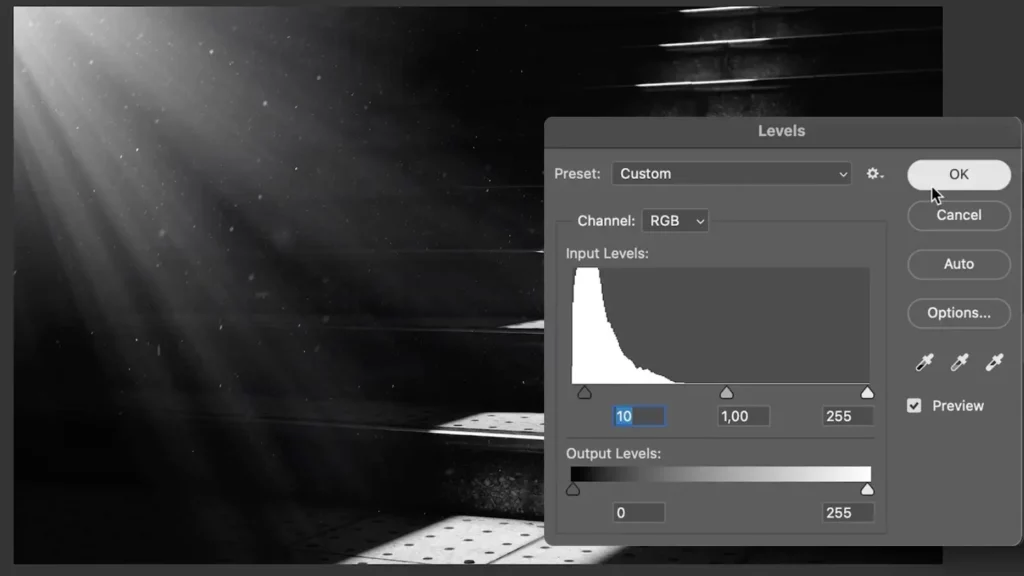
I think linear Dodge and screen will work really well for this image then what we can do to remove this hard edge is by adding a levels adjustment by clicking on cmd/ctrl + L and then making the darks darker to hide those harsh edges
after that, we can add a layer mask then with the brush tool paint with black to mask the edges
and that’s pretty much it it’s just as simple as that you just add your overlay place it exactly where you want, change the blending mode, and then adjust it with a layer mask accordingly
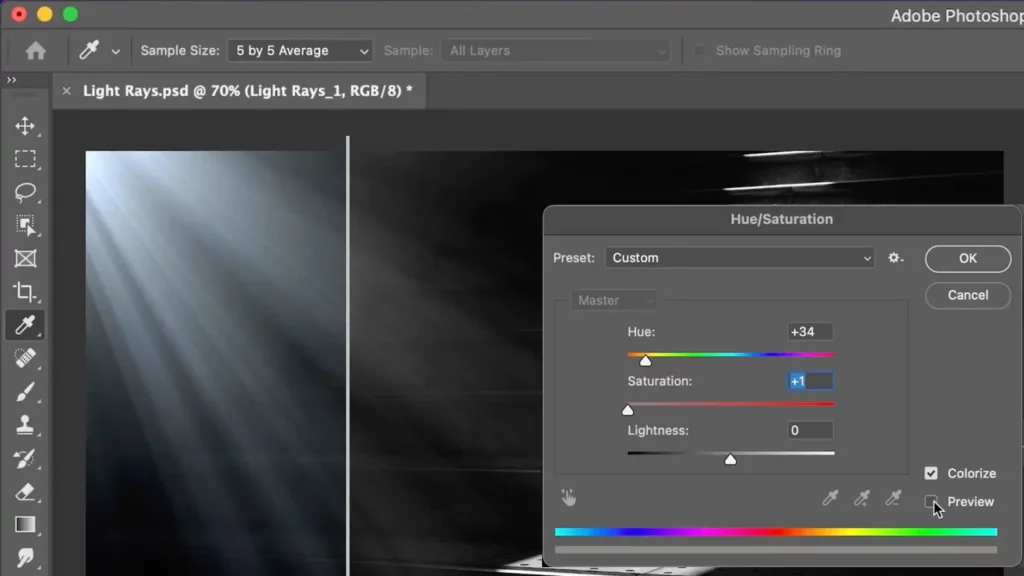
This image has a yellow tone to it. We need to match the overlay color to the background, so what we can do is select the overlay layer and then click on cmd ⌘ + U to add a hue saturation adjustment layer, check colorize and add a slight yellow tint to it then reduce the saturation all the way to 1.
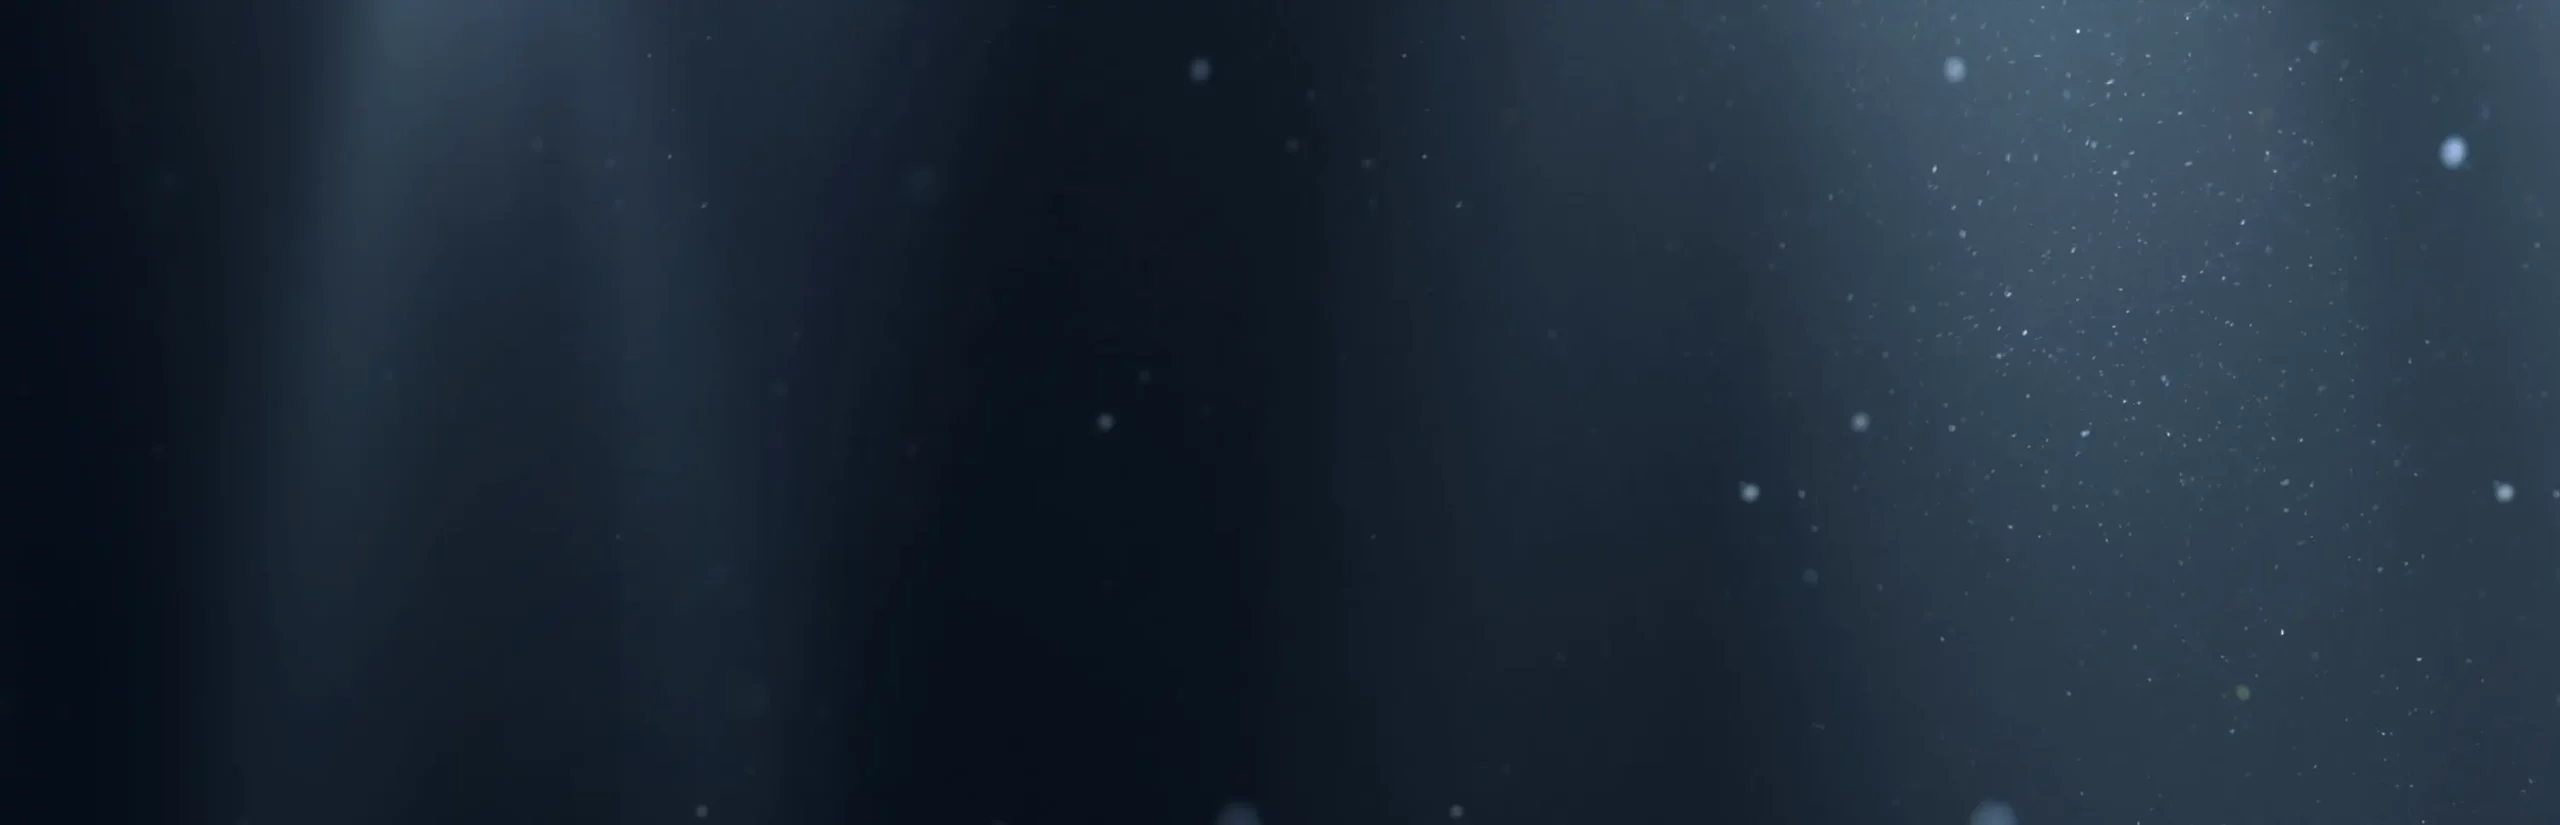
so that’s before and after and that’s much better now
what we can also do to enhance this image is by adding some dust particles on top, so this dust particles overlays will work very well for this image
so let’s flip this one horizontally, adjust the scale and orientation to your liking and change the blending mode to screen, then also add a levels adjustment for this one and make the darks darker to hide those hard edges and place this one accordingly
so that’s it that’s how you can really easily use overlays to really enhance your images here is the before and after
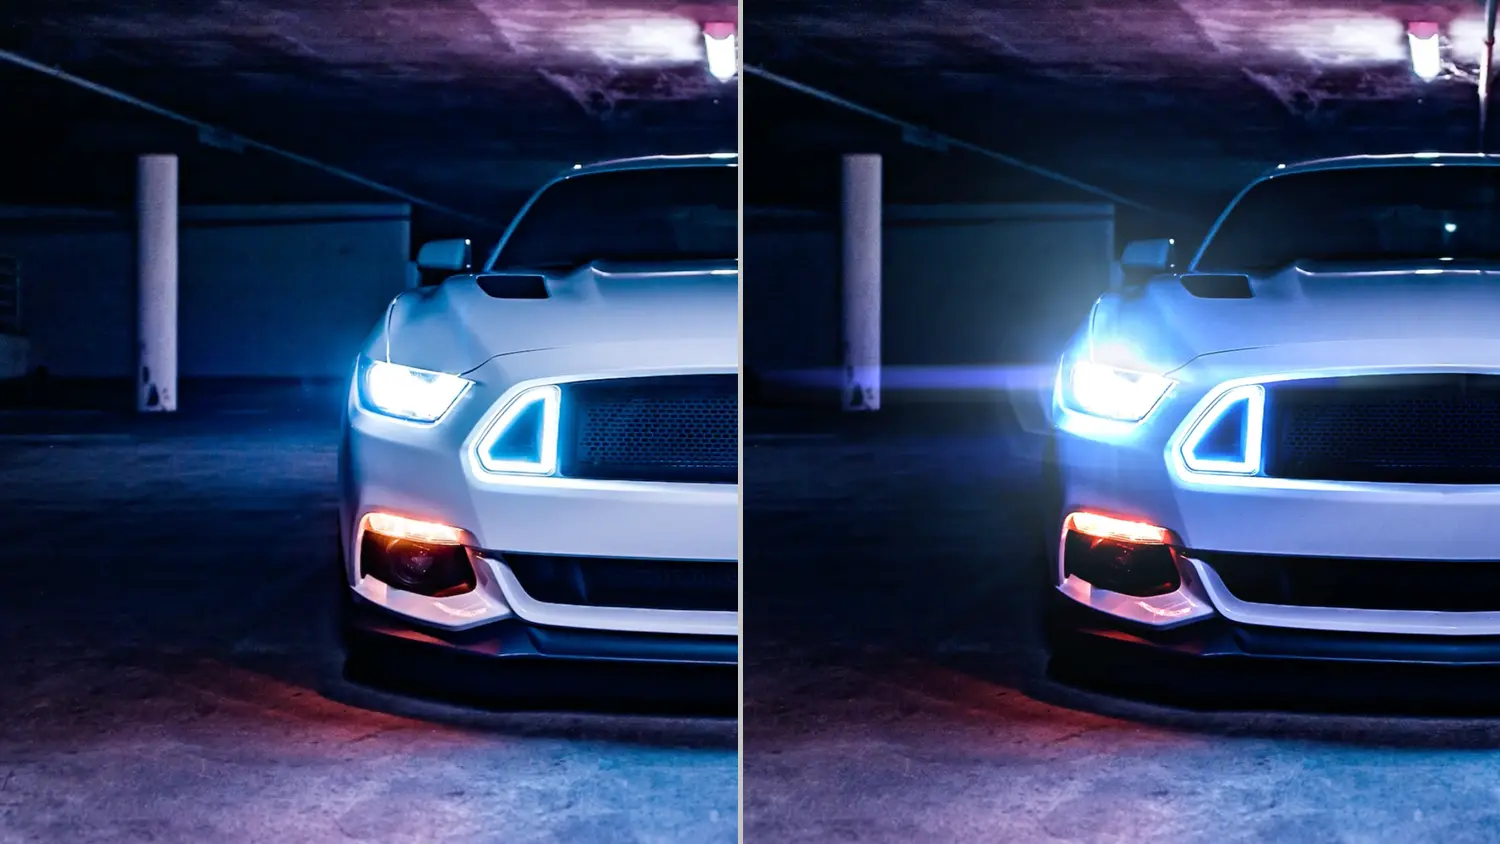
3 – How to Apply a Lens flare Overlay
For this image, we can use one of the car headlight lens flares from our Overlays Bundle BeamFx to improve the headlights of the car

THE ULTIMATE
OVERLAYS BUNDLE
Snow . Rain . Fire . Particles . Lens Flares. Light Rays and more
so let’s bring this car headlight lens flare and then change the blending mode to linear Dodge
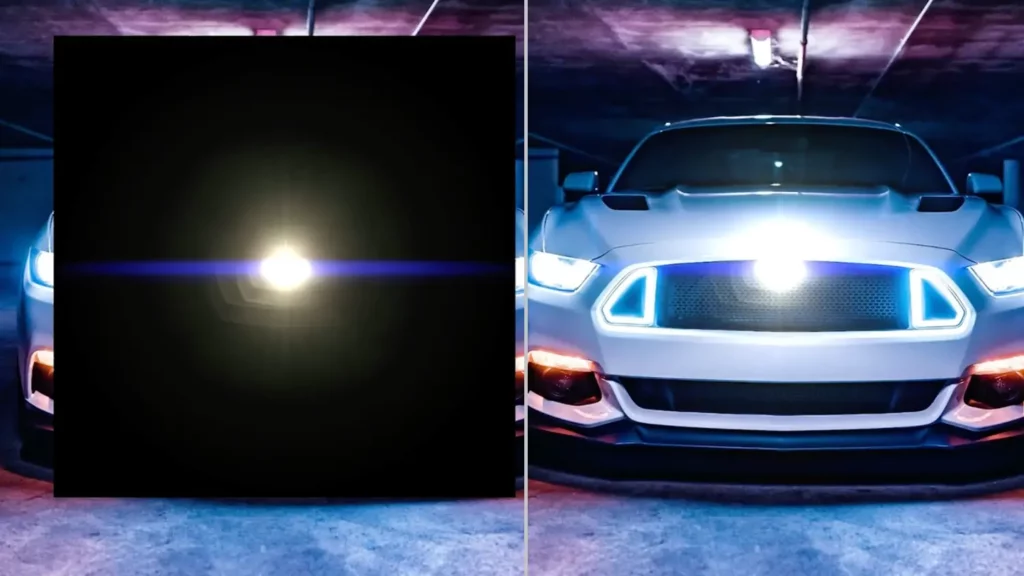
place it on top of the headlight and align it, the linear Dodge blending mode is much stronger and more vibrant than the screen blending mode
so what you can do to reduce the intensity is add a layer mask and mask it from the very bright area of the headlight
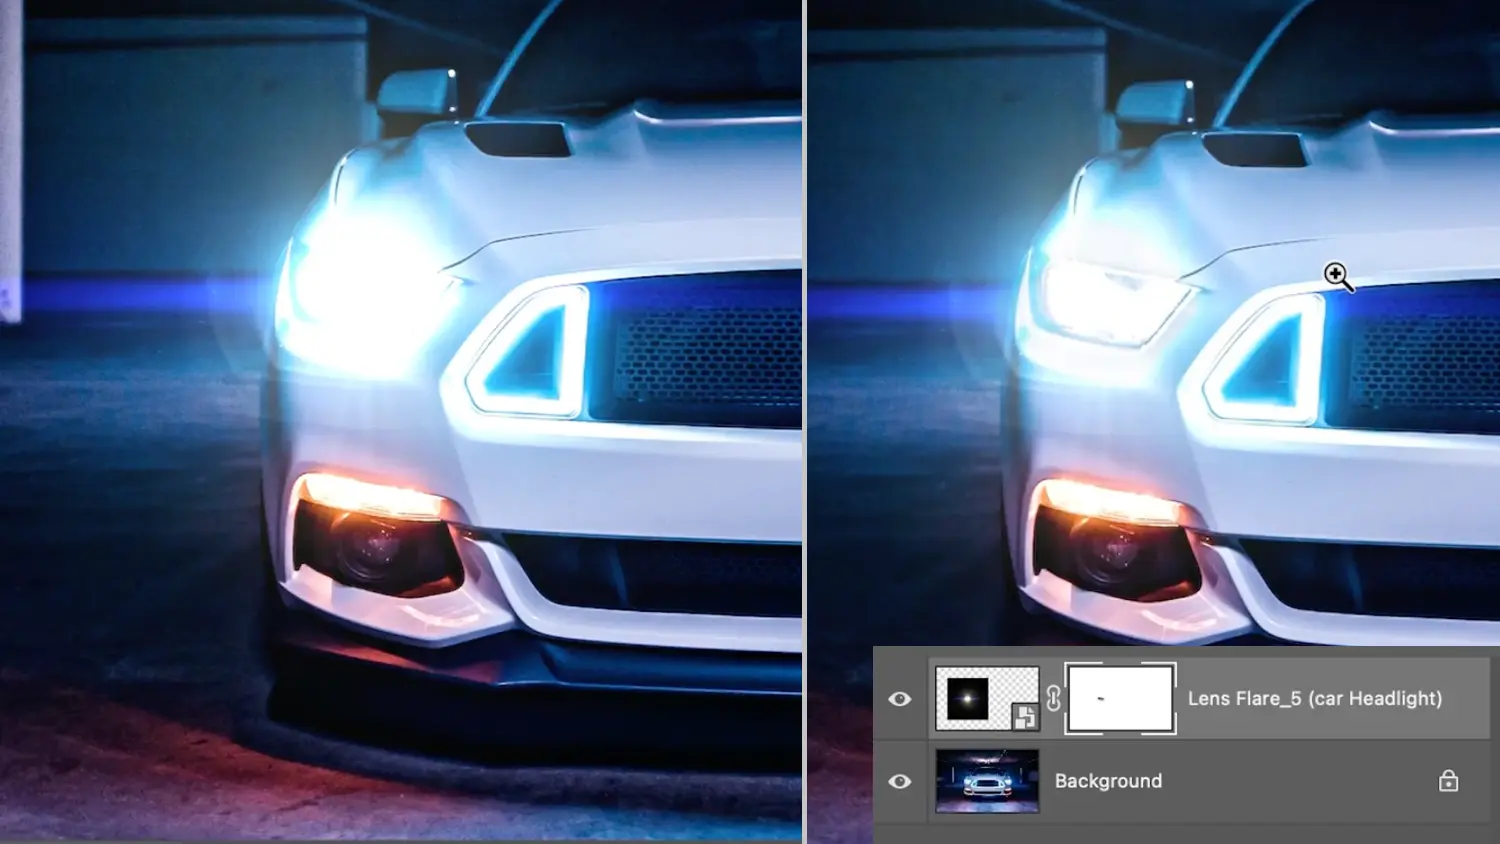
you can also duplicate the overlay layer to enhance the lens flare and reduce the opacity of this second layer as needed, then you can select these two layers and duplicate them to the other side
you can also stack multiple lens flares so for example we can add this one and change the blending mode of this one to “screen”, and add the adjustment layers or mask as needed.
so here’s a quick before and after on using lens flares to improve the car headlights of this image
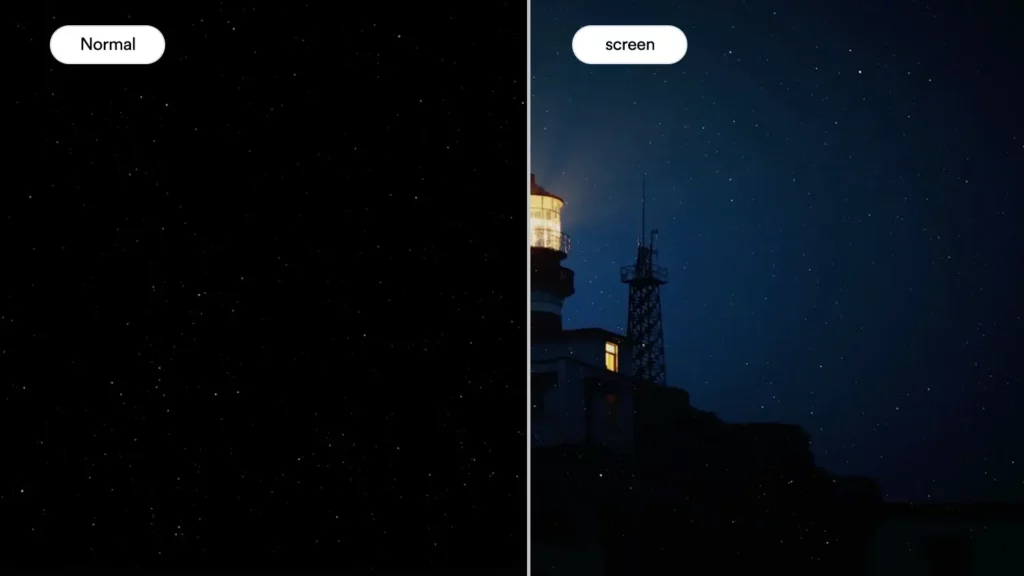
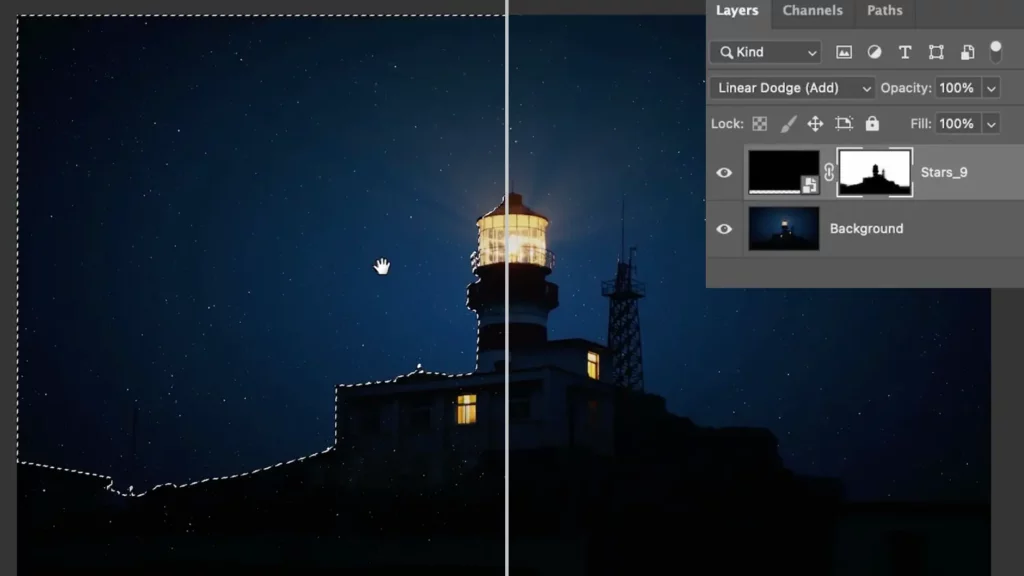
4 – How to Apply Stars Overlays
in this image, I want to enhance the sky in the background by adding some stars and also I want to enhance the light coming from the lighthouse by adding a lens flare
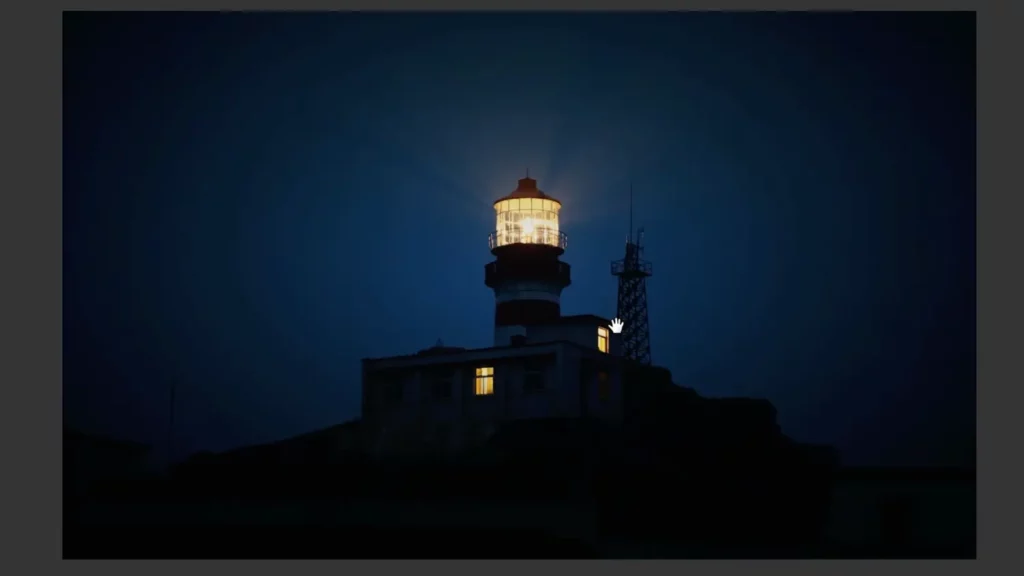
so for the background, I’m using this stars overlay, scale it to make sure it is covering the entire canvas then you can change the blending mode to “linear Dodge”, as you can see it is also covering the foreground and we need to fix that
so select the Sky by selecting the background layer and then go to select > sky
now select our overlay layer and add a layer mask to hide it from the foreground, the selection will be applied to the mask automatically
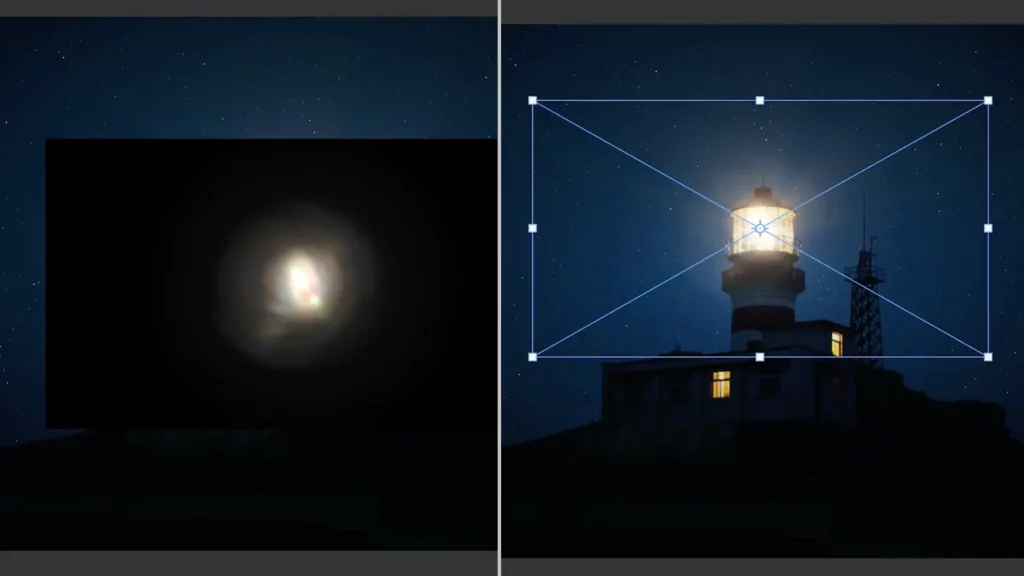
next, we’re going to import this lens flare for the Lighthouse, so as always change the blending mode to screen and then scale it and match it to the size of the lighthouse light
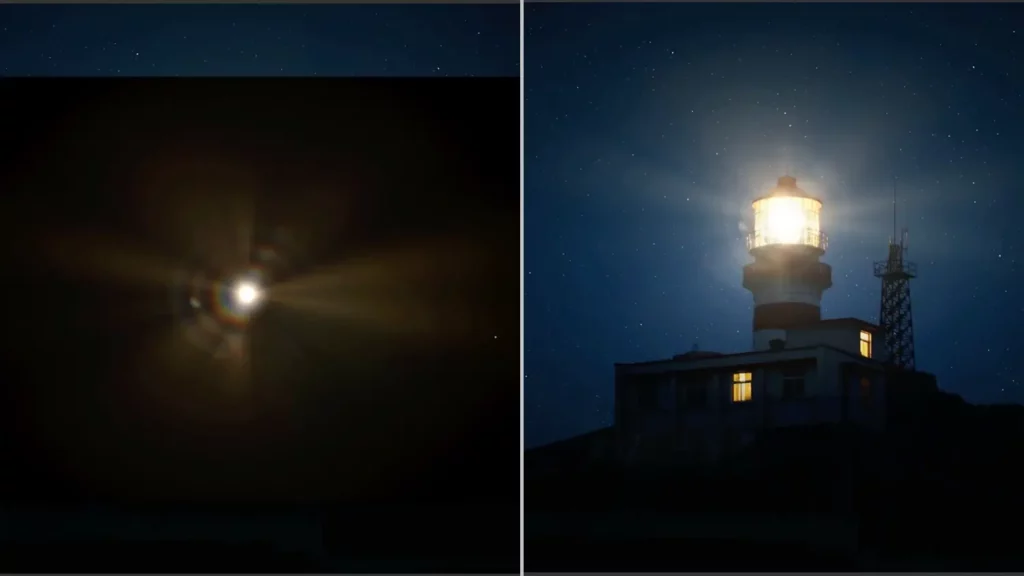
I’m gonna also import another lens flare change the blending mode of this one to linear Dodge and adjust it accordingly this time I’m gonna add a layer mask for the second lens flare and I’m gonna hide it from this area to reduce its brightness
And again you can also add a Hue saturation adjustment layer to change the color of the lens flare by checking colorize, in this case, I’m gonna add a slight yellow tint. and here’s a quick before and after
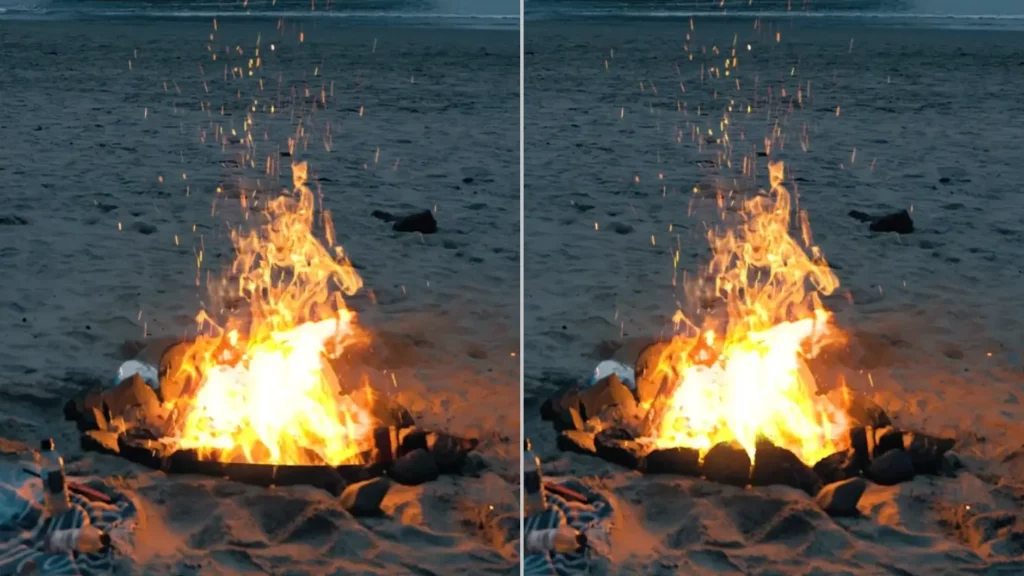
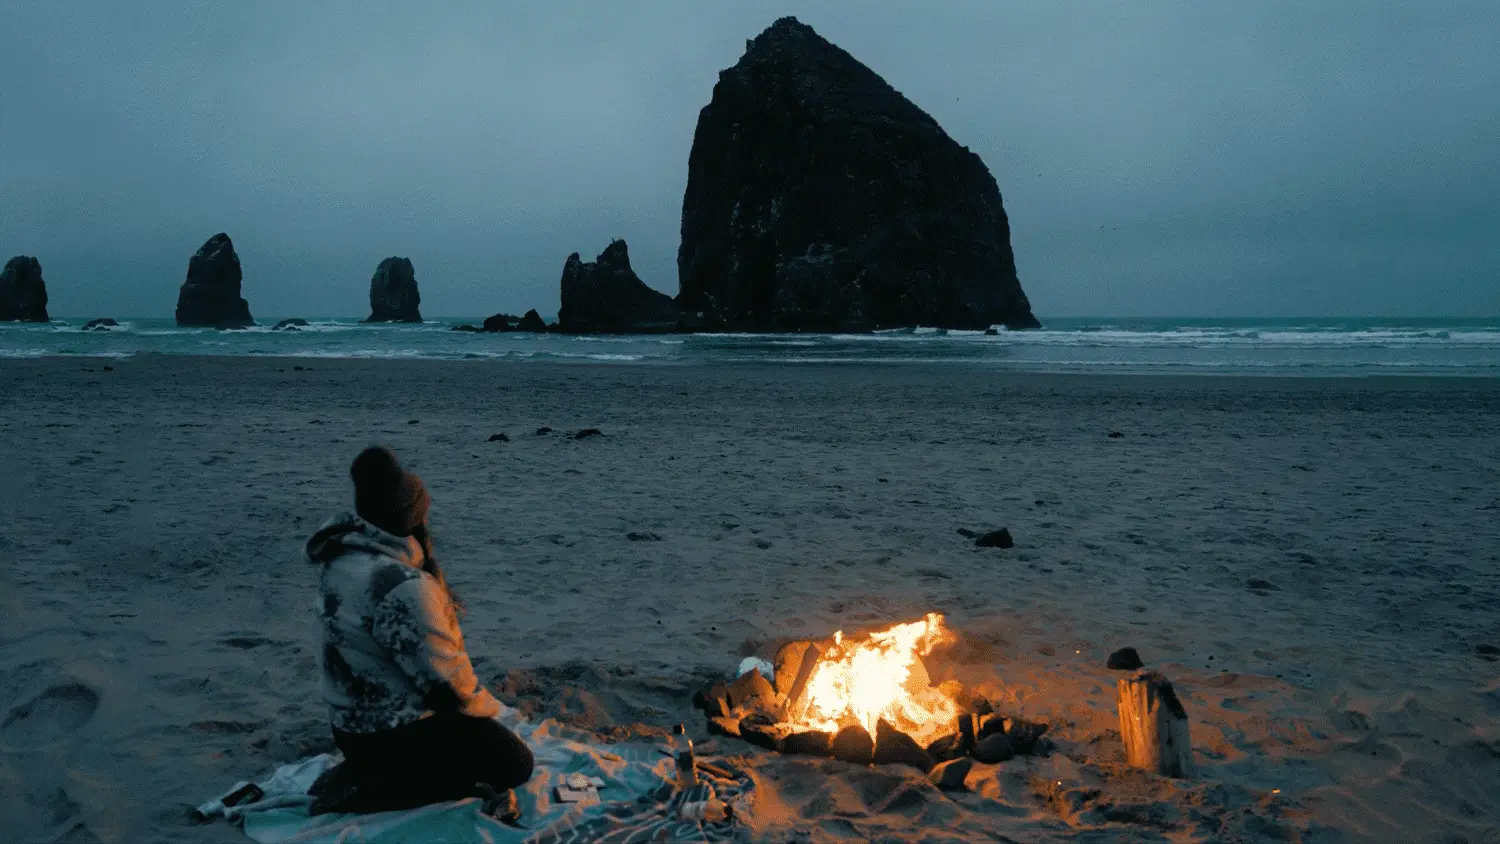
5 – How to Apply a Fire Overlay
here’s another perfect example where we can use some fire overlays to improve the campfire in this image
I’m gonna import this fire overlay to the image, scale it down to the size of the campfire, and then change the blending mode to “linear Dodge”, you can also rotate your image and use warp to distort it and match it exactly how you want it to be.
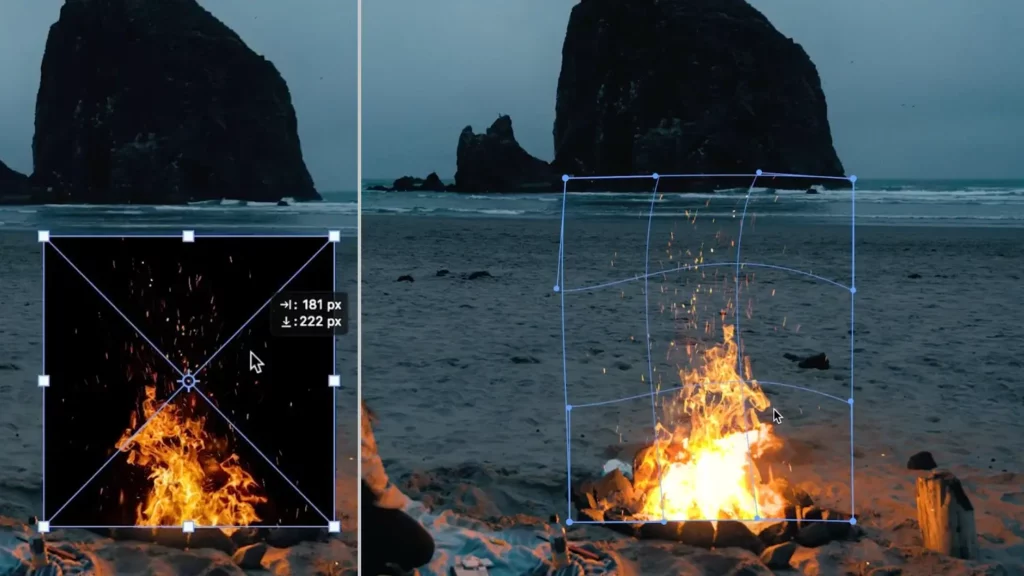
next, we need to hide the harsh Edge and mask the fire where the stones in the bottom are visible, add a layer mask to the overlay layer and paint with black at the bottom to mask that part
you can also add some level adjustment using ctrl/cmd + l and improve the contrast of the fire, and that’s pretty much it on how to add the fire
now after adding some stars in the background and a few adjustment layers to improve the color and the contrast here’s the quick before and after
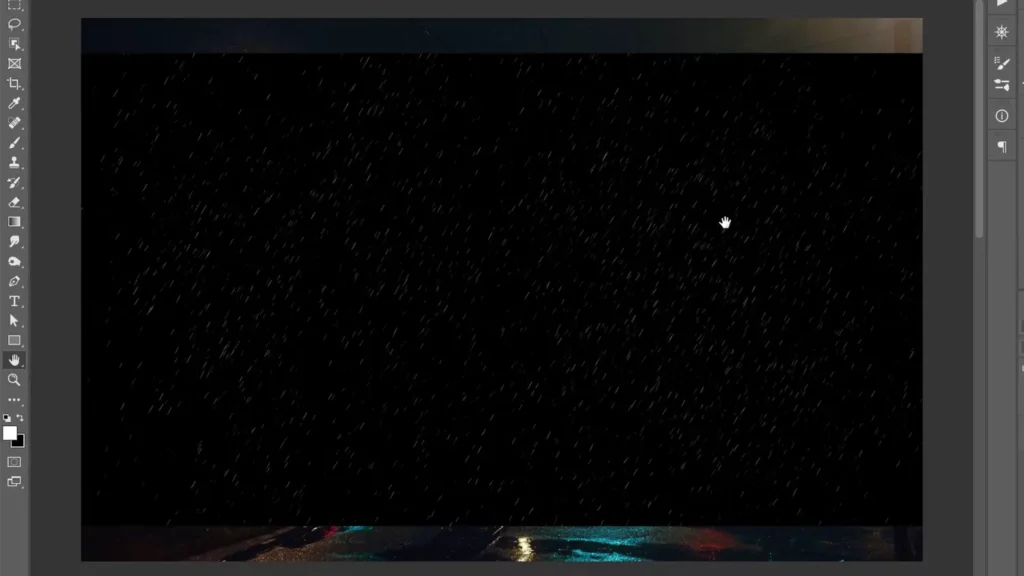
6 – How to Apply a Rain Overlay
let’s add some rain overlays to this image and I’m gonna show you how to apply a rain overlay properly and make it look as realistic as possible
most rain overlay effects look fake because people don’t really know how to use them properly so the key to having realistic rain overlays is to apply them in multiple layers and use the proper blending techniques
so let’s start by importing the first rain overlay, and as you can see this overlay has small rain sizes, and in this rain overlay set inside out overlays bundle you will have multiple types of rain, you will have small rain for the backgrounds and bigger rains for the foreground
then change the blending mode of this overlay to “linear Dodge”
linear Dodge is especially important for a rain overlay because linear Dodge will take the color of your background image for example screen will not do that so linear Dodge will look more realistic
We want the rain in the background to be very small so let’s scale this overlay even smaller and then duplicate it multiple times to cover the canvas, then select all layers, merge them by clicking on ctrl/cmd + e, and change the bending mode back to “linear Dodge”
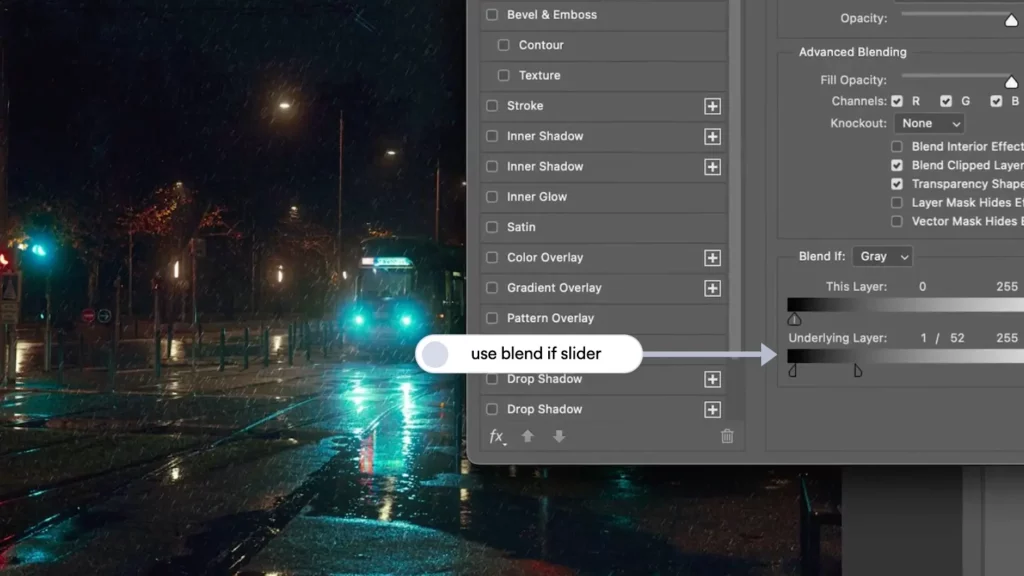
the first thing we need to do is to use “blend if” to make the rain look less visible in the shadows areas
to do that double click on the layer to bring in the blending options and then in the blend if options you’re gonna make the rain look less visible in the darker areas by moving the slider to the right and the rain will look much more realistic
if you want the effect of the rain to look stronger you can just duplicate the layer or use a levels adjustment and make the whites whiter
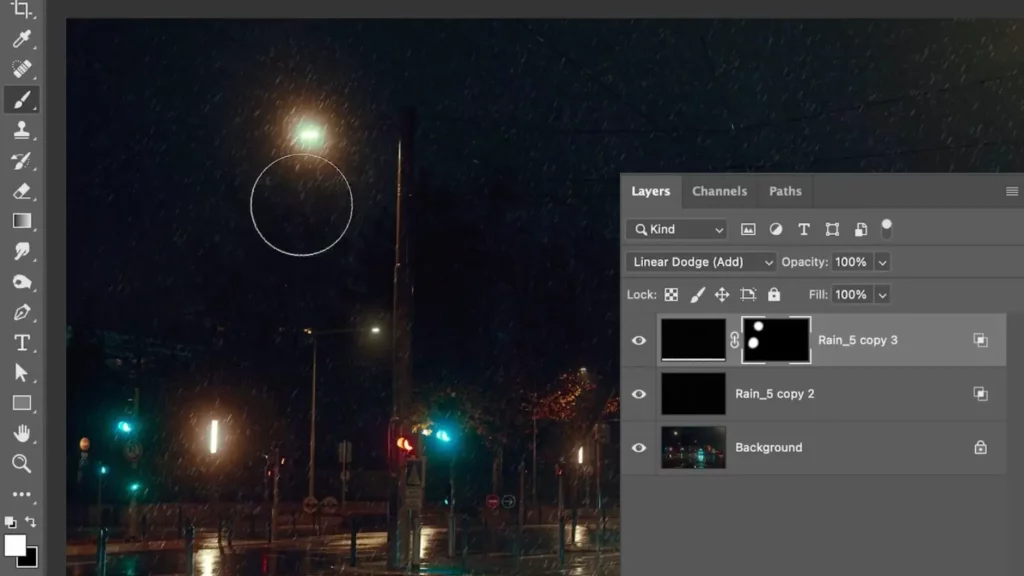
In real life, rain will be more visible in the spotlights and to achieve that effect you can duplicate the rain layer, move it a little bit then add an inverted layer mask by holding alt or option
Then in the layer mask and with a white brush, you can reveal this layer only in the spotlights areas
now you can import the next layer of rain and this one is going to be a little bit bigger than the rain in the background, so pick an overlay with bigger raindrops from our overlays Bundle and again scale it or duplicate it as needed to cover the entire canvas and change the blending mode
Now you can use blend if again to make it less visible in the darker areas then reduce the opacity or fill accordingly
and lastly, we’re gonna import one last layer of rain and this time this rain is going to be the rain in the foreground and it’s going to be out of focus so we can accomplish that by applying some Gaussian blur by going to filter > blur > gaussian blur and apply about four to five percent radius
here’s the result that I got this is the before and after

7 – How to Apply a Snow Overlay
applying a snow overlay in Photoshop is very similar to rain you’re gonna want to apply the snow in multiple layers so you get a realistic result
let’s start by importing a snow overlay with smaller snow particles for the background, scale it up to cover the canvas then change the blending mode for this one to screen
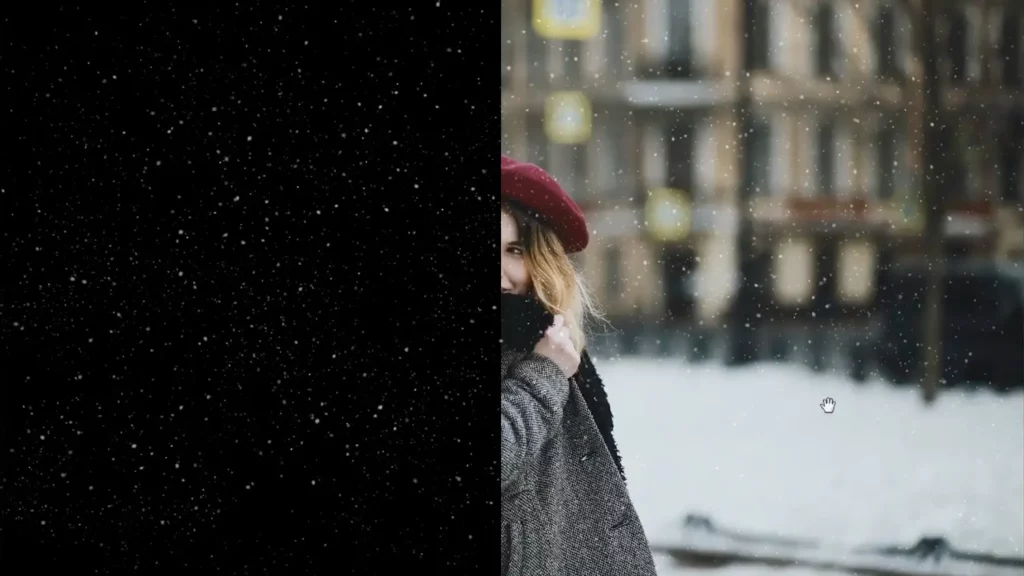
we don’t want this to be visible in our subject so select the background layer and go to select > subject, then select the snow overlay layer and add an inverted layer mask by holding alt or option
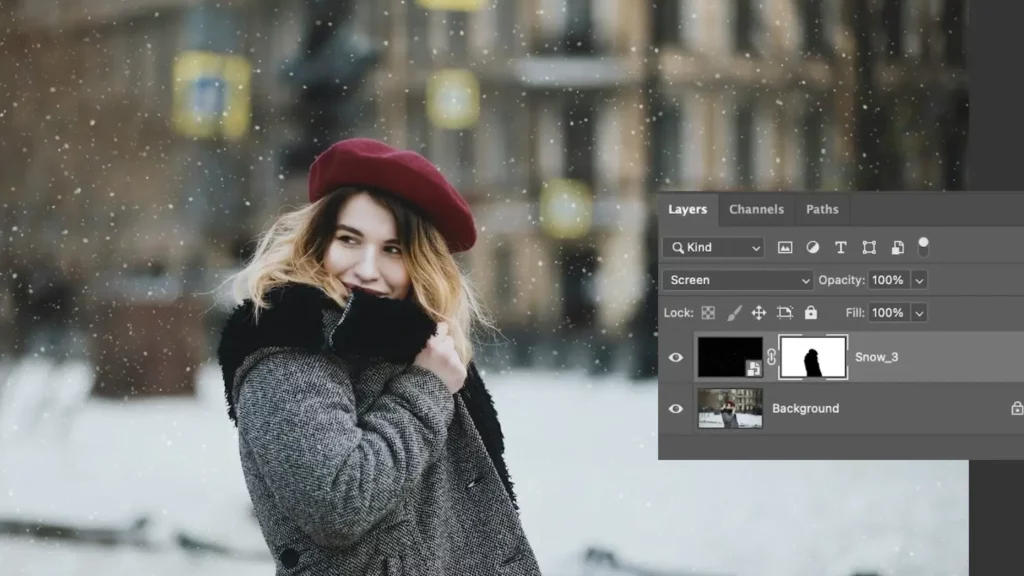
the background is out of focus so we need to blur the snow overlay by applying some Gaussian blur
let’s add another layer of snow for the foreground with bigger particles and we’re gonna do the same thing except adding a layer mask for the subject, then reduce the opacity of this one to 60% or 70%
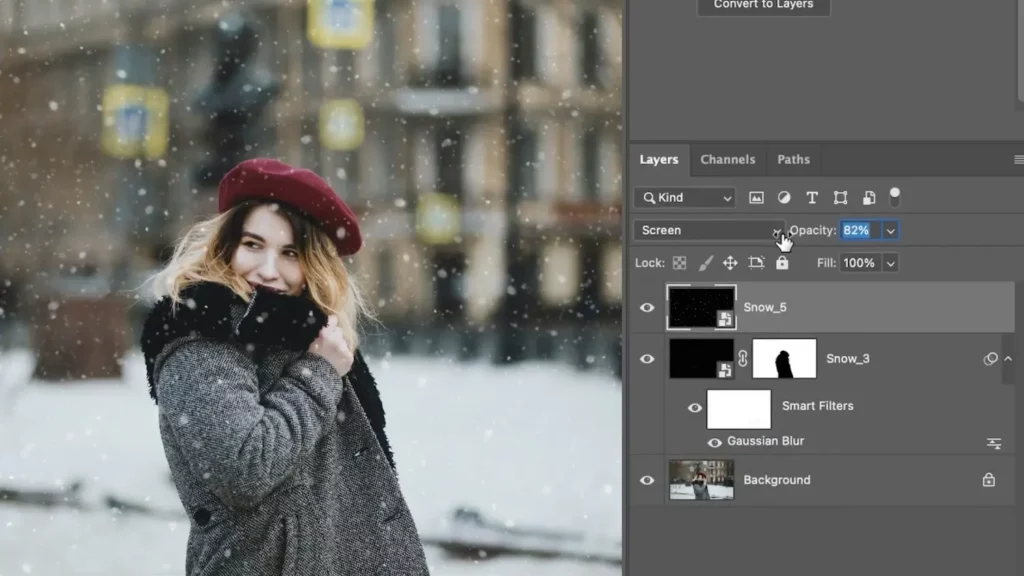
Let’s add one more overlay for the foreground, in this case, this one is already out of focus so we don’t need to apply a gaussian blur filter, but you can add blur if needed

7 – How to Apply a Fog Overlay
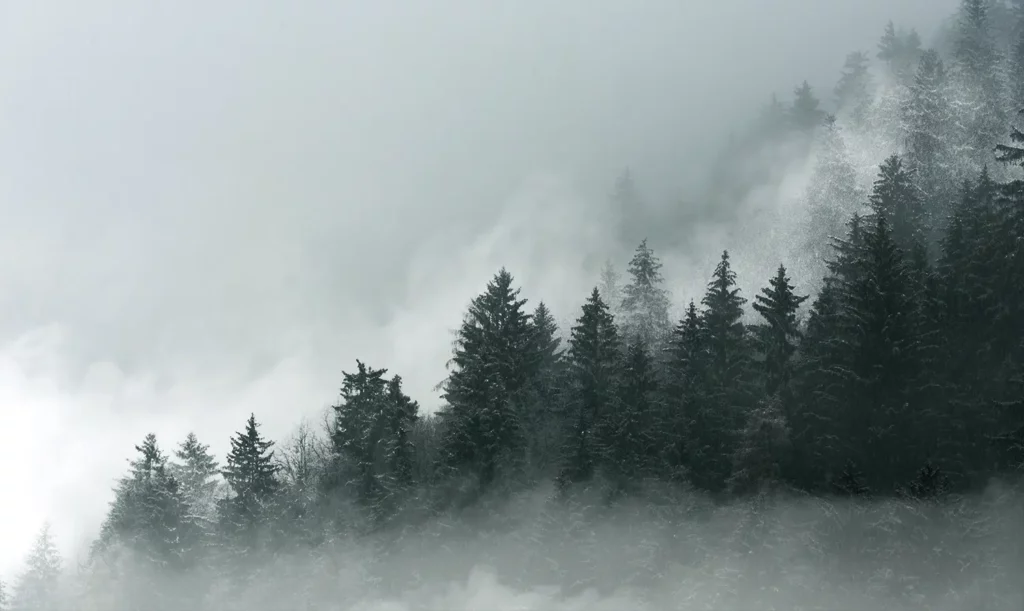
one of the best ways to add depth and drama to your images is by using Fog overlays and this image is a great example of that

I’m going to use the first overlay to add some fog in the background, I’ll change the blending mode to screen, and to make this overlay only visible in the background, and to do that we can use blend if again to achieve that
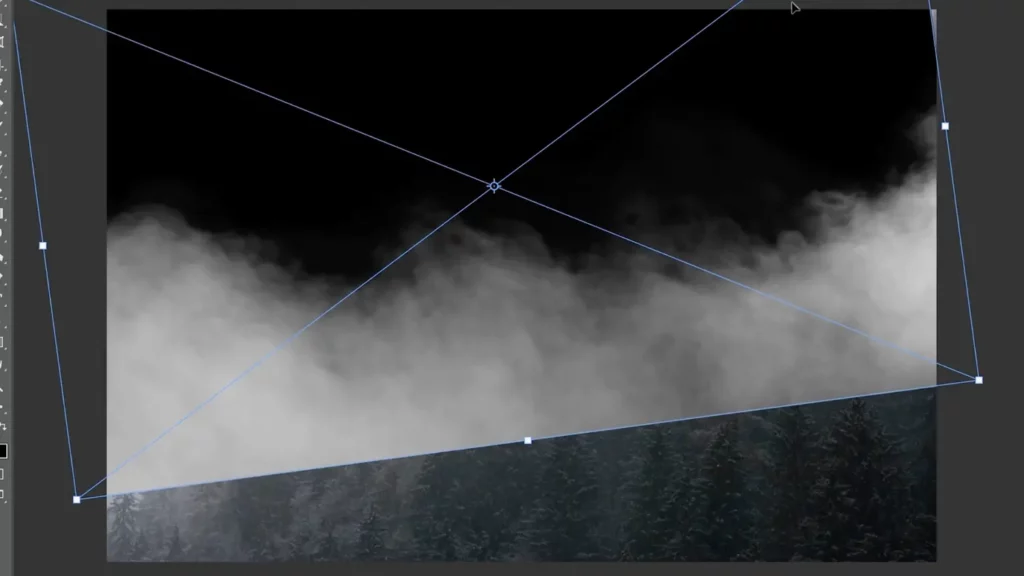
so double click on the overlay layer and then use the underlying layer slider to hide it from the trees in the foreground then you can use alt or option to add a smoother transition
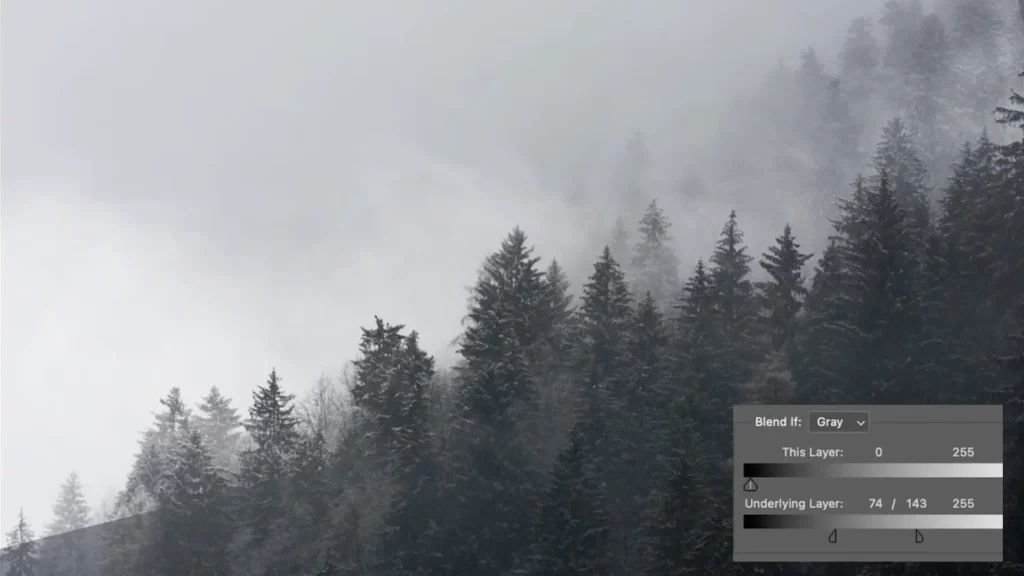
for the parts that are still showing a hard Edge you can use a layer mask and paint with black
If you want to make the fog look stronger you can use a levels adjustment layer and add more contrast
next, I’m gonna import another fog overlay and I’m gonna use this one for the foreground, this time no blend if is needed, then again apply a levels adjustment layer to add some contrast
then after adding some more adjustment layers to adjust the color and the contrast here’s a quick before
so there you have it that’s how to use the power of overlays to transform boring images into stunning works of art in just a few clicks
Now imagine the time you’ll save by having a curated collection of high-quality overlays right at your fingertips no more scouring the internet for hours trying to find the perfect effects our overlays bundle is your One-Stop solution giving you the freedom to unleash your creativity and make your images truly stand out
so if you want to take your photography and design to the next level checkout BeamFx: overlays bundle today and get instant access to the overlays that will transform your work
thank you for reading till the end, I can’t wait to see the magic you’ll create with this overlays bundle don’t forget to subscribe to my channel and stay tuned for more exciting content until next time happy creating