
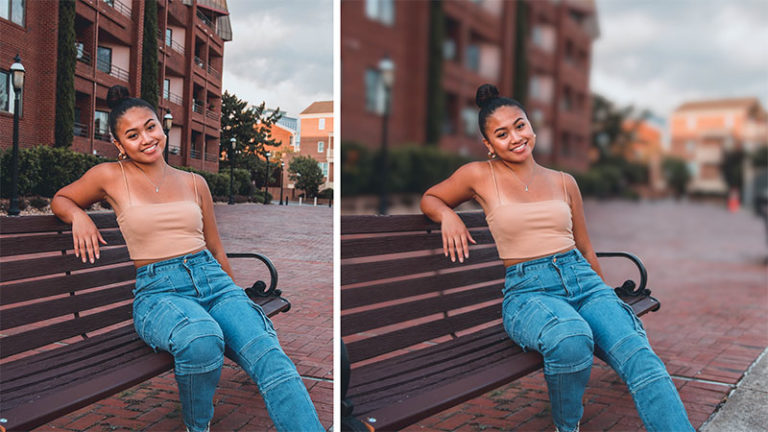
Creating fake bokeh in photoshop is s very straightforward process if you have the right image to work with
In this tutorial, you are going to learn how to make fake Bokeh in Photoshop that looks realistic using 2 simple steps.
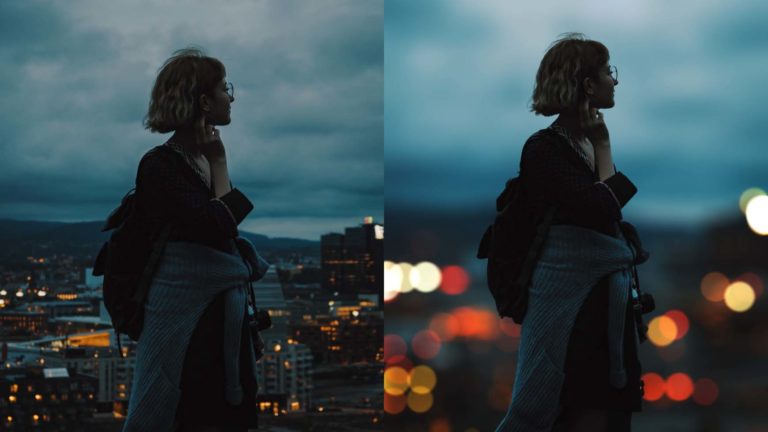
so to get the best results from this tutorial, make sure you have an image with low light and it has some light in the background just like the image we have today
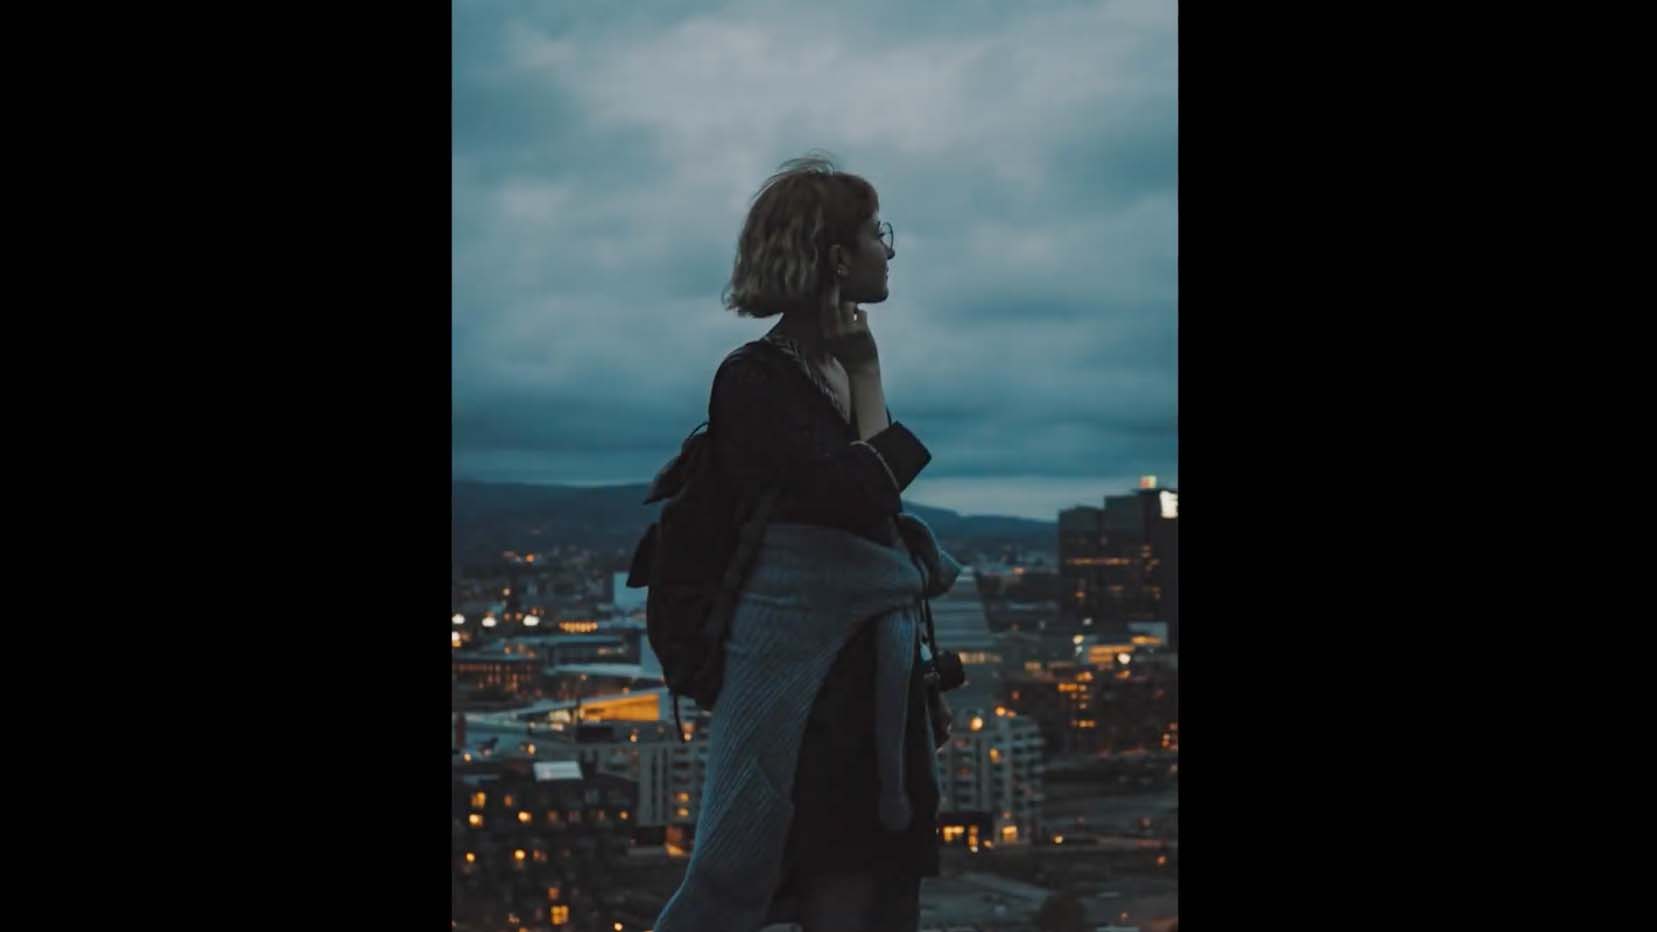
If you want to follow along with this tutorial using this image, you can download it from the tutorial resources section above
We’re going to do this in two steps, the first step is to separate the subject from the background so that we don’t have a halo effect when we add blur to the background.
1 – Select and Mask the Subject
Start by duplicating the background image by clicking on ctrl/Cmd + J and now to select the subject, we can use the “select subject” feature in Photoshop.
So go to select > subject.
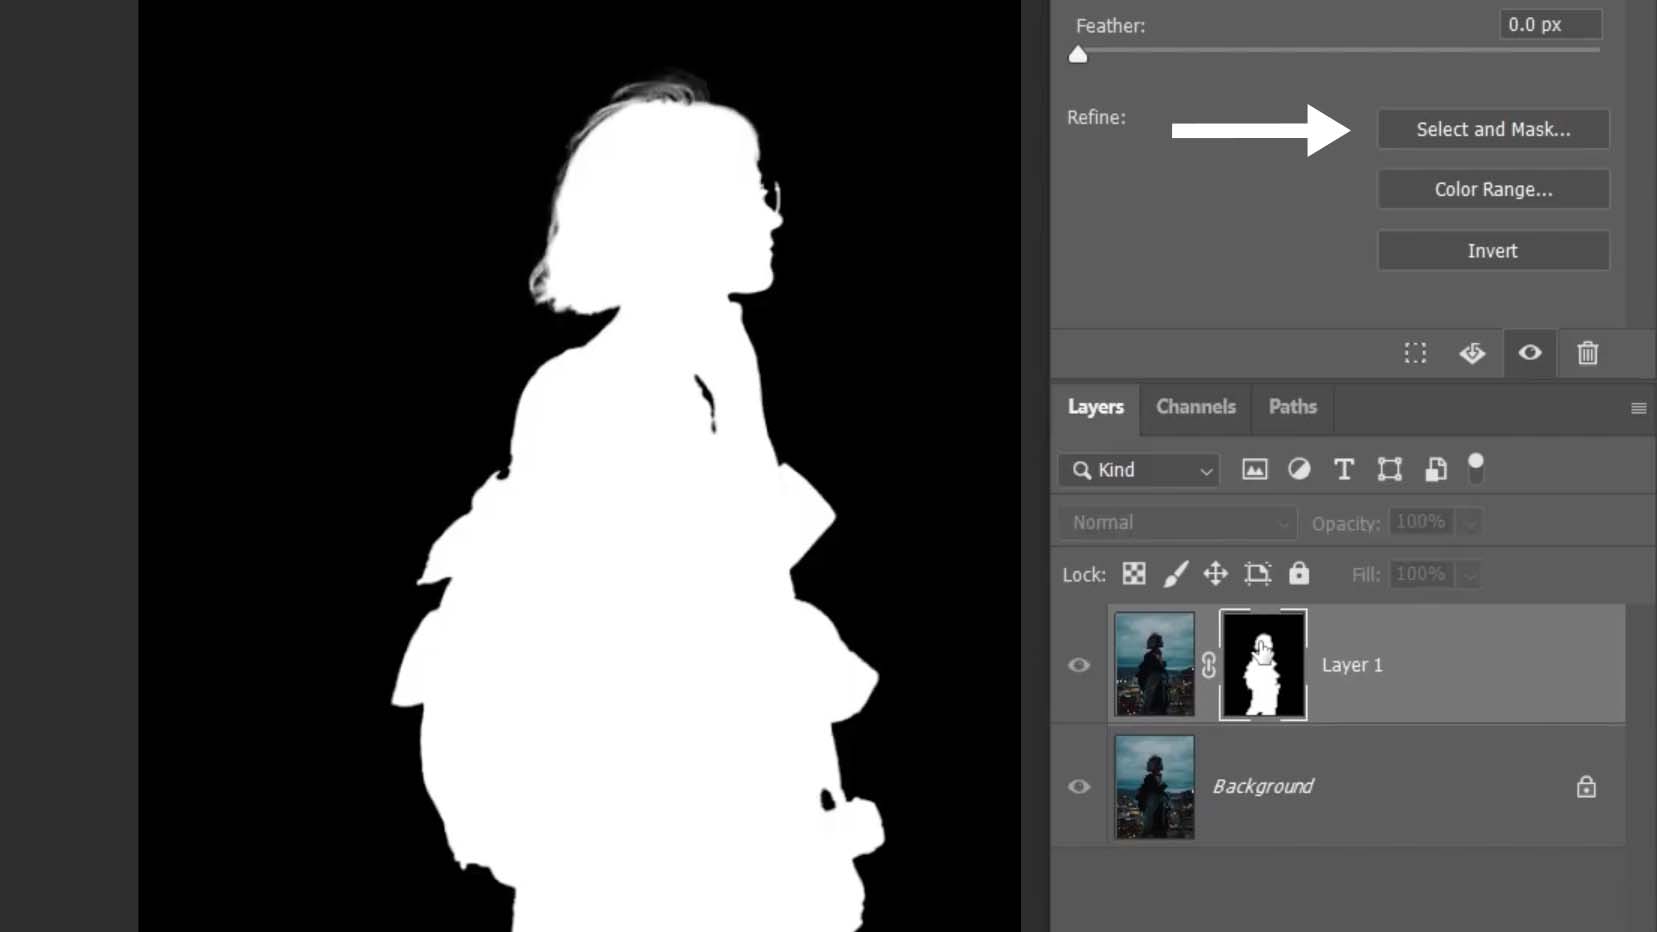
Once you have a selection of the subject active, click on the layer mask icon to add a layer mask and hide the background.
if you hold alt or option and click on the layer mask, you’ll be able to see your layer mask in detail, and you can also refine your selection more by clicking on the “select and mask” button.
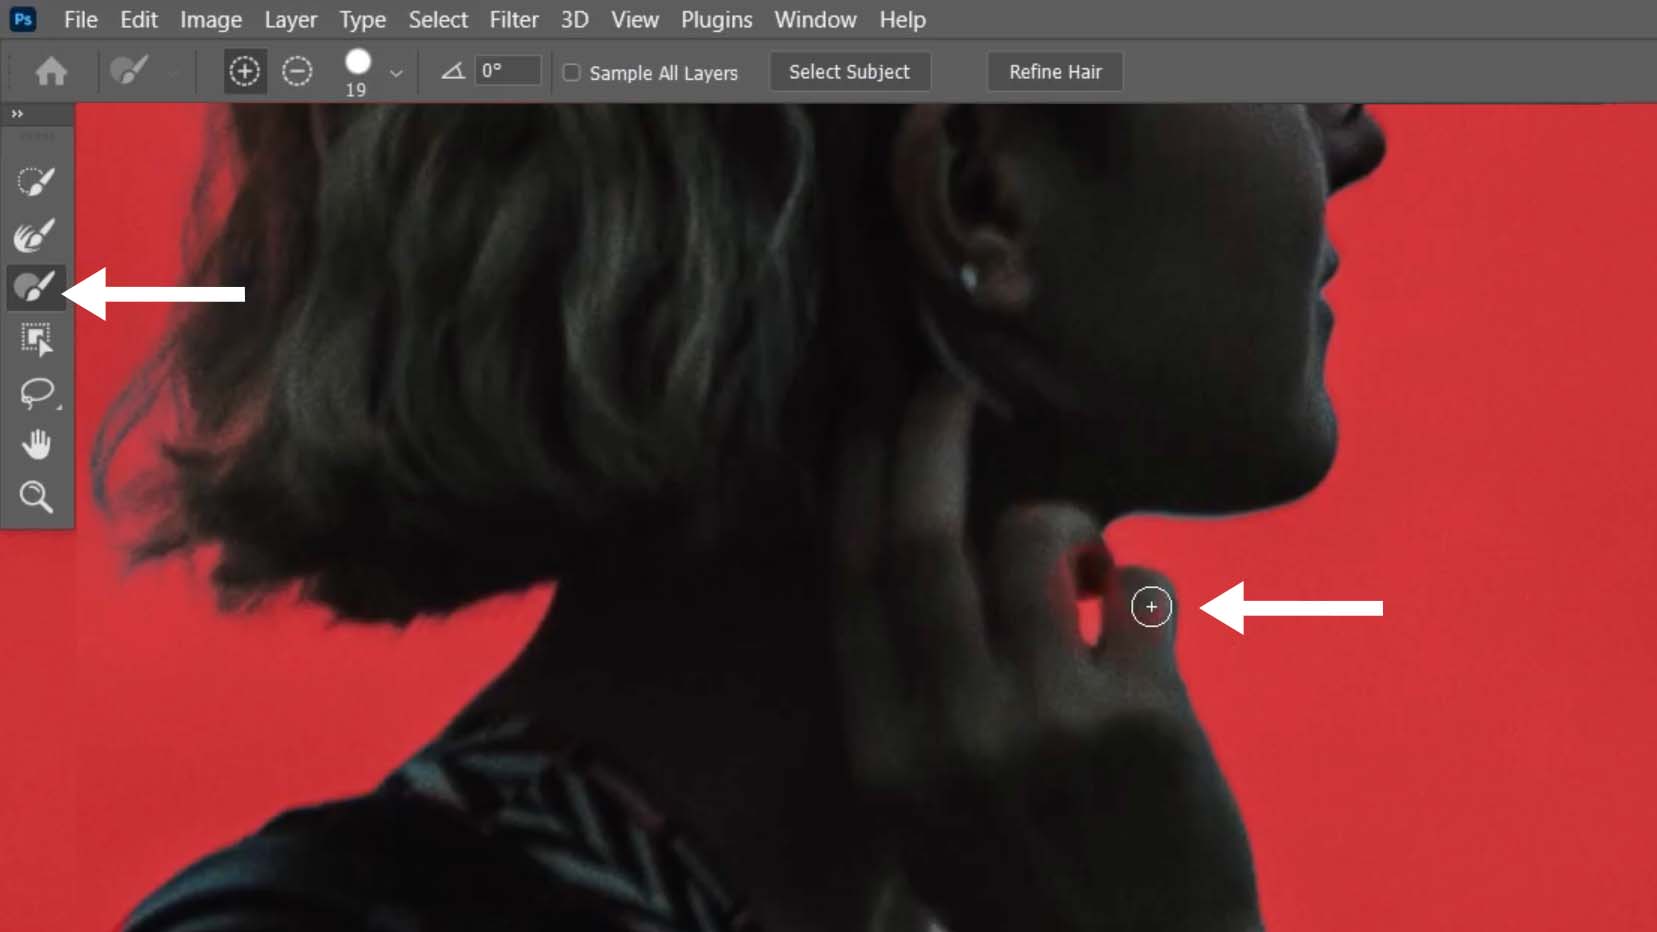
from here, you can use the refine edge brush tool to enhance your layer mask.
In this case, the view is on overlay and you can also control the opacity of the backdrop using the opacity slider,
you can select the refine edge brush tool, and use it to refine your layer mask and improve any missing areas like the hair.

Now, if you want to restore an area back, you can switch to the brush tool, and then use alt/option the switch between the “plus” + to add and “minus” – to remove.
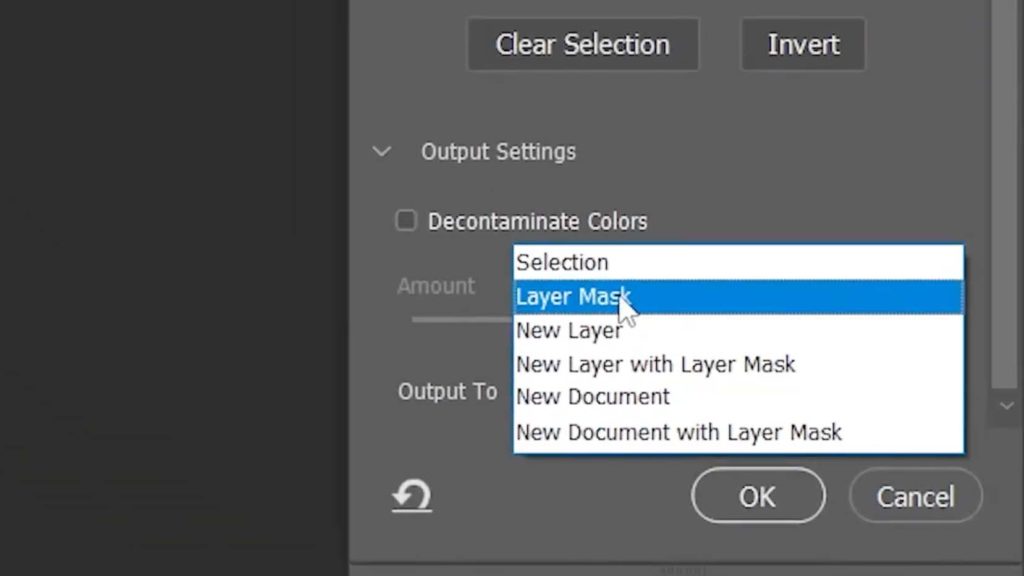
Once your selection is ready, go to the bottom and then change the output to “layer mask”, and click on ok
This will apply the changes to the layer mask
2 – Remove The Subject From The Background
now that we have the subject separated on a new layer, we need to remove it from the background image layer so that we don’t get a halo effect around the subject when we add blur,
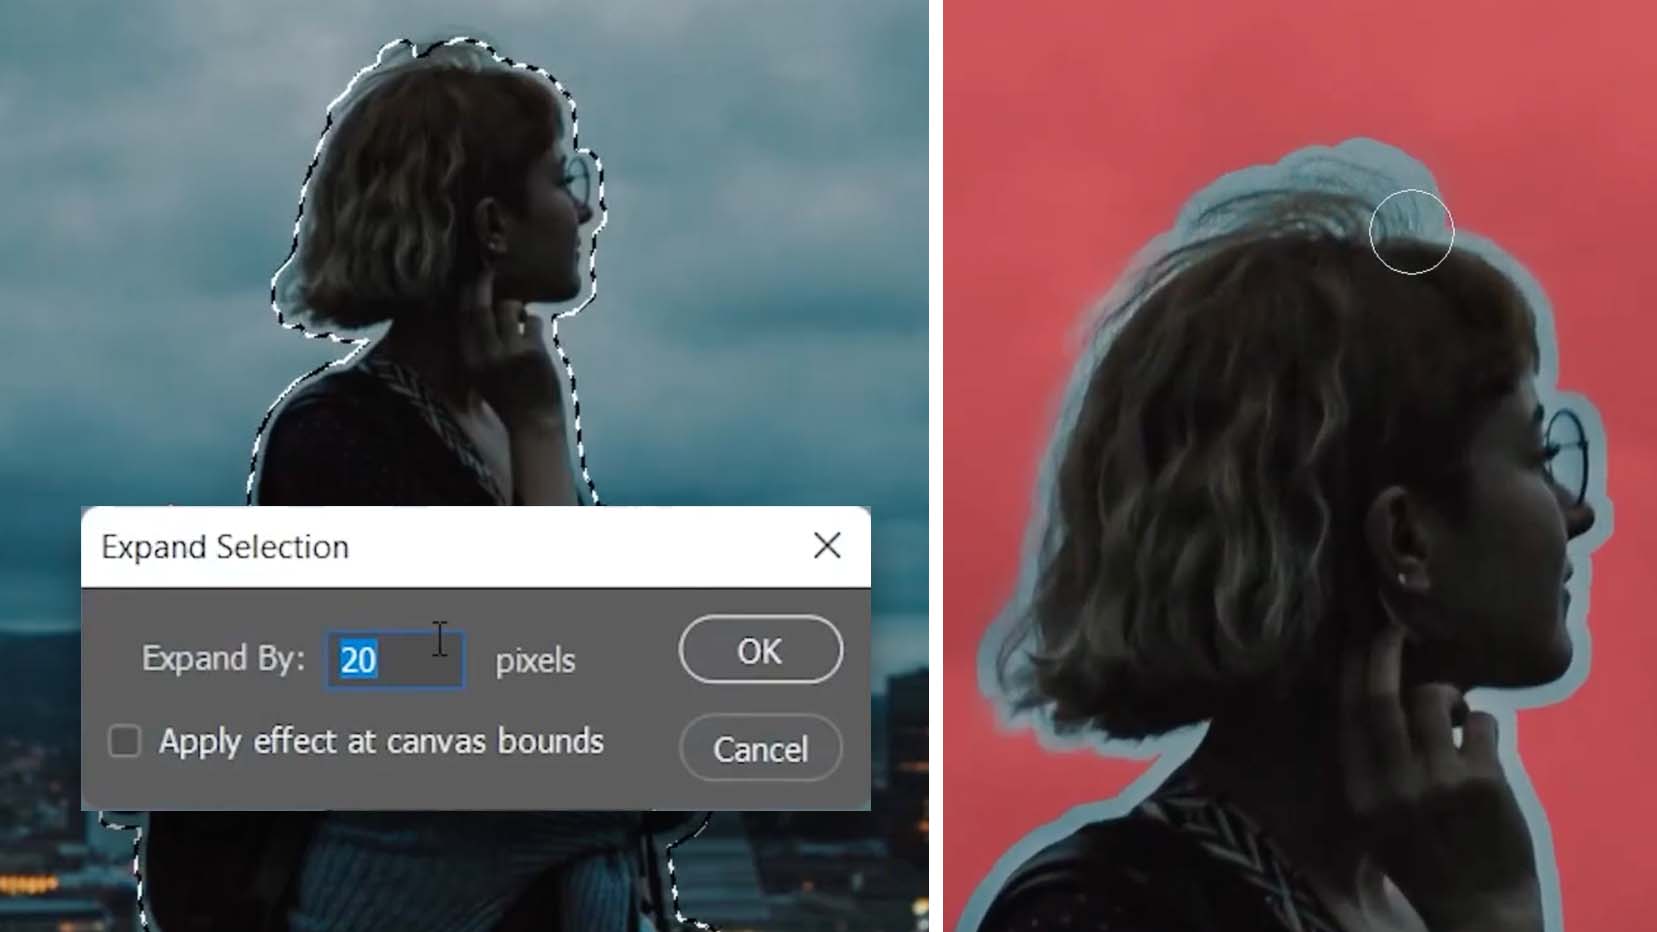
So we’re going to be using the selection from the layer mask, and to do that ctrl/cmd click on the layer mask of the subject layer to load it as a selection.
Now go to select > modify > expand
in this case, I’m going to expand the layer mask by 20px, click on ok, and if you click on Q, you’ll be able to see the expanded area better.
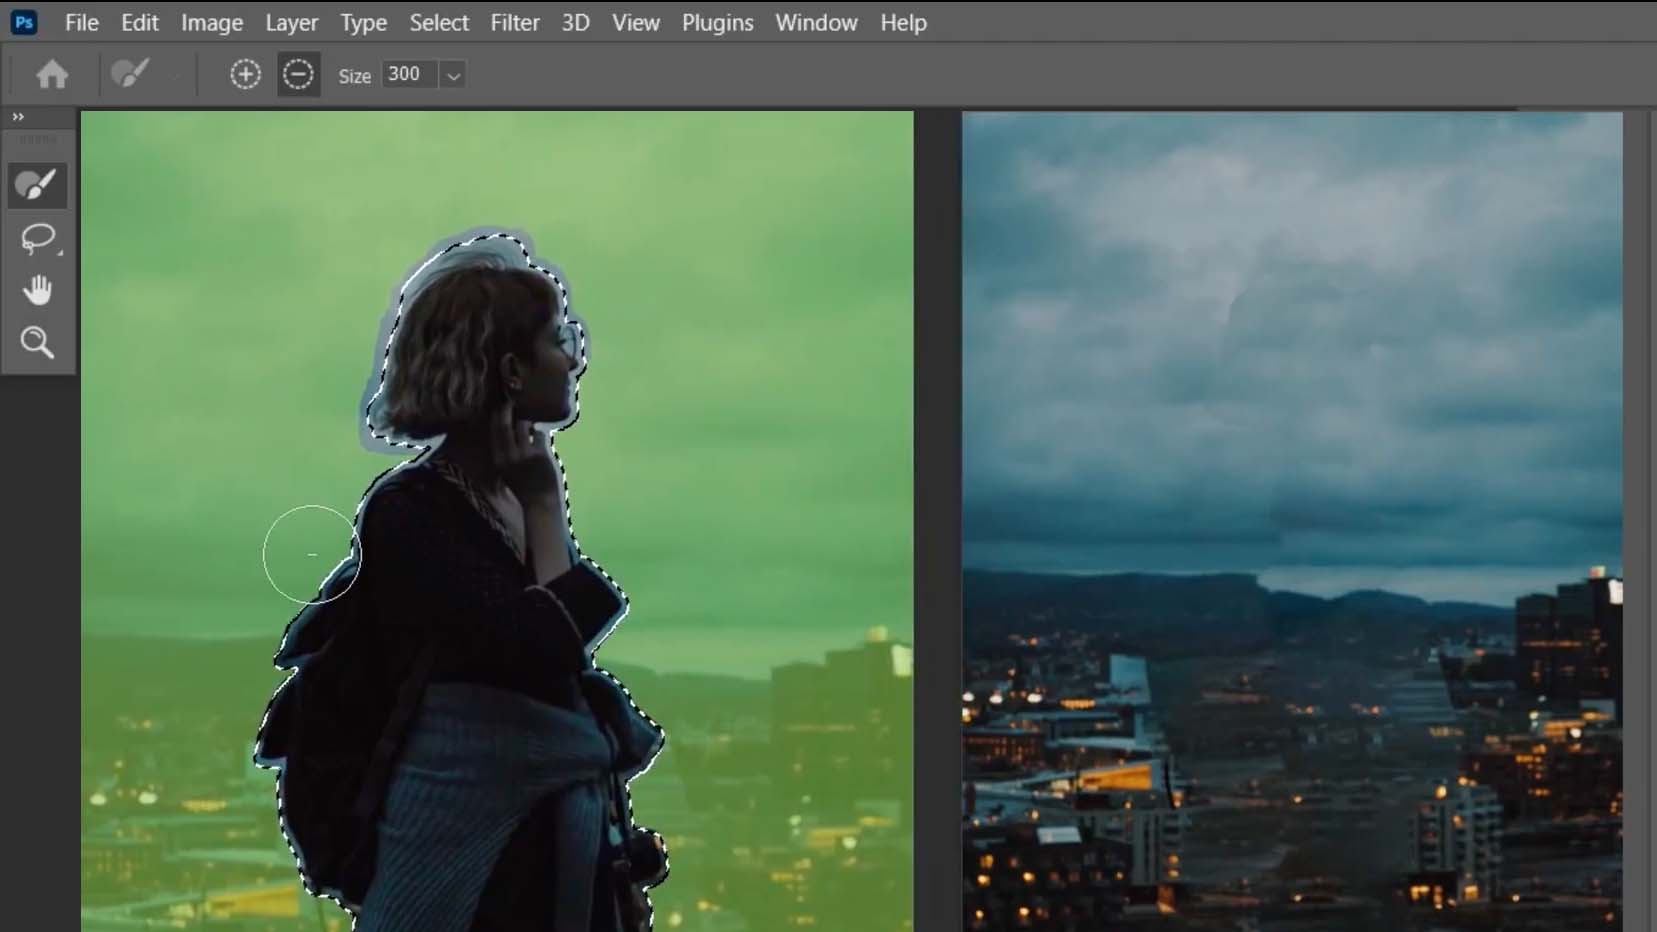
now you can switch to the brush tool and then you can paint on top of any area that is missing.
Now click on Q again to get back to the selection, make sure your background image layer is selected, then go to edit > content-aware fill.
Here you can let Photoshop automatically fill the selection with information from the background, and it also doesn’t have to be perfect because the background is going to be blurred anyway.
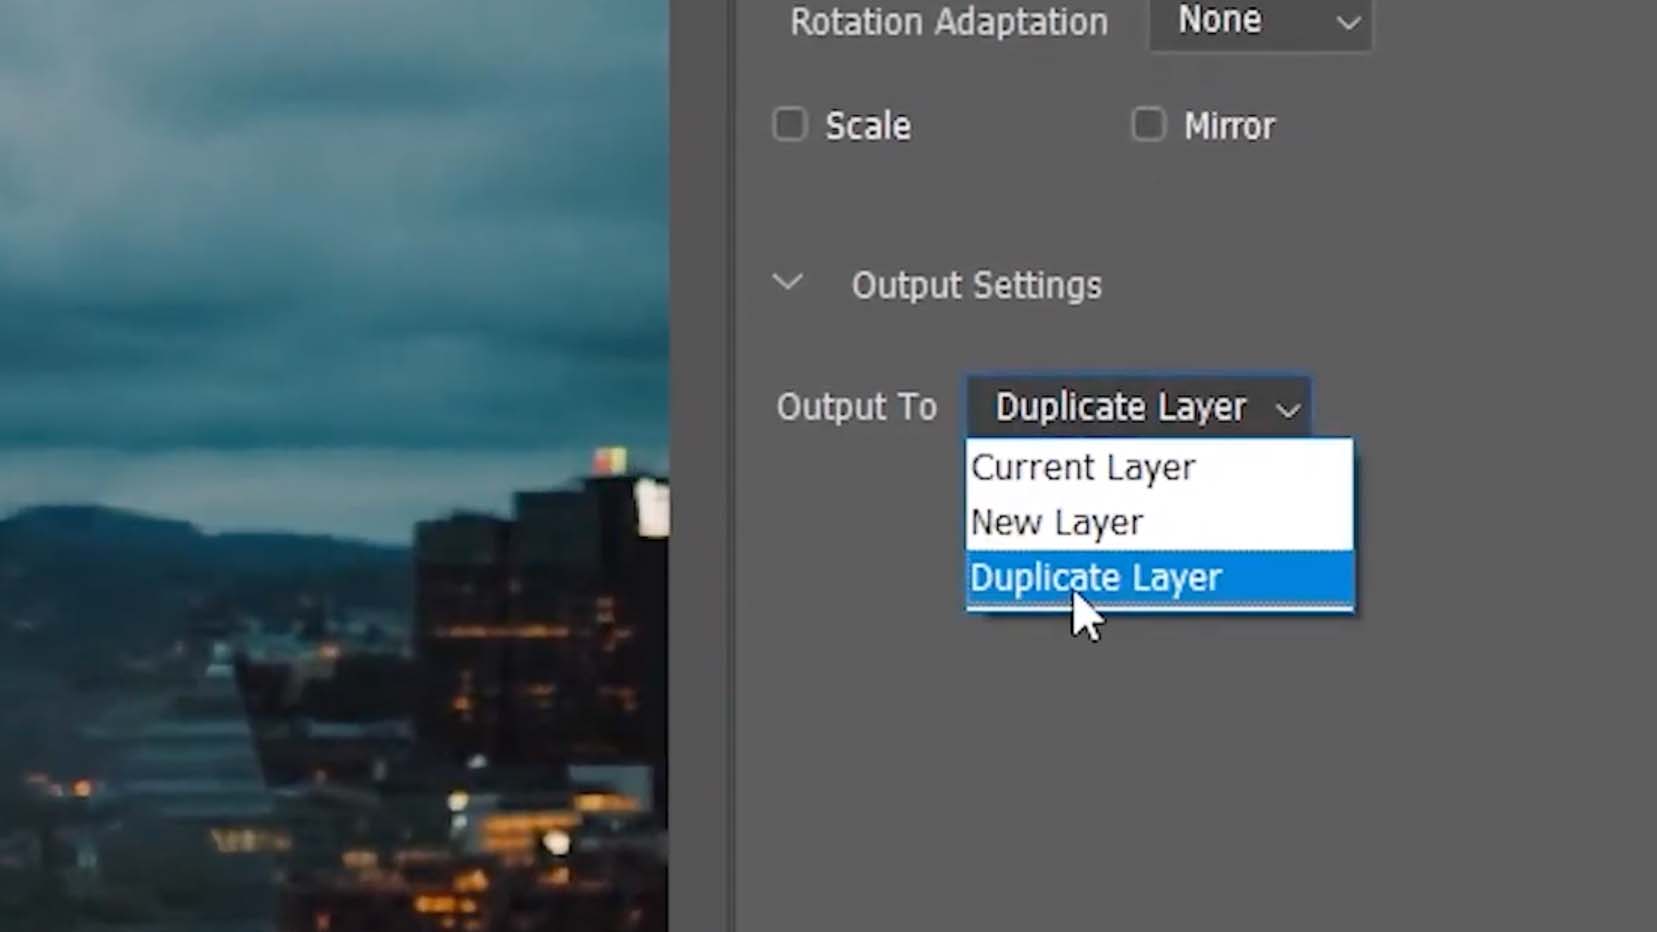
next, in “output” on the right side, change it to “duplicate layer” and then click on ok.
Then click on Ctrl/cmd + D to deselect, and now we have the subject separated from the background and we are ready to add blur.
3 – Add Blur Using The Tilt-Shift Filter
Before we apply the blur filter, right-click on the duplicated layer and then choose “convert to smart object”.
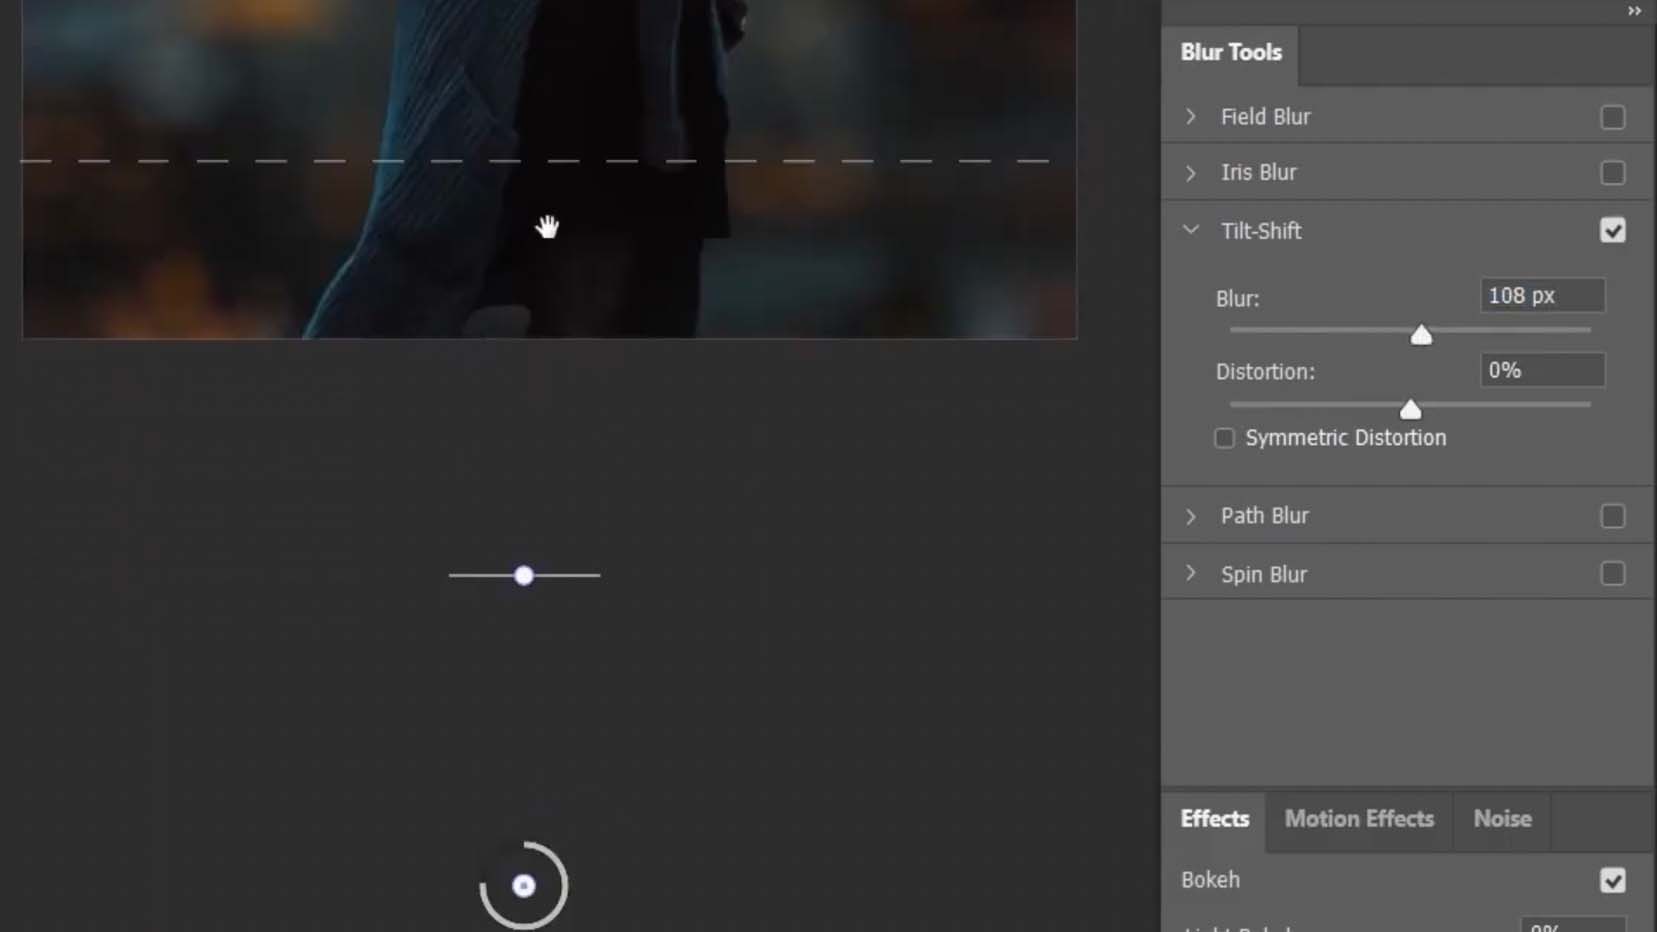
Now go to filter > blur gallery > tilt-shift.
in the tilt-shift filter, anything inside the first two main lines will be in focus and anything in between will be blurred.
You can move the first lines to expand the focus area, and you can also move the dashed lines to add a transition.

In this case, we want all of the background to be out of focus, so we need to move the focus area outside of the canvas.
You can also increase the amount of blur to see a little bit better.
4 – Add Bokeh using The Effects Panel
Now to add the bokeh effect, we can do that using the “effects” panel at the bottom by increasing the value of the “light Bokeh” slider.
If the light bokeh slider is not giving you the results that you want, that means you need to increase the light range using the “light range” slider at the bottom, so everything between the two control points is the amount of light that the bokeh is going to be visible in.
So to add more bokeh, All you need to do is to increase the range of the light, and in this case, if I increase the range too much, you can see that it’s also starting to be visible in the sky.
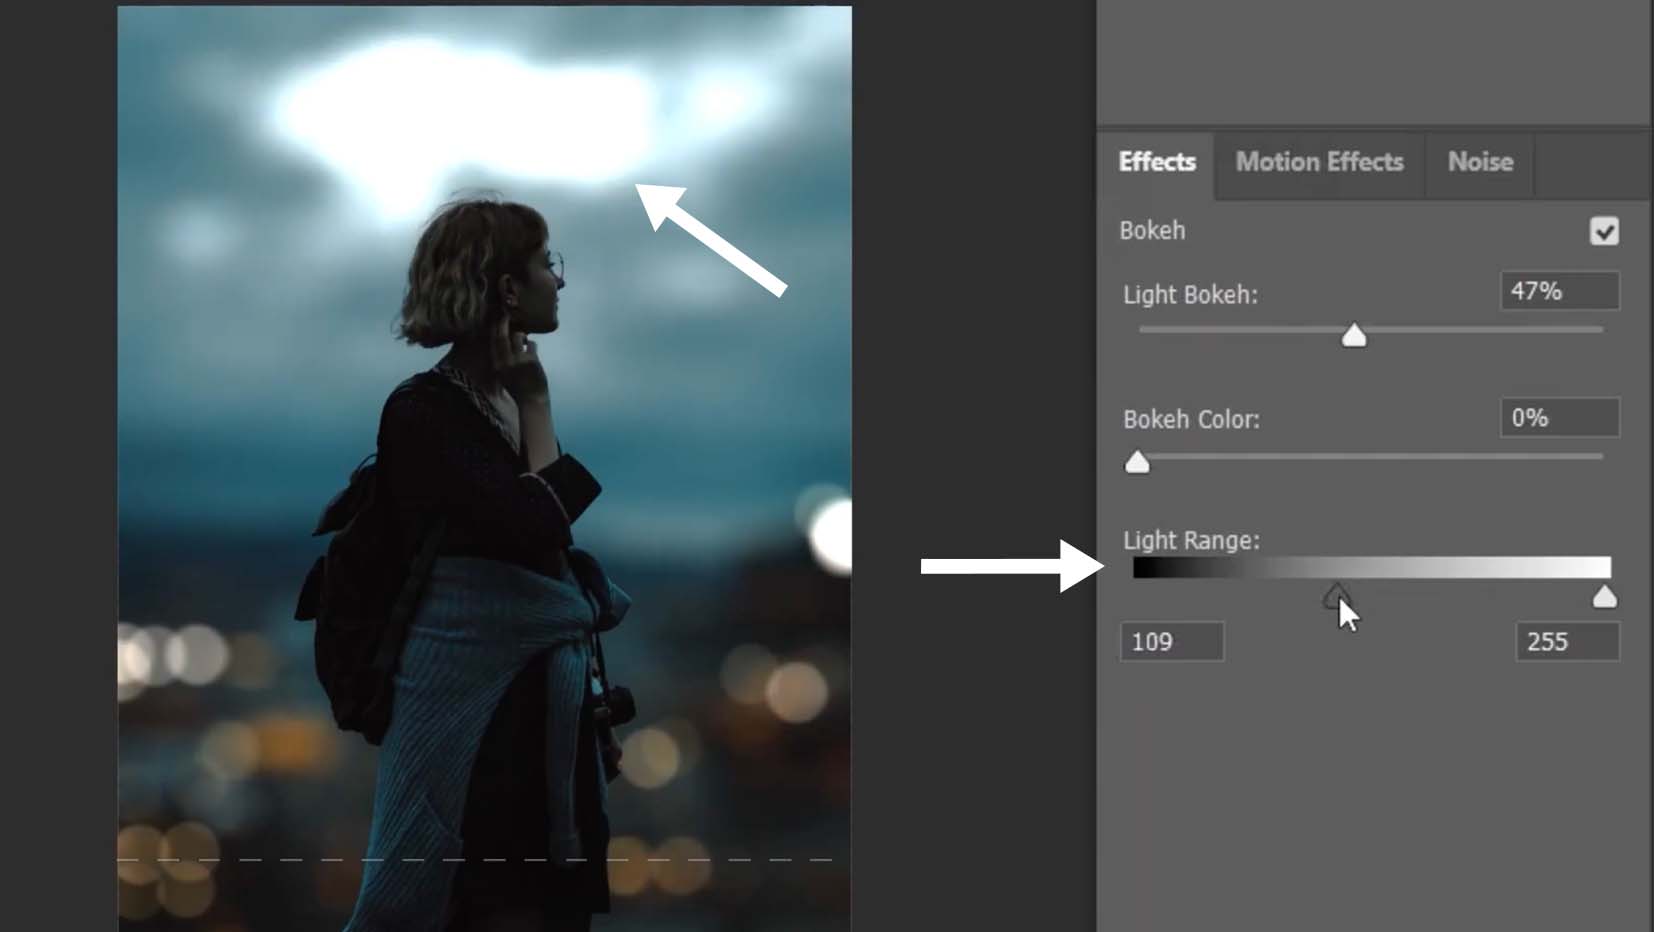
Obviously, we don’t want that, So I’m going to bring it back until it becomes invisible from the sky.
You can also introduce more color to the Bokeh using the “Bokeh color” slider.
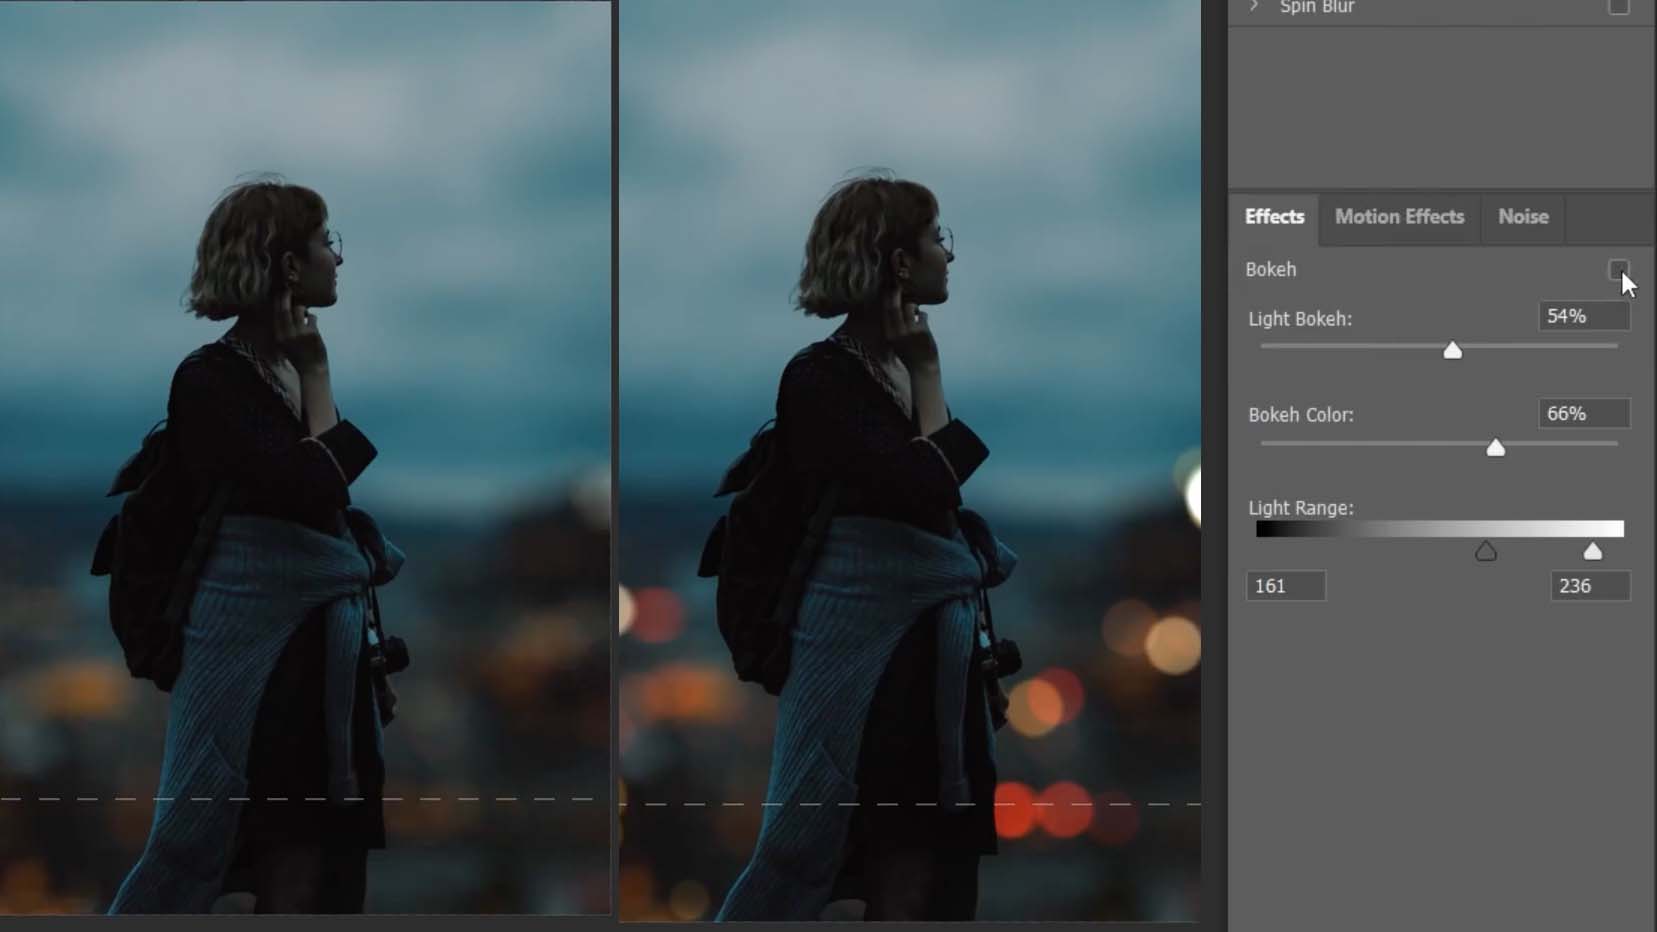
And now all you have to do is to mix and match the values between the light Bokeh and the light range to get the results that you need.
So as you can see, this is with and without the bokeh effect.

And now if you move the blur slider, you will see how the bokeh effect is reacting with the blur value, so in this case, I’m going to keep the value to about 100px
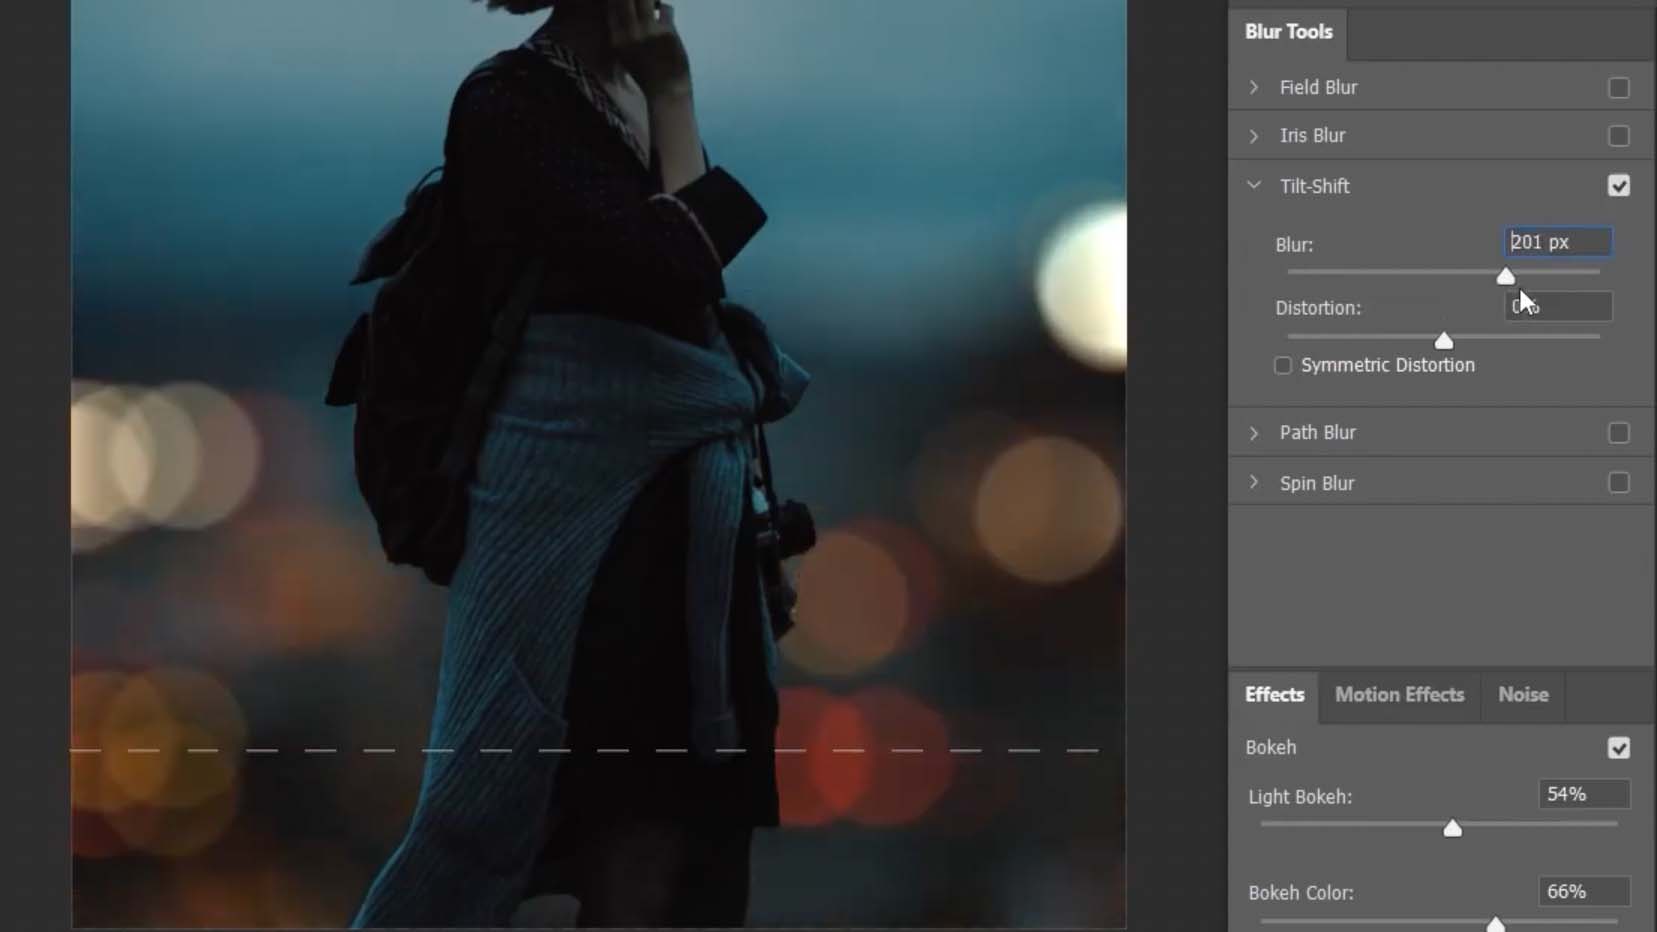
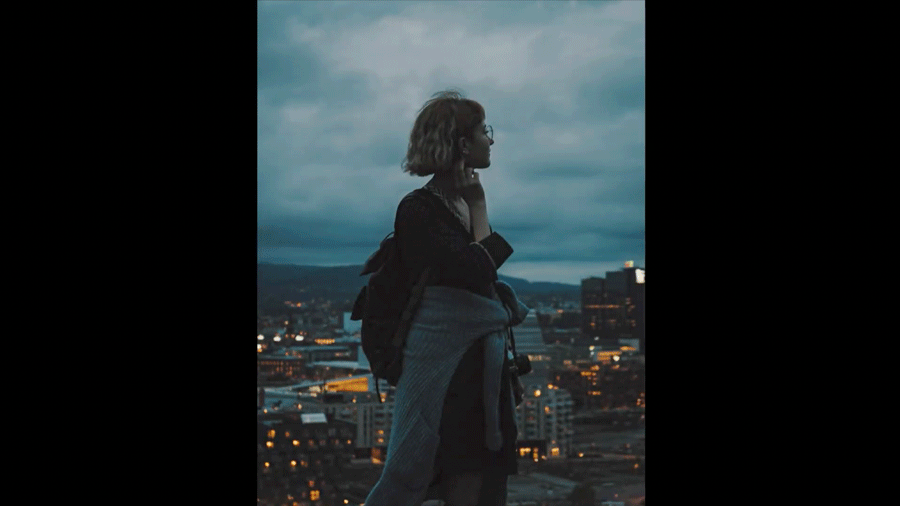
click on ok. To apply the changes. And this is before and after.
So that’s how to easily add fake Bokeh in Photoshop, if you enjoyed this tutorial or you have any questions down below and i’ll do my best to help
Next, you can watch “How to blur Background using Neural Filters and Depth Maps” to learn how automatically blur background without making selections.
Thank you for following along and I’ll see you in my next tutorial.


1 thought on “2 Simple Steps to make fake bokeh in photoshop”
How edit natural photo.. without colour to natural.plasse on tutorial