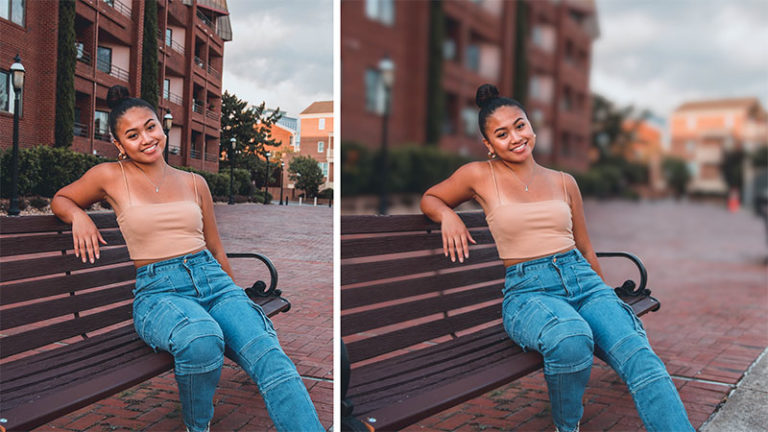
Blurring a background has never been easier in Photoshop thanks to the depth blur filter inside the new neural filters that came with Photoshop 2022
Today you’re going to learn how to blur background in Photoshop and add depth of field, i will show you how to blur a background the easy way using the depth blur filter, i’ll show you how this filter works, how to overcome its limitations, like the inaccurate selections, the halo effects
And then i’ll show how to blur a background in difficult situations by doing it manually using depth maps.
So let’s get started
1 – How to blur background in Photoshop using neural filters
To follow along with this tutorial and have access to the latest version of the depth blur filter, make sure you have Photoshop 2022 version 23 and above installed.
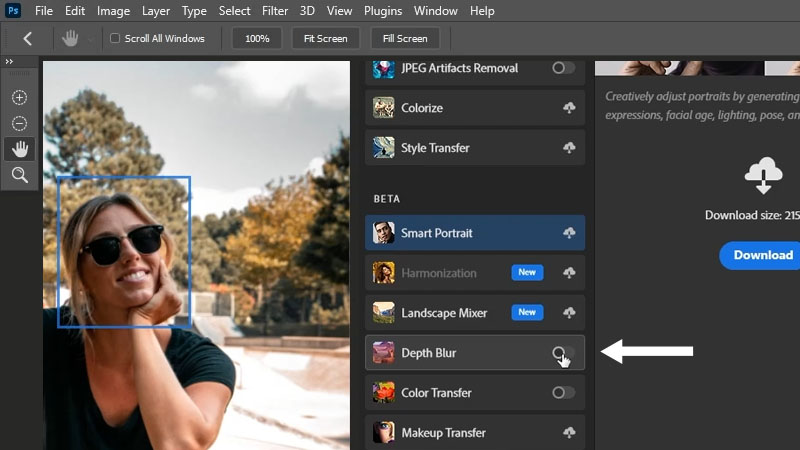
now, to get to the depth blur filter, go to filter > neural filters.
there are many new filters that you can try out on your own, like skin smoothing and colorizing black and white images, but today we’re going to be looking at the new depth blur filter.
So when you open this for the first time, you might need to download the filter first, and all you have to do is click on the download button and then enable the filter.
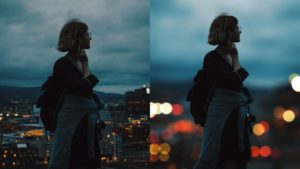
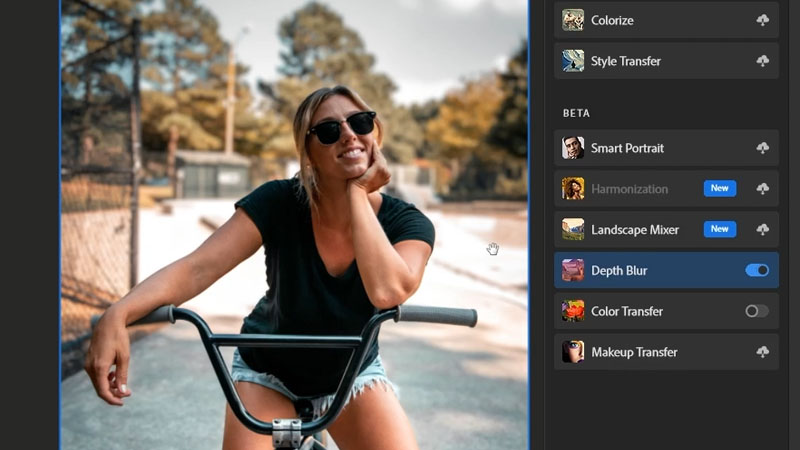
Now Photoshop is going to analyze the image, select the subject, and then blur the background,
And as you can see, Photoshop did a really good job right off the bat, it detected the subject and blurred the background for us, before this, we used to manually have to make selections and separate the subject from the background, and then we can blur the background and it takes a lot of time.
So I think this feature is really amazing and it’s going to be very helpful for a lot of people.
let’s take a look at the settings this filter has to offer.
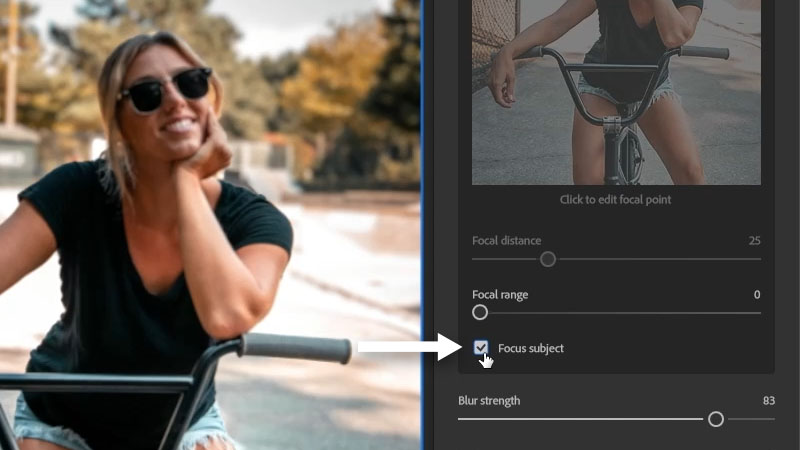
sometimes when you apply this filter, you might not have the focus subject automatically checked, and if I uncheck the option, as you can see, we didn’t get the best results on isolating our subject, So make sure to click on the focus subject checkbox, to exclude the subject from the selection, and I believe this is using the same technology behind the select subject feature in Photoshop.
The first thing that we have is the focal range slider, and this slider will help you control the range of the blur, if you keep its value low, it will be less visible on the objects in the foreground.
This is also a very good feature that will mimic the depth of the camera lens, and what I usually do is increase the blur strength all the way, and then you will be able to see the results a little bit better when you are moving the focal range slider.
So if I increase the focal range all the way, you will see that Photoshop is now detecting objects that are a little bit further in the foreground, and they have less blur than the objects in the background.
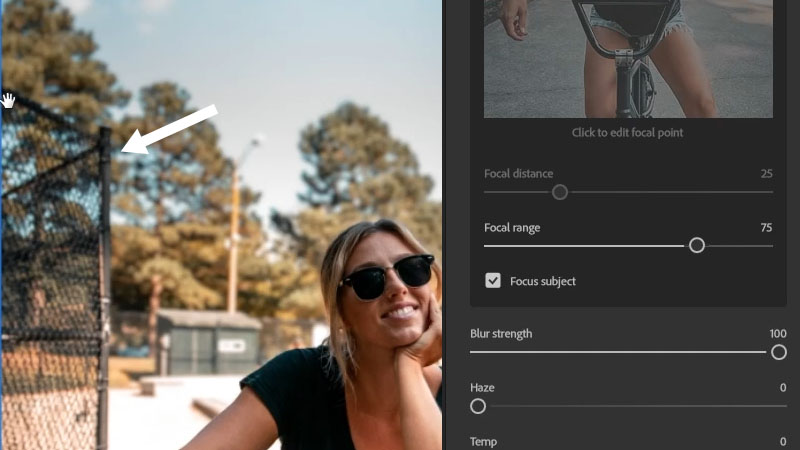
so for this case, I’m going to keep the focal range to about 30
Each time you make a change, Photoshop is going to take a little bit of time to process the image, And this is actually much faster than it used to be.
before it had to re-upload the image to the cloud and process it each time you make a change, so this is a nice addition.
Moving on, we also have haze, temperature, tint, saturation, and brightness sliders, and as the name implies, these sliders will give you the ability to add haze, add more warmth to your image, and so on, but in this case, we will keep the value in all of these sliders to 0
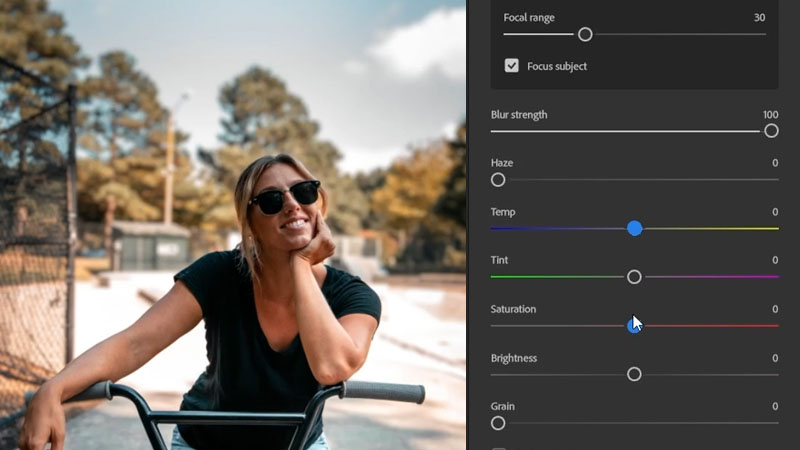
but there’s another very useful slider which is the grain slider, and I can see that it can be very useful for many people because when you add depth of field to the background, you will lose all the grain in the original image, so this will help you bring back some of that grain in the background.
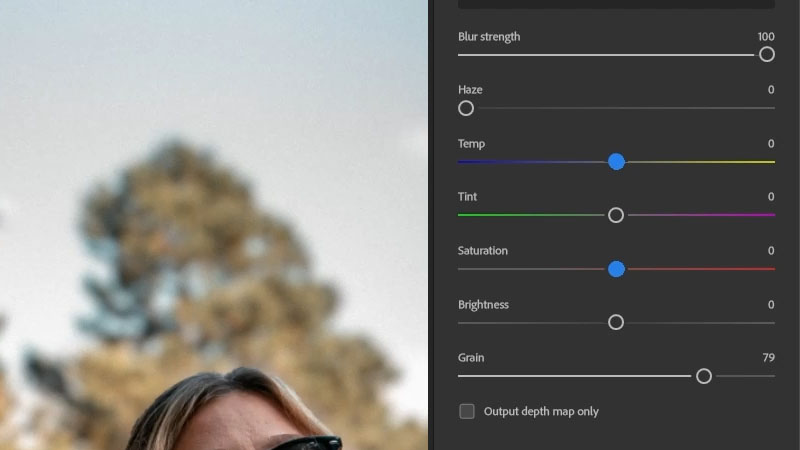
The next check box that you have will give you the ability to output a depth map only And we’re going to talk about this later,
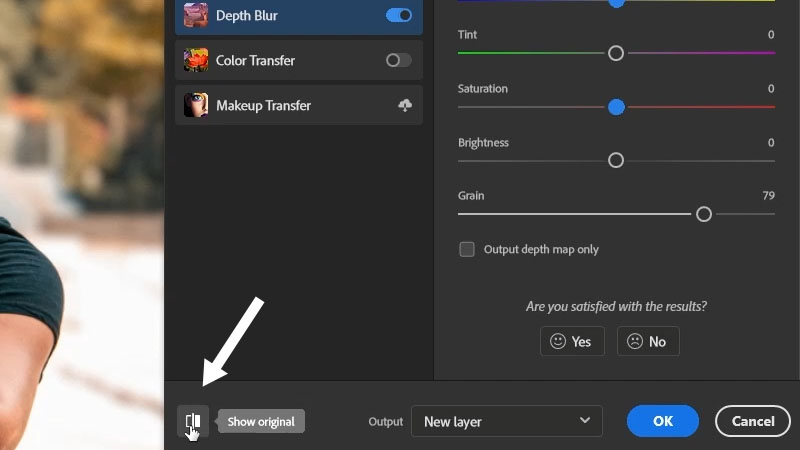
If you want to see the before and after you can click on the icon in the bottom left corner
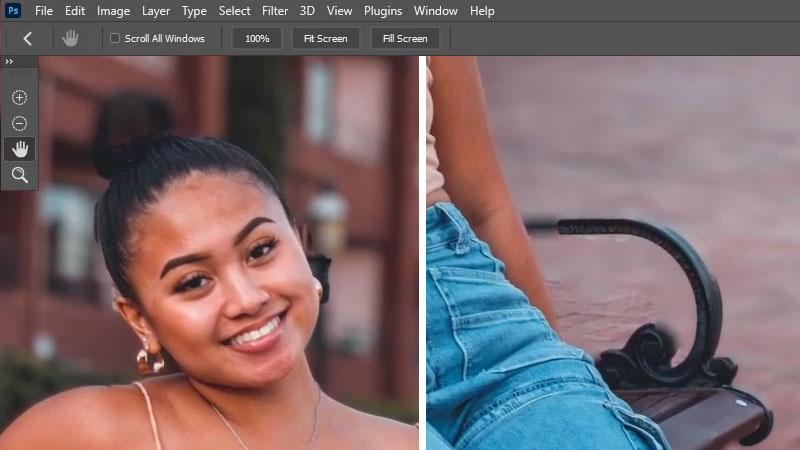
Now, If we take a close look at our subject, you will see that some parts of the subject are not properly selected, like the left side of the bike, and some in the background.
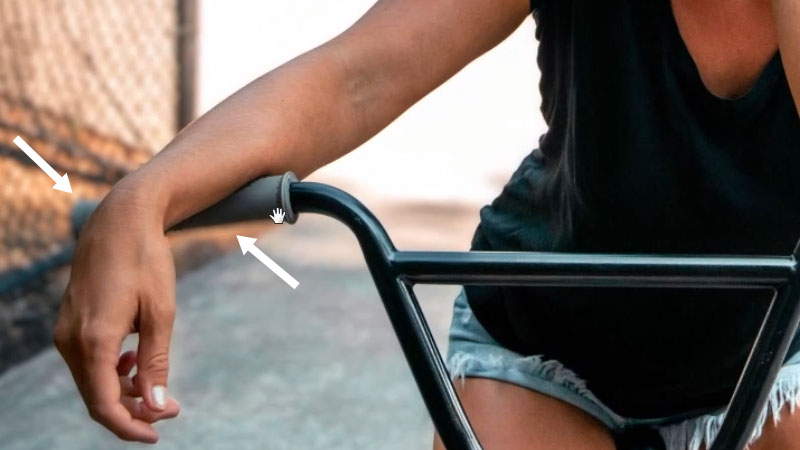
And to fix that, you have a couple of tools on the left-hand side that you can use, the “subtract from selection” and “add to selection”.
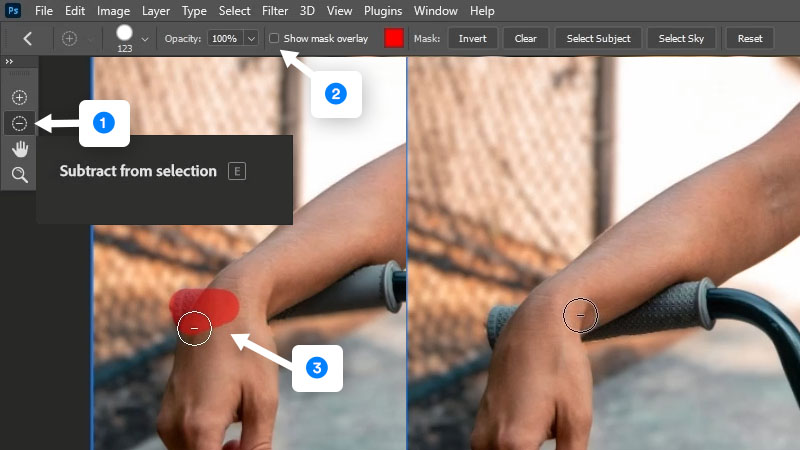
So now we can take the subtract from the selection tool and you can control its size the same way as you control the brush tool, You can also hold alt or option the switch between these tools just like in the select and mask panel.
then you can paint on those areas to exclude it from the blur area.
you might also want to uncheck the “show mask overlay” option to hide the mask overlay.
once you are done refining the selection, you can choose an output option at the bottom, you will see that you have a couple of options, the first one is to apply the changes to the current layer which is destructive, You can export it to a new layer, a new layer with a layer mask, a smart filter, or a new document
Choose “smart filter” and click ok.
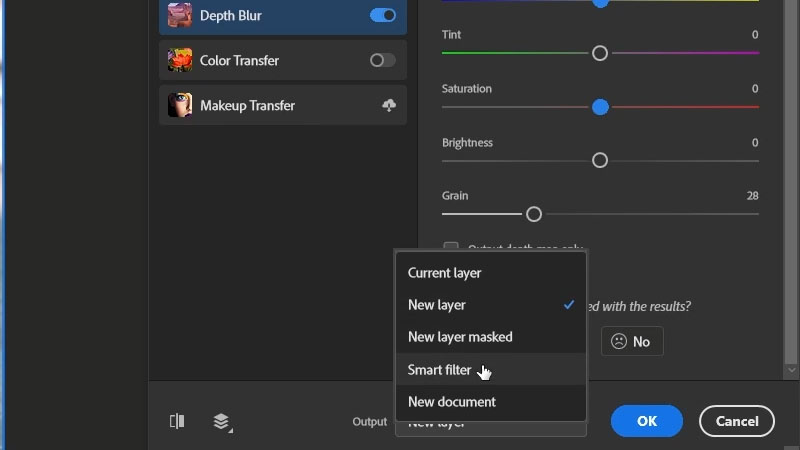
now it’s going to automatically convert the layer to a smart object and apply the changes as a smart filter, this means that it is non-destructive and you can always go back and edit the filter by double-clicking on it
and that’s how the depth blur filter works, now let’s talk about the issues that you might face and how to fix them.
2 – Removing the halo effect caused by the depth blur
So I have another example here that I applied the Depth blur filter to, and first of all, photoshop did a great job on selecting the subject and blurring the background, But the problem here is that there are some halos on the edges of our subject.
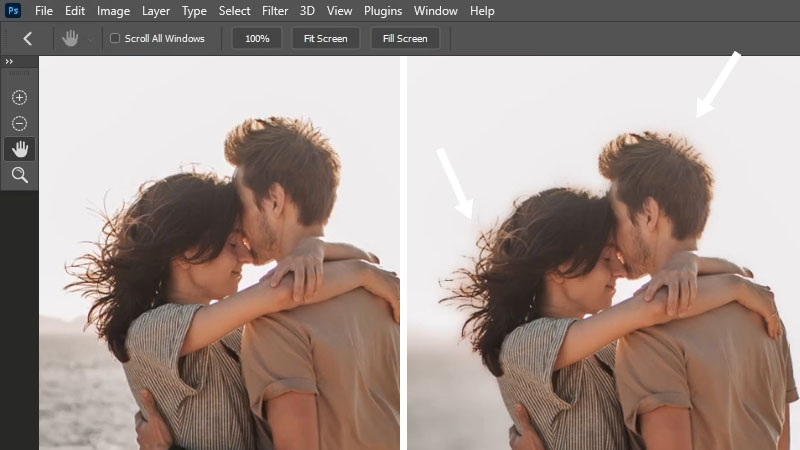
And this is a common problem, when you try to blur the background and you separate your subject from the background, you blur the background and then you add your subject on top.
Now the original copy of the subject underneath will be blurred and it’s going to leak outside the selection.
So to fix this, you need to apply the changes to a smart filter, then click ok.
what you need to do next is duplicate this layer by clicking on ctrl/cmd + j and then delete the smart filter from the copied layer.
Then go to select > subject.
So now we have our subject selected and you can take your time here and use the refine edge tool to make a good selection of it but in this case, this selection is good enough for this example.
Now with the selection active, add a layer mask, and now we have a copy of only the subject.
Next, add a new layer underneath the subject layer, and then take the clone stamp tool by clicking on S and making sure the sampling is set to current and below.
now simply sample from an area from the background that is similar and paint underneath the subject, and as you can see by doing this the halo effect is gone and it looks much better.
So you can use this technique to remove any halo effects caused by this depth blur filter.

3 – How to use Depth Maps to Add Blur Manually
Another problem that you might face using the depth blur filter is having inaccurate selections, so I already applied the depth blur filter to this image, and as you can see, there are a lot of areas of the subject that are not included, And also some areas of the background that should be out of focus, but they are in focus.
And this might not be a big problem if we have the tools to further refine the selection as we have in the select subject panel.
But unfortunately, this is still limited on what you can do to refine the selection, sure we have the subtract from selection tool that will help us remove unwanted areas, and you might think you can use the add to selection tool to add the missing areas, but you can’t, this tool will only restore the areas that you already removed, so in this case, we can’t do anything to fix this unless we do it manually.
And that’s where the depth maps come in Very handy.
So in the depth blur panel, if you scroll to the bottom, you’ll see that you have an “output depth map only” option, and if you enable this option, Photoshop will create a depth map for you, And you can use this along with the lens blur filter to manually add depth blur to the background.
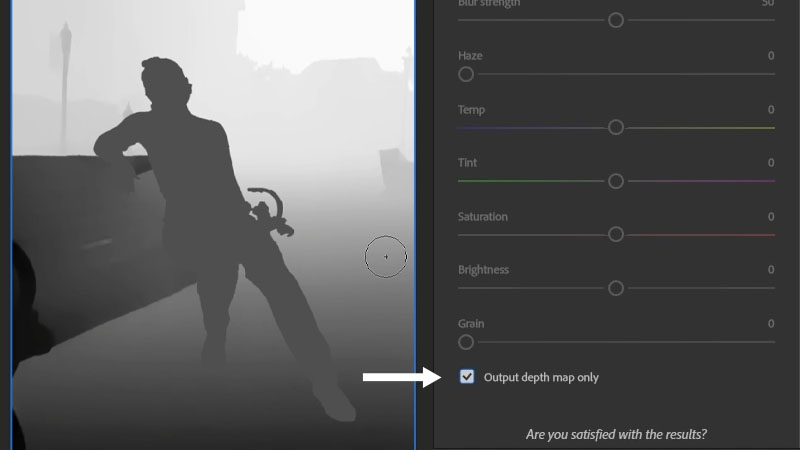
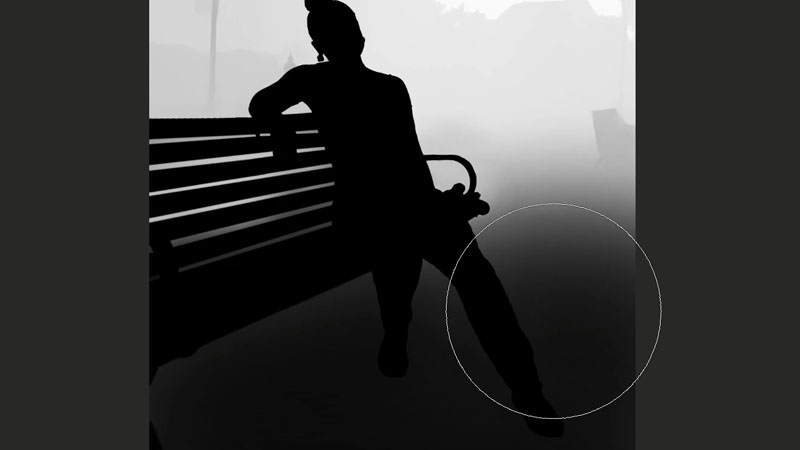
So the idea here is the darker areas will have less blur and the brighter areas will have more blur.
And you can see that in the depth map, Photoshop created multiple levels of contrast to control the blur, Also, the selection in this depth map is not perfect and we’re going to be modifying this in a little bit.
to export this depth map, make sure the option is checked, then select “new layer” as the output method and click “Ok” To output this depth map to a new layer.
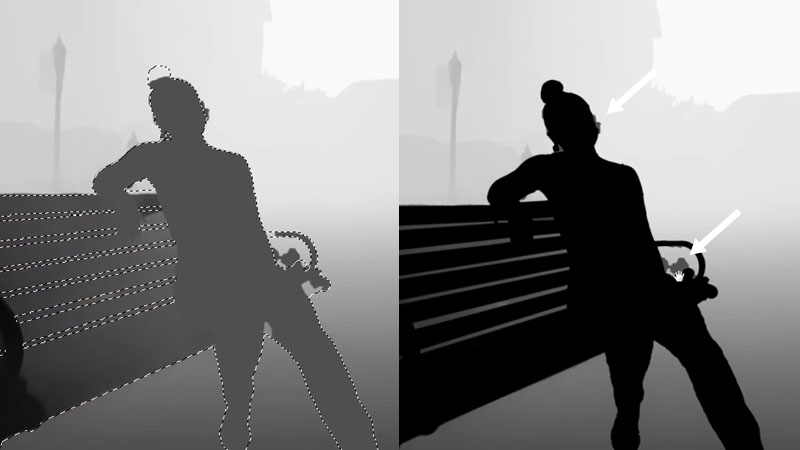
Now, before we use this depth map, we need to make a better selection of the subject, and you can use something like the pen tool or select subject to make a perfect selection of your subject.
Once you have an active selection of the subject, select the depth map layer, Then fill this selection with black by clicking on D then alt + BSpace (win) or option + Delete (Mac).
Now, click on ctrl/cmd + H to hide the selection, and as you will see, that there are some areas from the old depth map selection that we need to remove and we can easily do that using the brush tool.
So take the brush tool, and first of all, invert the selection by clicking on ctrl/cmd + shift + I, then hide the selection again, and using the brush tool you can sample from a nearby area with the same color, and then paint on top of it with the low flow and capacity.
Once you are done, you can click on Ctrl/Cmd + D to deselect.
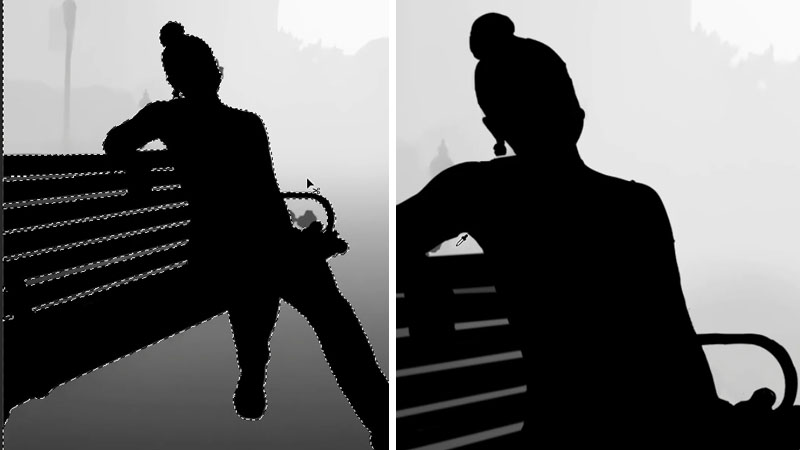
now, since the blur will not be visible in the dark areas we can make the foreground darker as well So it doesn’t have blur and we can also do that using the brush tool and painting with black in the foreground, this way the blur will not be visible in the foreground and it will gradually increase in the background.
Now that we have the depth map ready, we need to convert it to a channel before we use it in the lens blur filter.
To do this go to channels and click on the blue channel for example and duplicate it by dragging it to the new channel icon, then double click on it to rename it and I’m going to call this one “depth map”
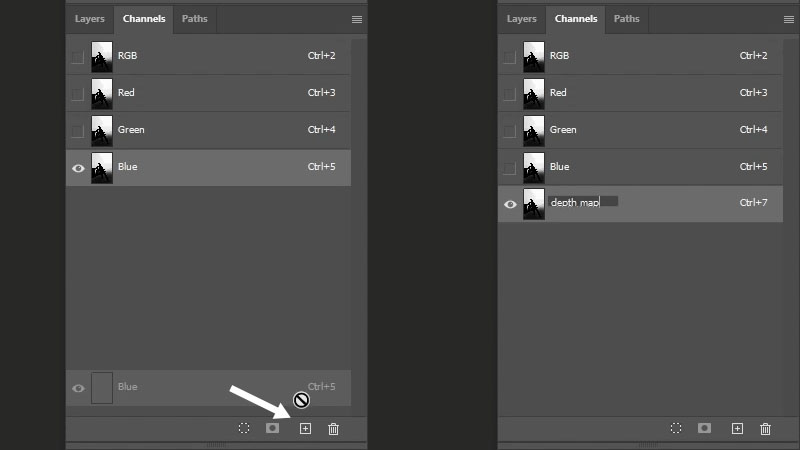
Click on RGB to go back to RGB mode, go back to layers, and now you can hide the depth map layer, select the main layer and apply the lens blur, by going to go to filter > blur > lens blur.
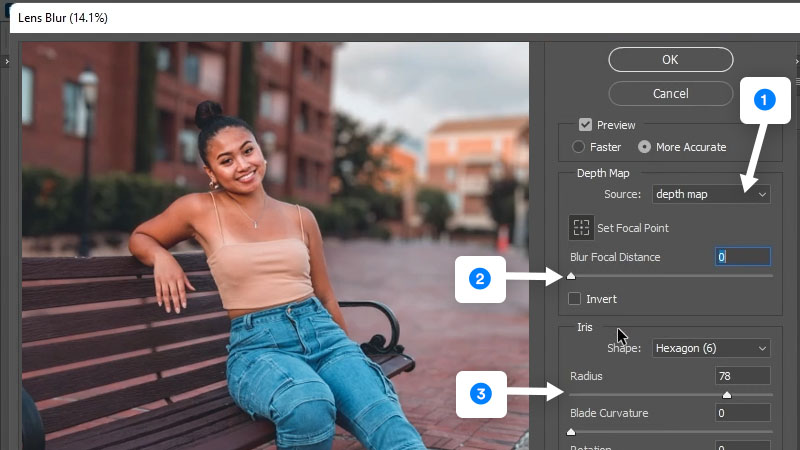
Now the first thing that you need to do here is to choose the depth map as the source using the dropdown. And now, as you can see the lens blur filter is using this depth map to control the blur areas.
Also, make sure the blur focal distance is 0 to keep the subject in focus, and now all you have to do is to play with the sliders to get the desired results, So using the “Radius” slider you can control the amount of blur, and you can also control the specular highlights, add noise if you need to, and so on
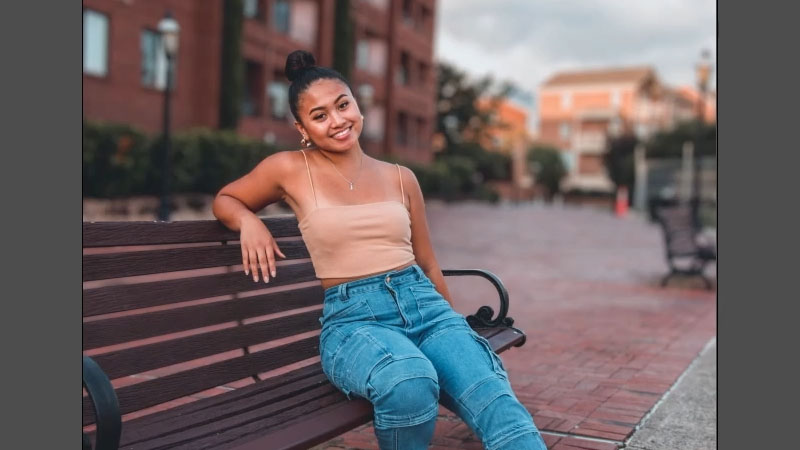
as you can see, the selection now is much better than the depth blur filter.
So using this technique is a great way to have perfect selections, or if you want to have total control over the blur areas.
So that’s how to blur a background in Photoshop let me know if the new depth blur was useful for you in the comments.
And if you enjoyed this tutorial, make sure to subscribe to the youtube channel and turn on the notification bell. So you don’t miss out on new tutorials like this.
Thank you guys so much for following along with the tutorial and I’ll see you in my next one. ✌️