
Have you ever felt overwhelmed by the brush settings panel in Adobe Photoshop?
You’re not alone.
With a vast array of brush options and settings, it can be confusing and intimidating. However, fear not! In this Photoshop brushes tutorial, I’m going to simplify the process and make it easy for you to understand.
As a graphic designer and digital artist, I know firsthand the importance of having the right tools in my creative arsenal.
And let’s be real, brushes are one of the most versatile and essential tools in Photoshop.
Whether you’re digitally painting, designing a poster, or adding subtle texture to a photo, brushes should be an essential part of your workflow.
That’s why I’ve created this complete guide to Photoshop brushes, I want to help you overcome those design hurdles and unlock the true potential of your creativity.
In this article, I’ll take you through everything you need to know about Photoshop brushes – from the basics of what they are and how to use them, to more advanced techniques like customization and creating your own brushes, I’ve got you covered.
By the end of this guide, you’ll have a comprehensive understanding of Photoshop brushes, armed with the knowledge and confidence to create stunning designs that will leave others in awe.
Get ready to brush up on your skills!
What are Photoshop Brushes?
If you’re a newbie to Photoshop, you might be scratching your head and wondering, “What in the world are Photoshop brushes?” Fear not, my friend! It’s actually quite simple.
Think of a Photoshop brush as a tool that allows you to paint and draw using all sorts of textures and shapes.
brushes are so versatile that they can be used for practically anything!
from creating digital paintings and illustrations to adding texture and depth to photographs, With the right brush settings and know-how, the possibilities are endless!
So don’t be shy, give those brushes a try and let your creativity run wild.
Does Photoshop have free brushes?
Photoshop comes pre-loaded with a variety of basic brush types, but the real power of Photoshop brushes lies in their customizability.
You can create your own brushes from any image or shape, or download pre-made brush sets from online resources, With so many options available, the possibilities are truly endless.
How to Install Photoshop Brushes
Before you can start using brushes in Photoshop, you need to install them. Thankfully, this is a relatively simple process:
- Find a brush set that you like, There are countless websites online that offer free and paid brush sets for Photoshop, Some of my go-to sites include Envato Elements, DeviantArt, and Creative Market.
- Download the brush set, and Extract the contents of the file to a location on your computer that you’ll remember.
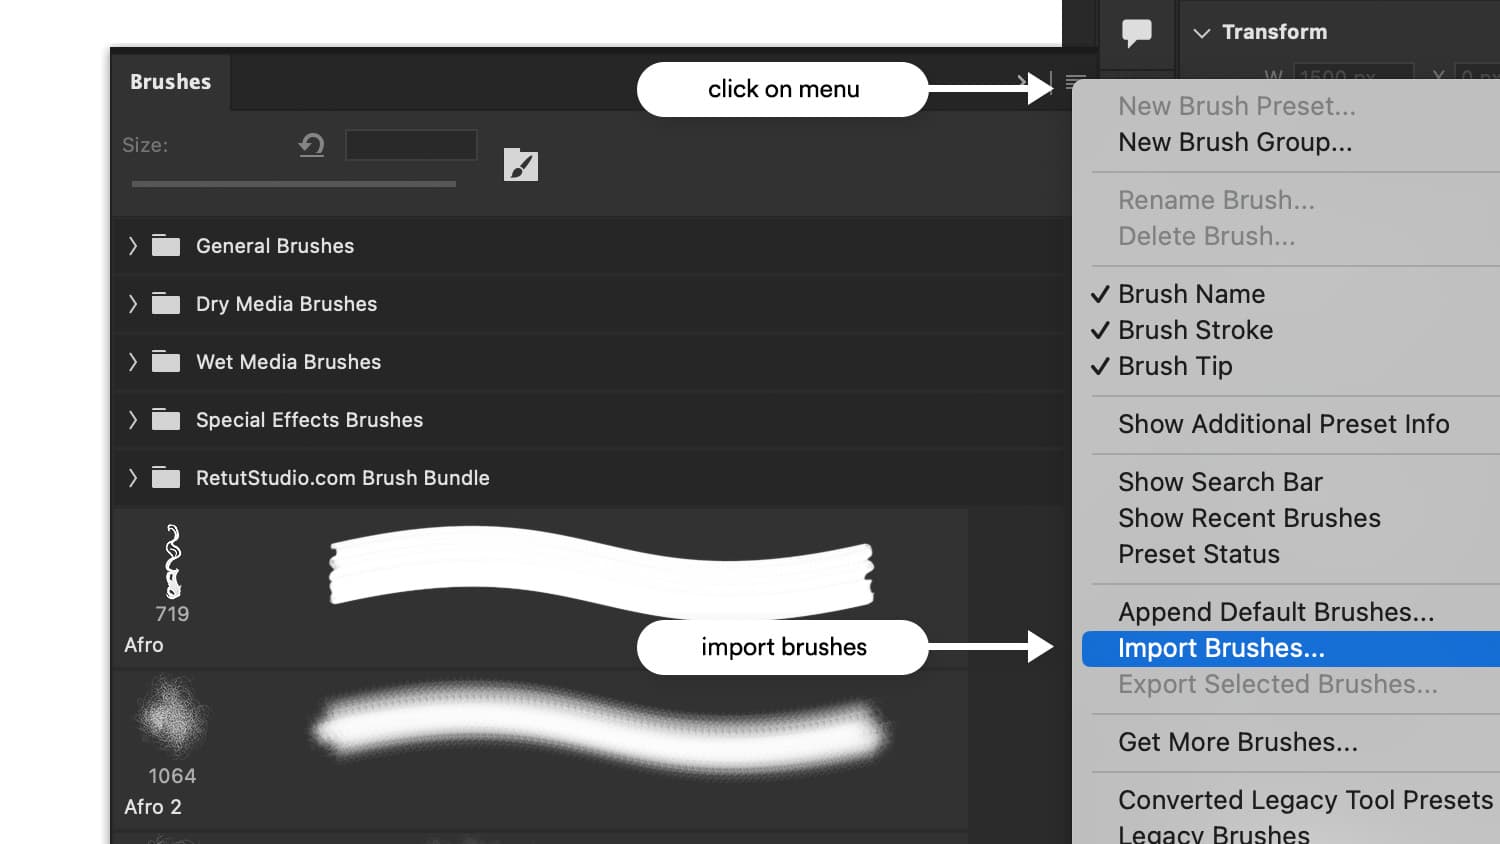
Most brush sets come in a compressed .zip file. - Open Photoshop and navigate to the Brushes panel (Window > Brushes).
- Click the “hamburger” icon in the top right corner of the panel and select “Import Brushes” from the dropdown menu.
- Navigate to the location where you extracted the brush set and select the .abr file (this is the file type for Photoshop brushes). Click “Open.”
- Your new brushes will now be available in the Brushes panel!
Using Photoshop Brushes
Once you’ve installed some brushes, it’s time to start using them! Here are a few tips to help you get the most out of your brushes:
- Familiarize yourself with the Brush Tool.
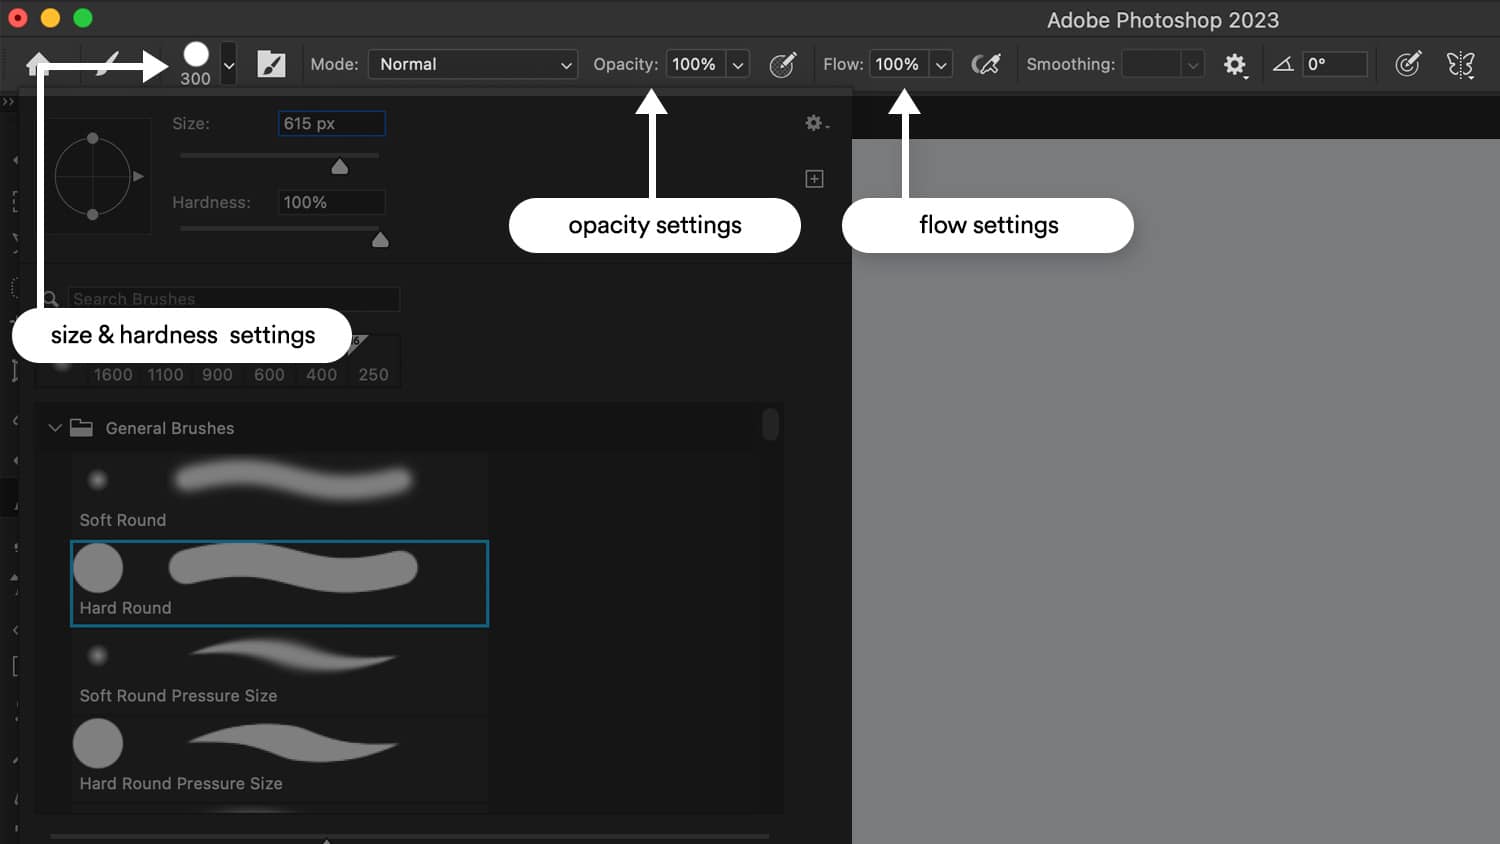
The Brush Tool is located in the toolbar on the left-hand side of the screen. Click on B to switch to the brush tool and Make sure you have the correct layer selected, and then click and drag your cursor to start painting with your chosen brush. - Adjust your brush settings.
In the Options Bar at the top of the screen, you’ll see options for Brush Size, Opacity, and Flow. Adjusting these settings can drastically change the appearance of your brush strokes. - Experiment with different brush types.
Photoshop offers a wide variety of brush types, including round brushes, textured brushes, and scatter brushes. Try out different brushes to see which ones work best for your project.
How to create a custom brush in Photoshop
Creating your own custom brushes in Photoshop is a great way to add a unique touch to your digital art and design projects. Here’s a step-by-step guide on how to create a custom brush in Photoshop:
- Choose your image or shape:
First, choose the image or shape that you want to turn into a brush. This could be anything from a photograph to a hand-drawn doodle. - Select and edit the image:
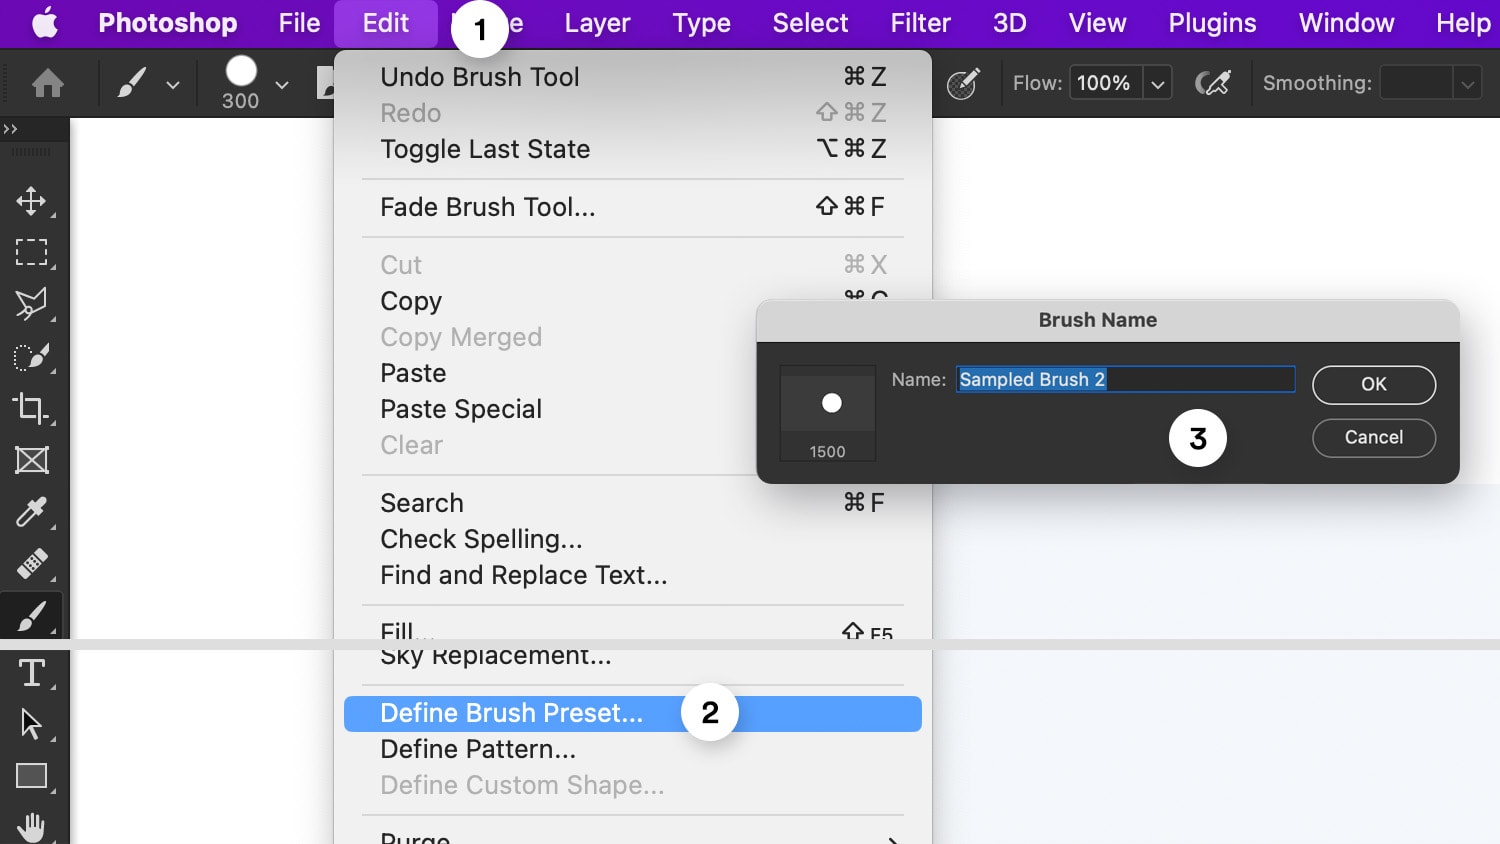
Next, select the image and make any necessary edits. This could include adjusting the contrast, brightness, or color levels, or cleaning up any unwanted background elements. - Define the brush:
Once you’re happy with the image, go to Edit > Define Brush Preset to open the Define Brush Preset dialog box and give your brush a descriptive name, and - Save and use the brush:
Finally, click OK to save your new custom brush. It will now be available in your Brushes panel, ready to use in any of your Photoshop projects.
Don’t be afraid to experiment with different images, shapes, and brush settings to find what works best for you and your projects.
I also create my own brushes in Photoshop where i fine-tuned the settings to suit my workflow, i use them all the time in my design workflow and i compiled them all into The Ultimate Brush Bundle For Photo Editing
Quick tip:
Before you convert an image to a brush preset, make sure the background is white or transparent and the brush shape is black, you can desaturate your image by clicking on ctrl/cmd ⌘ + shift ⇧ + u
Customizing Photoshop Brushes
While pre-made brush sets are great, sometimes you need a brush that’s tailored specifically to your needs. Here are some tips for customizing your brushes:
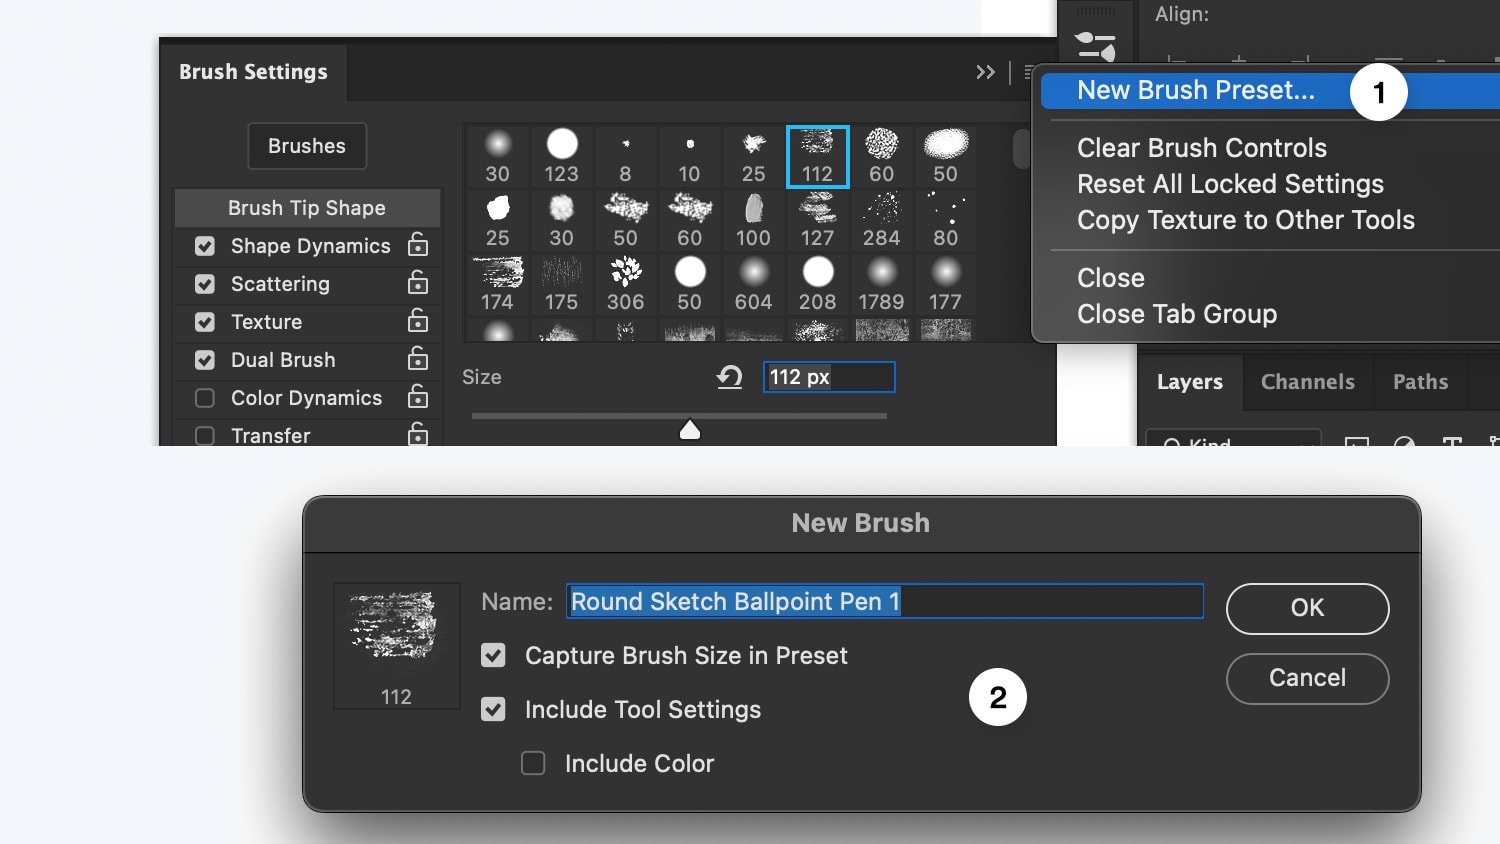
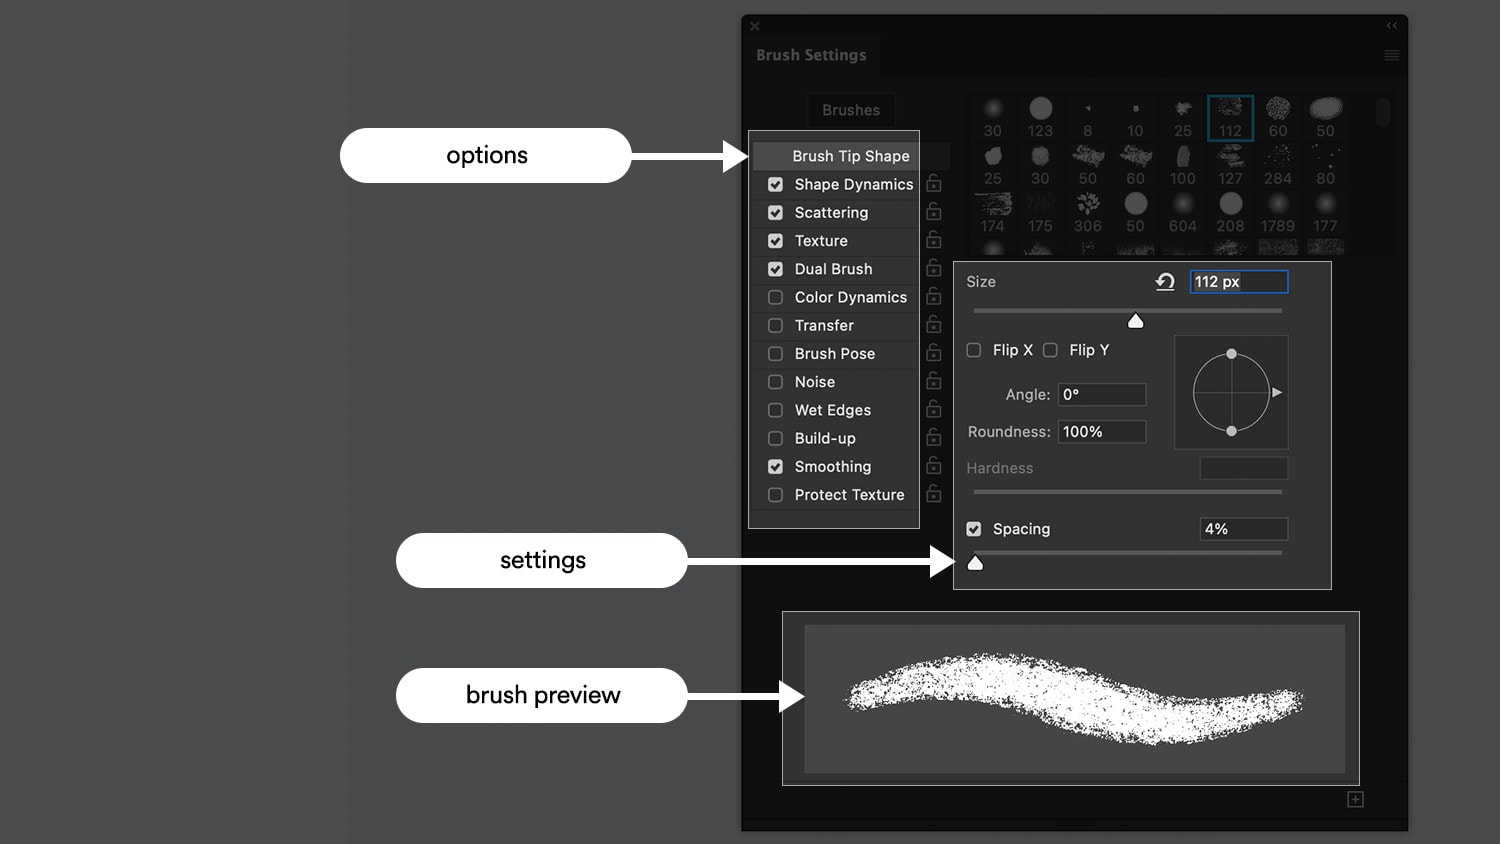
- Open the brush settings panel (Window > Brush settings) and adjust the settings to achieve different effects, The Brush panel offers a wide variety of settings, including Size, Spacing, Shape Dynamics, and many more.
Experiment with these settings to achieve different textures and effects. - Save your settings by creating a new brush preset from the “hamburger” Menu
- Choose which setting you want to include, Photoshop will allow you to include “Brush”, “tool settings”, and “color”
- Save your new brush preset
You may find the brush settings panel a little overwhelming when you are just getting started with brush presets
So Let’s look at these brush settings in detail to understand what they do and how you can use them to create complex brush presets that create amazing effects that can be controlled by pen pressure, tilt, or movement like a watercolor or a fog brush for example.
Understanding the Brush settings panel
If you want to level up your brush presets game, it’s important to master the Brush Settings Panel in Photoshop, This panel is a powerhouse of options that can help you create advanced brush presets.
we’ll dive into some of the most important settings you need to know.
Brush tip shape:
The brush tip shape setting allows you to choose from a wide range of brush shapes and sizes, including round, square, and custom shapes. Experiment with different shapes to find the one that works best for your specific project.
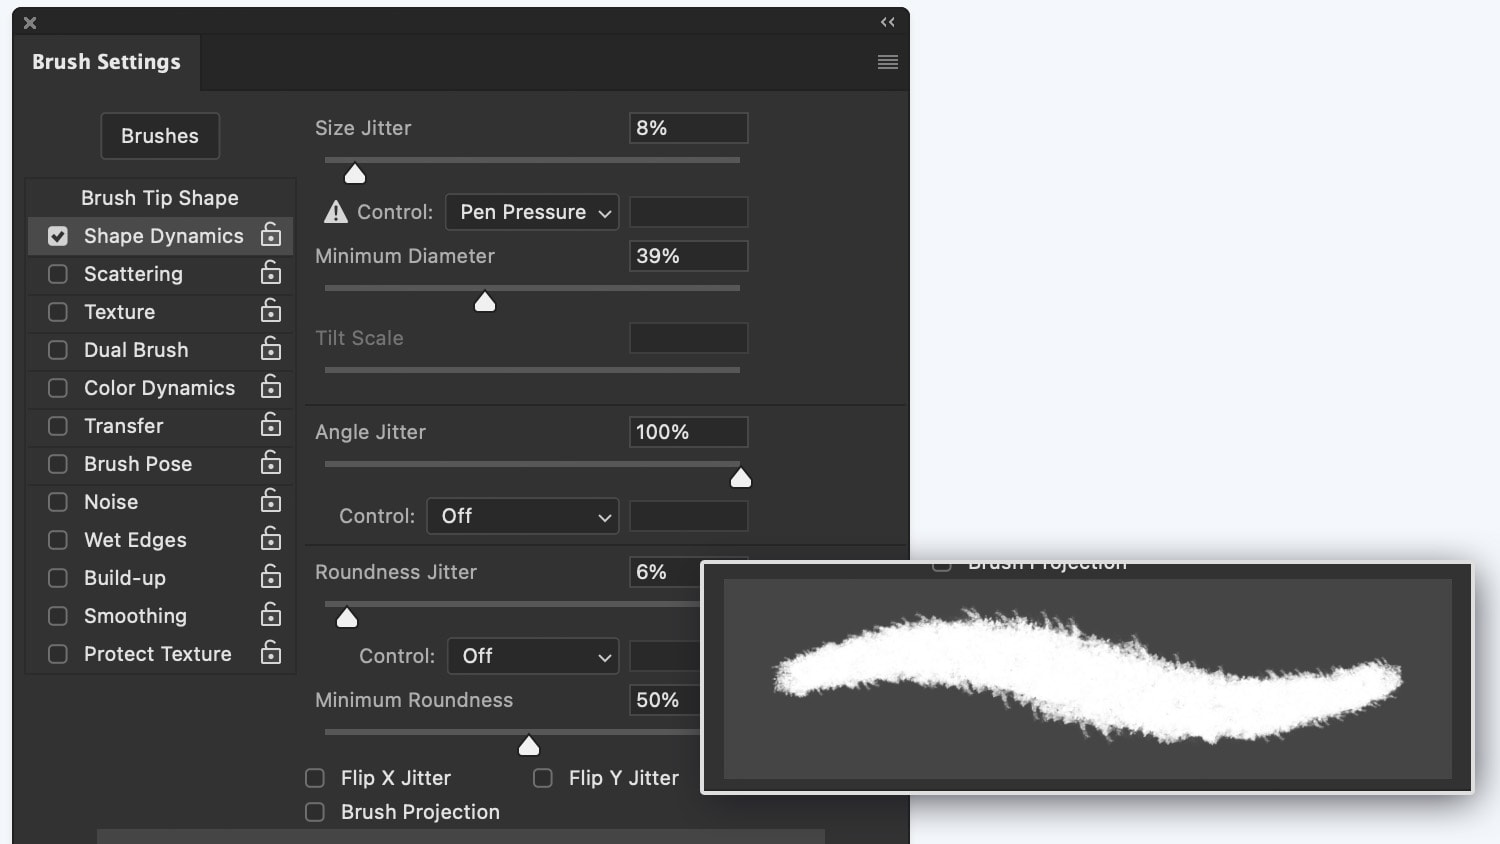
Shape dynamics:
Shape dynamics determine how the brush shape changes as you paint, allowing for more organic and varied brush strokes. Play around with this setting to create more interesting and dynamic brushwork.
Scattering:
Scattering creates random or scattered marks, which can add a sense of chaos or energy to your artwork. Adjusting this setting can give your work a unique and dynamic feel.

Texture:
Texture can be added to your brush strokes, giving them a more realistic and tactile feel. Experiment with different textures to add depth and interest to your work.

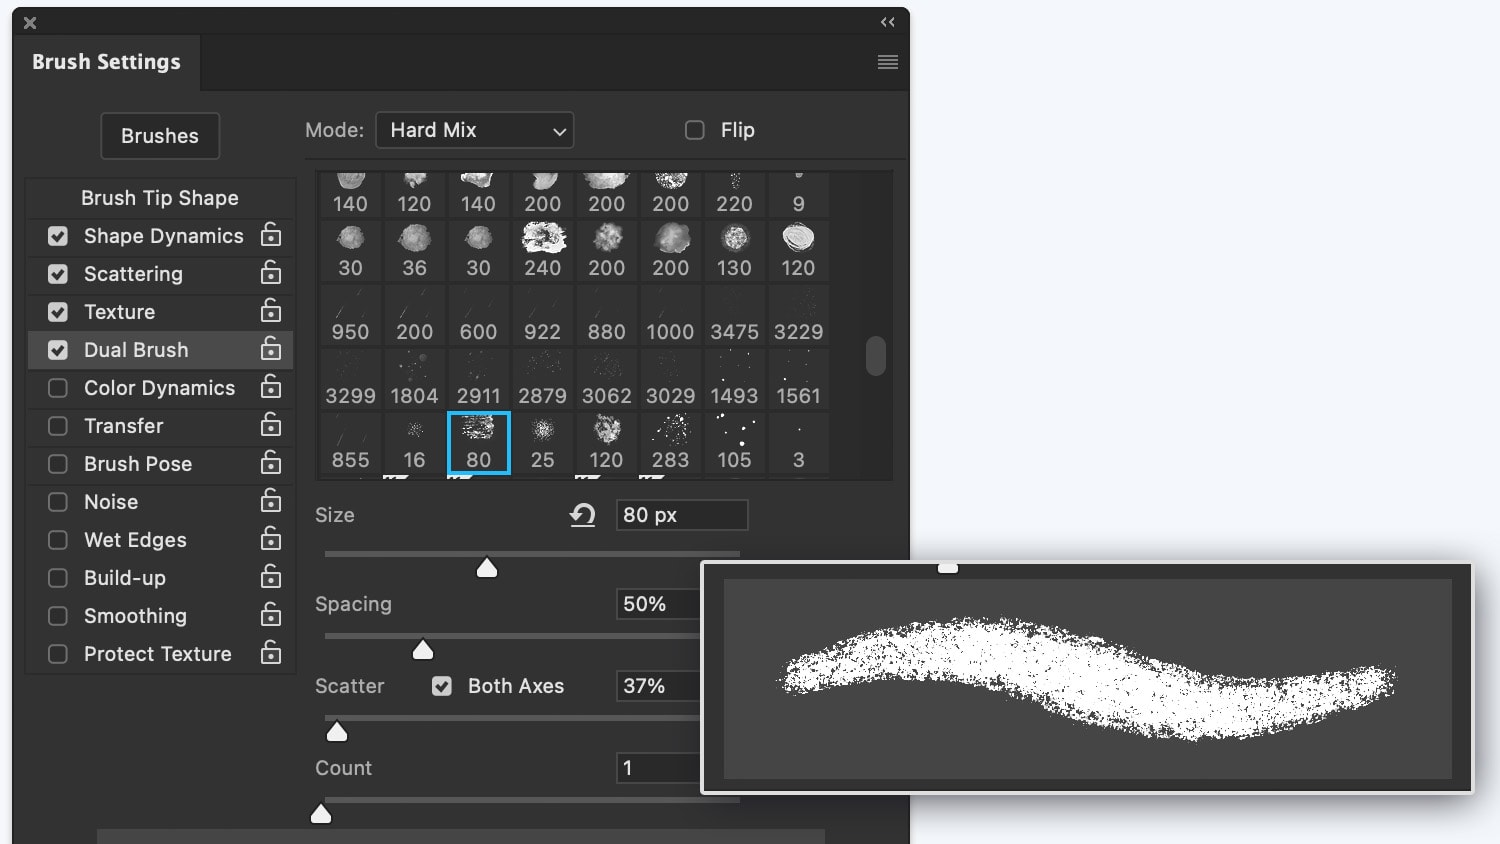
Dual brush:
This setting allows you to use two brushes simultaneously, which can create interesting and unique effects. Play around with different brush combinations to see what works best for your project.
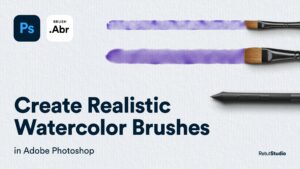
I made a tutorial before on how to create a watercolor brush, in this tutorial i explained the dual brush setting, check it out if you want to learn more about the dual brush option.
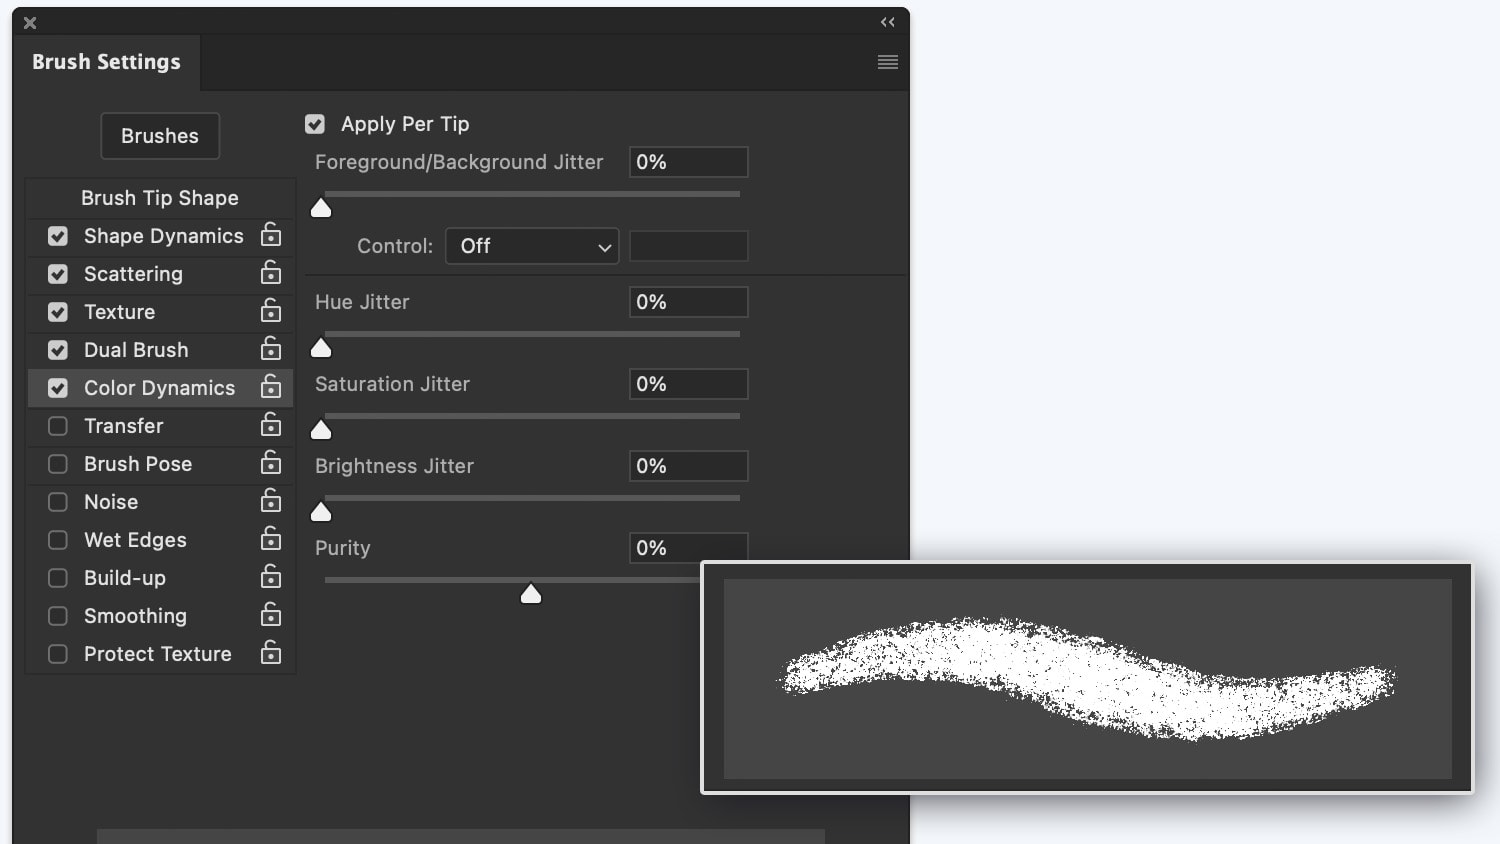
Color dynamics:
Color dynamics allow you to vary the color of your brush strokes, creating more visually interesting and dynamic artwork.
Transfer:
Transfer controls the amount of paint that is transferred from the brush to the canvas, creating more realistic and nuanced brushwork
Brush Pose:
Brush Pose determines the angle and direction of the brush stroke, allowing for more precise and controlled brushwork.
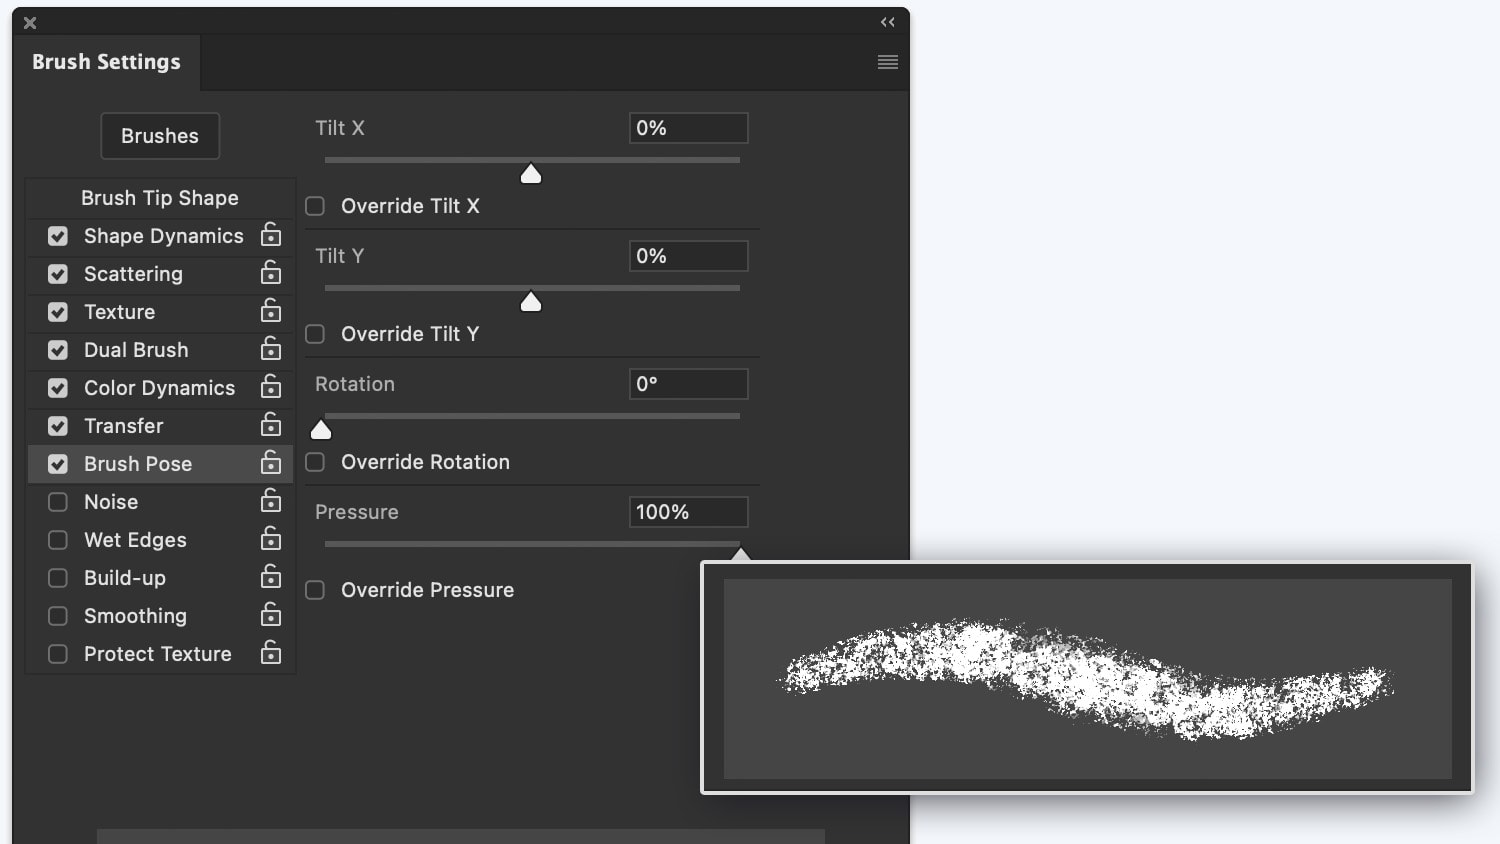
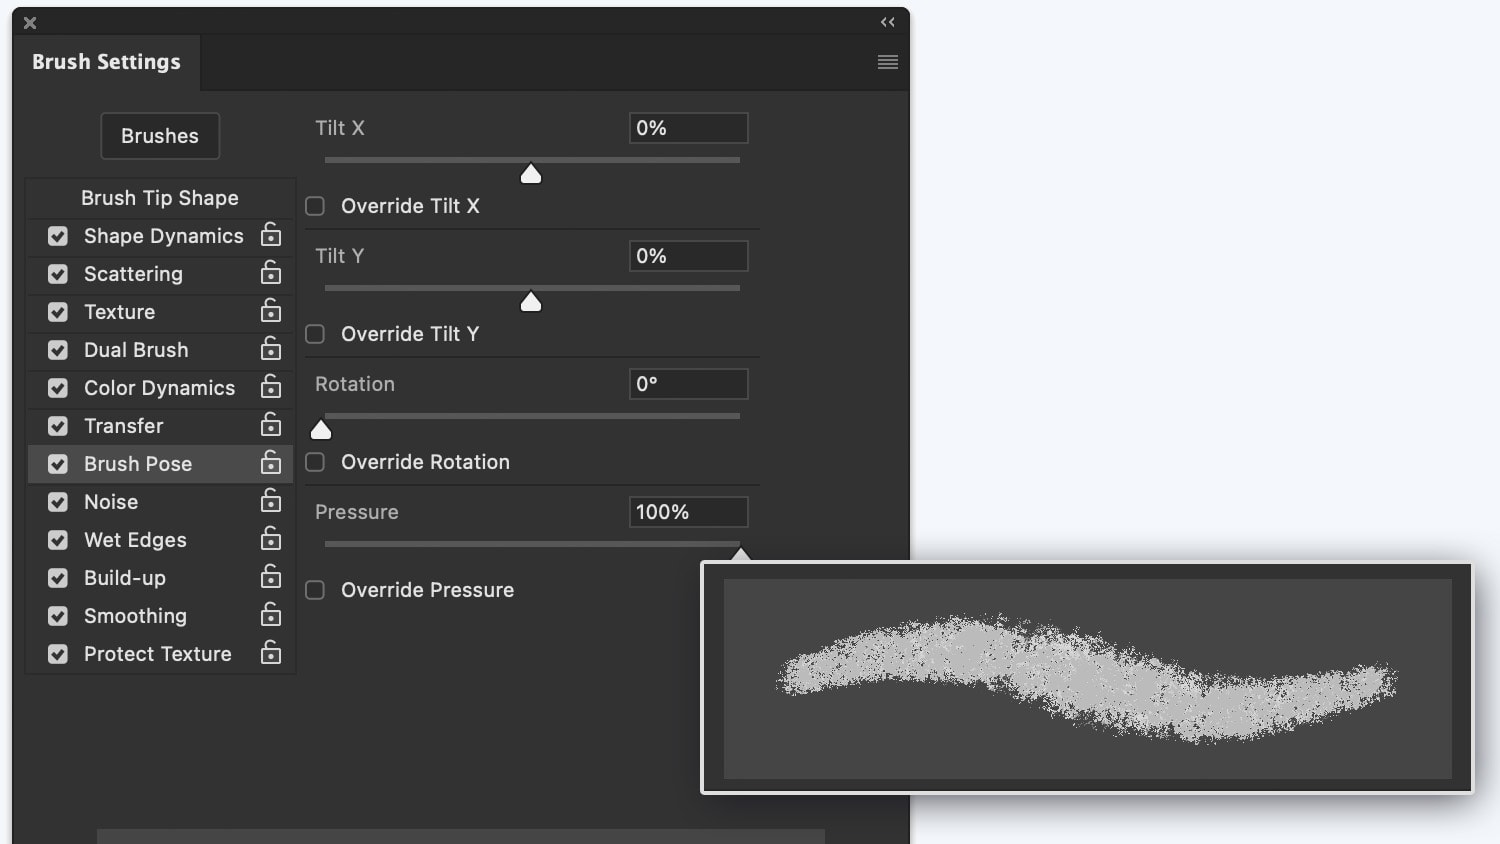
Noise:
Adding noise to your brushwork can create a more textured and interesting effect. Experiment with different levels of noise to find what works best for your project.

Wet edges:
Wet edges create a more realistic and fluid effect, mimicking the way that paint behaves on a real canvas.

Build-up:
Build-up controls the accumulation of paint on the brush, allowing for more nuanced and realistic brushwork.
Smoothing:
Smoothing can help to create more precise and controlled brushwork by reducing the jitteriness of the brush strokes.
Protect texture:
Protect texture preserves the texture of the underlying layer, creating more visually interesting and complex brushwork.
Best Practices for Using Photoshop Brushes
While Photoshop brushes can be a powerful tool, there are a few best practices to keep in mind:
- Use brushes sparingly
Overusing a single brush type can make your work look repetitive and uninteresting. Instead, try to use a variety of brushes to achieve different effects. - Choose the right brush for the job
Not all brushes are created equal. Think carefully about the effect you want to achieve, and choose a brush that will help you achieve that effect. - Practice! Like any skill
using Photoshop brushes takes practice. Spend some time experimenting with different brushes and settings to find what works best for you.
Final Thoughts
As we wrap up, I want to emphasize the incredible versatility and power of Photoshop brushes in helping artists and designers achieve a wide range of effects and styles in their digital work. With the ability to install pre-made brush sets and customize your own brushes, you can truly take your creative work to the next level.
But, it’s important to remember that while Photoshop brushes can be a powerful tool, they aren’t the only ones at your disposal.
It’s important to experiment with different techniques and tools to find what works best for you and your projects. And, like any skill, practice makes perfect – the more you use and experiment with Photoshop brushes, the more comfortable and skilled you’ll become.
So, don’t be afraid to try new things and push the boundaries of your creativity, You never know what amazing results you might achieve, Embrace your unique style and let your imagination run wild – the possibilities are truly endless.
Thank you for reading till the end, this article is part of the Photoshop Basics tutorial series, check out my guide on Photoshop Blending Modes next to level up your Photoshop skills.