
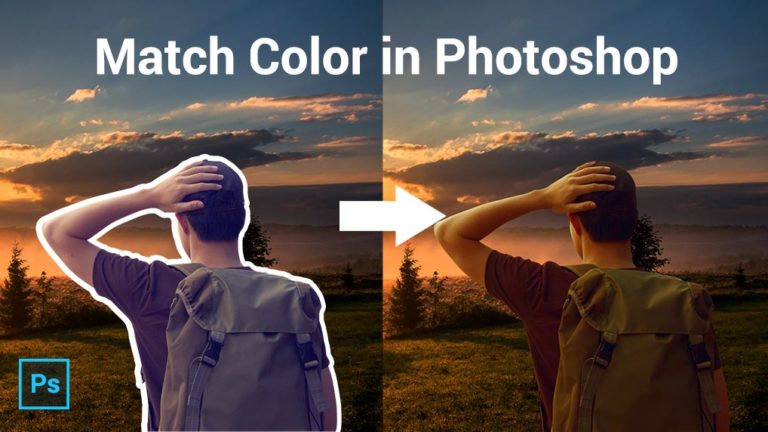
if you are new to Photoshop compositing or you find color matching a little bit hard then you’re in for a treat because Today you going to learn how to match color in Photoshop using two easy and powerful color correction techniques
by the end of this tutorial you will know how to match subject with background in photoshop, by matching luminosity and color tones between multiple images fast using these two techniques
are you ready? let’s get started
1 – how to Match Subject With Background in Photoshop Using The curves Automatic Color Correction Algorithm
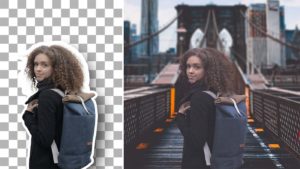
So here we are in Photoshop and we have two images that we need to match their color together and as you can see that our background is warm and our subject has he cool contrast and we need to match the color in this case I want to match the subject to the background

So what you need to do is create a curves adjustment layer on top of the subject, Then hold alt or option and click between the two layers to create a clipping mask, You can also create a clipping mask by clicking on the clipping mask icon in the properties panel And what will this do is the curves adjustment layer now is only affecting our subject and not the background

Now what you need to do is click on the menu in the curves properties panel and then select auto options, This will bring us the auto correction options dialog box, And it has four different algorithms that we can use the auto color correct images

Quick Tip:
Make sure that the layer of the curves adj layer itself is selected and not the layer mask, and you will know when you see it highlighted when you click on it, otherwise, this is not going to work
Then choose “enhance per Channel contrast”, and click on Shadows and then sample a color from the shadows in the background image, and Photoshop will automatically apply that color to the shadows of our subject,

Click ok and now click on highlights and this time sample a color from the highlights area on the background, In this case, I’m going to select a bright orange color near the Sun, And now that color is applied to the highlights in our subject

Click ok again and now Photoshop Will ask you If you want to make this color the default highlight and shadows colors for curves, In this case, we don’t want that we only want to apply this color once so choose an option

And now as you can see our subject is matching the background, that looks a lot better than before

but if the adjustment for you was not looking the way you want it you can always go back to the auto-correction options by holding alt or option and clicking on the auto button, And you can go back and edit the colors to your liking

And if it’s still not matching and doesn’t look right it’s probably a Luminosity problem, So if that is the case I’m going to show you how to fix that,
so to figure out if it’s a Luminosity problem we need to see the image in black and white by creating a check layer and it could be as simple as creating a black and white adjustment layer
Or we can create a solid color, And then choose a neutral color it doesn’t matter white black, or 50% grey, You want to make sure it’s neutral and you can tell By looking at the Hue and saturation values and you can see both of them are 0
And they stay at 0 even when you move the color picker up and down, But when you move it to the right you can see that the saturation value has changed, So make sure it is neutral and then click ok,

What you need to do now is change the blending mode to color, And that will convert our image to black-and-white, And this is actually more accurate than a normal black and white adjustment layer because a color blending mode will only affect color

You can see when I turn it on and off there’s no change but if I turn the black and white adjustment layer on and off it is affecting the Luminosity values

But we can still make the black and white Adjustment layer more accurate by changing its blending mode to color and now it will only affect color This is another way of doing it and I just wanted you to know different methods if you want to be more accurate when you’re making your adjustments.
So now we have eliminated color from our image that was Distracting us before and now we can only look at it in black and white and ask ourselves is the subject matching the background in terms of light or not, And in this case, our subject is a little bit brighter than the background, So I’m going to create another curves adjustment layer Then create a clipping mask and then make the subject a little bit darker

and by doing that you can see that it’s looking much better now and matching the background, here is the before and after

Now this Curves adjustment layer is also affecting color, but when you change the blending mode do luminosity, it will only affect luminance, also I’m going to change the blending mode of the color balance as well to color, And now it’s only affecting color, and now you can change color and luminosity accordingly and this is a great technique if you want to work on your color and Luminosity separately


So that’s one way to match color quickly and easily, I’m going to show you now a different technique using Color check layers
2 – How to match subject with background Using a color Check layer
first of all, delete the color adjustment layer and leave the luminosity adjustment layer and now we can only focus on color
So to create the color check layer we’re going to need to create another solid color, And you need to drag the Color Picker to the top right corner So that the saturation and the brightness is at hundred percent, It doesn’t matter if you change the Hue slider or not for now,

and now change the blending mode to luminosity, And this will leave us With only a color map of the image and this will help us match the color of our subject to the background

we can also create a hue saturation adjustment layer on top and crank up the saturation, And that will help us see the image of a little bit better

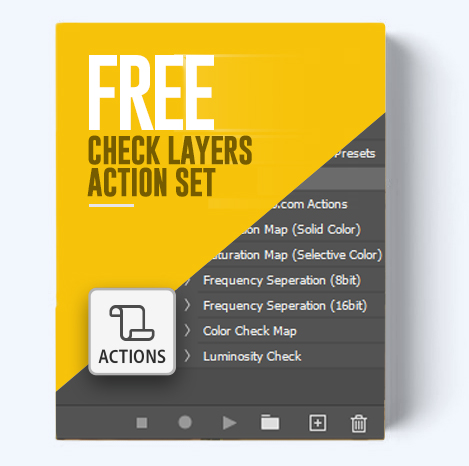
you can also achieve this with one click along with many other check layers by downloading my compositing workflow action set, it includes luminosity and color check layers, saturation map check layers, frequency separation actions, and more
So now let’s add a color balance adjustment layer this time and clip it to our subject, And now looking at the image we can clearly see that the subject is not matching the background and has a blue color contrast, So the first thing you’re going to do is Reduce blues and add Yellows, add a little bit of green and red,
And you can see now how the subject is starting to match with a background, Now go to shadows and add some yellow to the Shadows, a little bit of green as well and more Red in the highlights, do the same thing, this time do not make it Extreme changes, And now as you can see the color in the subject matches the background

And if I turn off all these check layers here’s how it looks like

you can also change the blending mode to color as well so it’s only affecting color All right that’s it, these are the two techniques That what I wanted to show you today, These techniques will help you quickly match color between two images, especially if you’re not sure where to start to match the color
So if you have found this tutorial helpful tell as what you think in the comments bellow
also if you want to get deeper and understand the secrets of compositing check out My Free Compositing Course that teaches you Photoshop Compositing in more detail and how to blend any subject with any background
Read my article The definitive guide to compositing in photoshop where i talk in-depth about perspective, color matching, luminosity matching, choosing the right image in compositing and more


4 thoughts on “2 Powerful Techniques to Quickly Match Subject With Background”
The two powerful techniques in your tutorial to quickly match the subject with erase background in photoshop seem accurate to me. Thank you very much.
Welldone bro you did a lottttttt of hard work
Thank you imran I appreciate your support
Hi, I would like to practice, where I can get the background picture? The have a Link for the backgroundsubject but not for the picture of sunset. Thanks.