if you want to learn how to merge multiple photos in Photoshop then you need to go through a few steps to get your image to look realistic, from good masking, matching luminosity, perspective, and color
and in this tutorial, I will show exactly how to make a composite image, and you are going to learn how to blend images in photoshop to create a surreal composite in photoshop
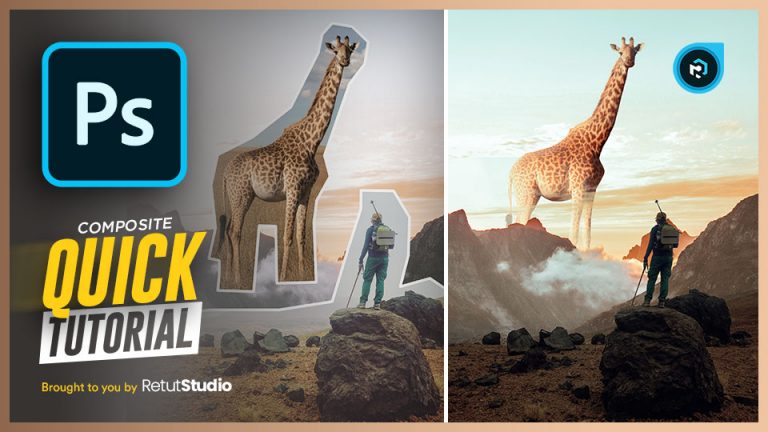
so for this tutorial’s example, i will show you how to merge photos in Photoshop by making a giraffe look like it’s behind the mountains by using blend If,
and we will also add another image in the foreground and match the color and the luminosity
Step 1 – Removing The Background
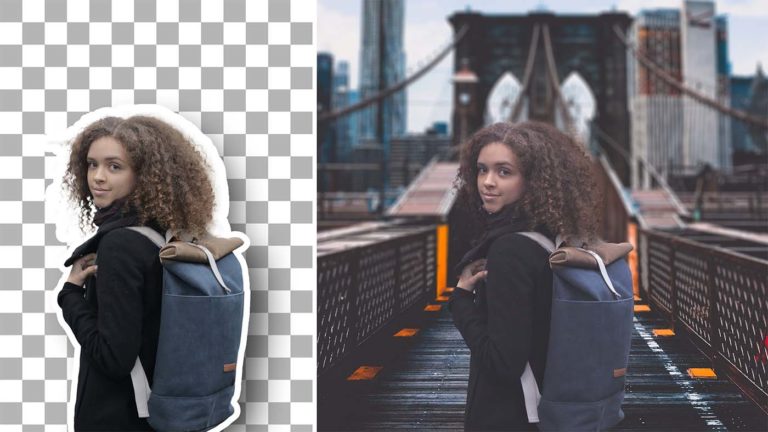
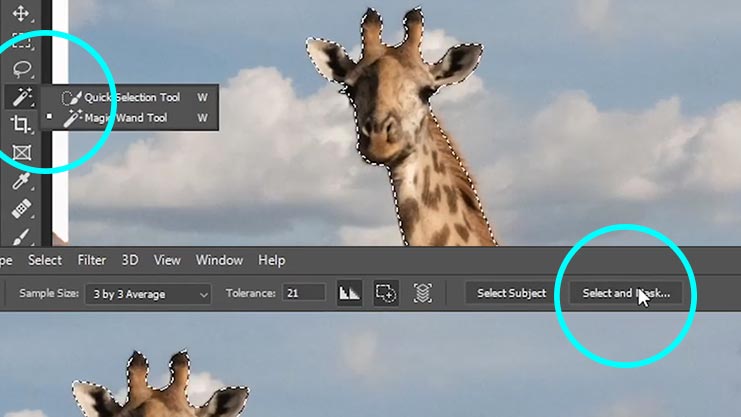
So as always the first step to combining photos in photoshop is removing the background, and in today’s example, the best way of removing this image’s background is by using the pen tool, because the background is busy and also the pen tool is more accurate than the other tools
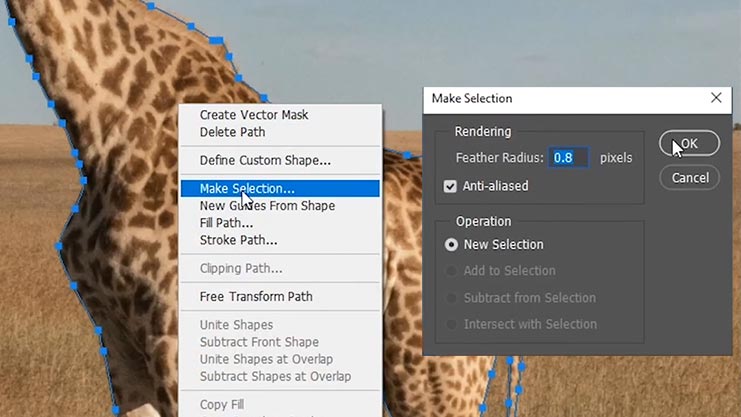
after you trace the subject using the move tool, right-click on the path and choose “make selection”
now we need to refine the hair, so click on any selection tool, and then click on the select and mask button
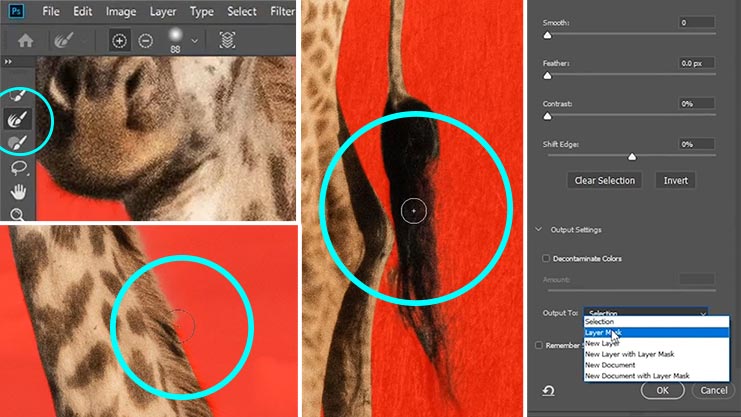
From here you are going to take the refine edge brush and paint on the hair to restore some of that detail, then now in the output options, make sure to choose layer mask and click ok
Step 2 – Matching The Subject’s Luminosity
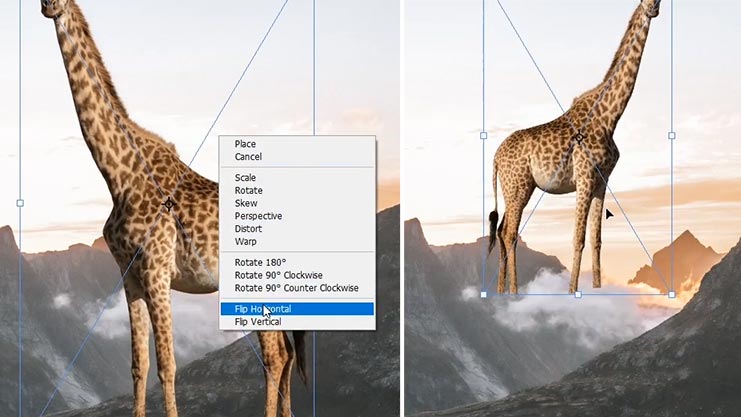
Ok now that you have the subject masked out, you are going to scale it down and put it behind the mountains, first, we need to match the light direction by flipping the image, to do that click on ctrl or command + t, then right-click and choose flip horizontal, and don’t worry about the legs we are gonna use blend if to hide them
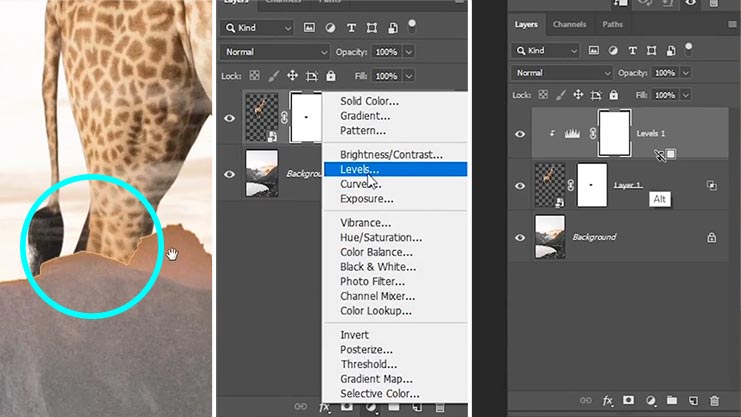
So now to make the giraffe look like it’s behind the mountains, double click on the subject layer to bring the layer style dialogue box and you are going to modify the blend if settings
We need to hide the giraffe where the underlying layer is darker which is the mountains by dragging the left slider to the right
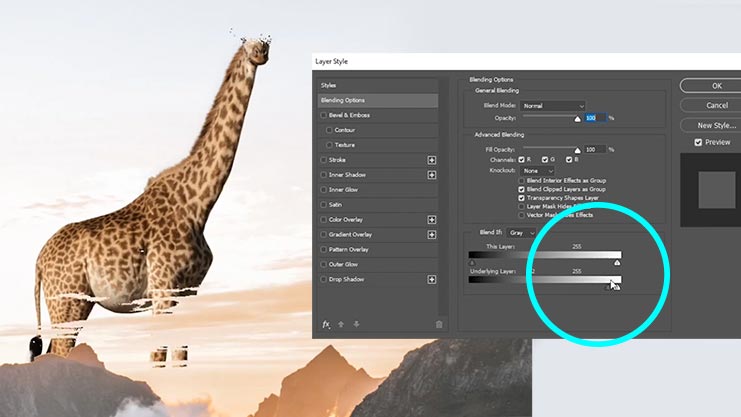
you will see that it will start to disappear from the mountains, and when you reach the point that it will start to disappear also on the sky, you are going to stop then hold alt or option to split the slider to make a smoother selection

In this case, I could not go further than that and there is still some parts of the legs visible so I added a layer mask to the layer and masked out that part of the legs with the brush tool
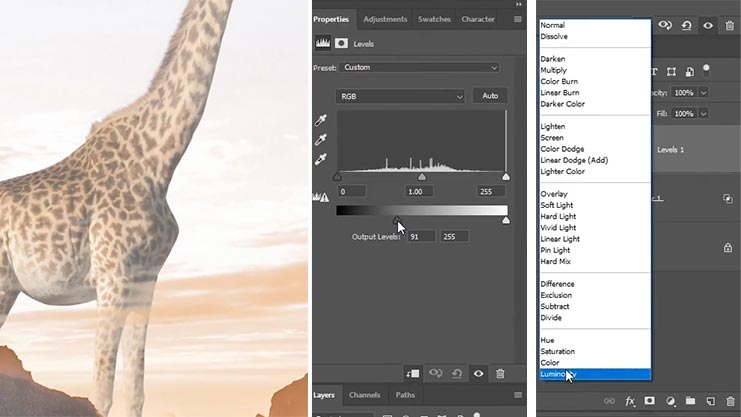
Ok now we need to match the luminosity because as you can see there is some fringing on the edges of the mountains and we need to make the giraffe lighter to match the luminosity of the background
So create a levels adj layer on top of the subject, then create a clipping mask to make sure that this adj layer only affects the giraffe by holding alt or option and licking between the two layers
Then drag the bottom slider to the right to make the darks lighter, so this adj layer is also affecting color and it’s desaturated the image, so to prevent that, change the blending mode of the layer to luminosity
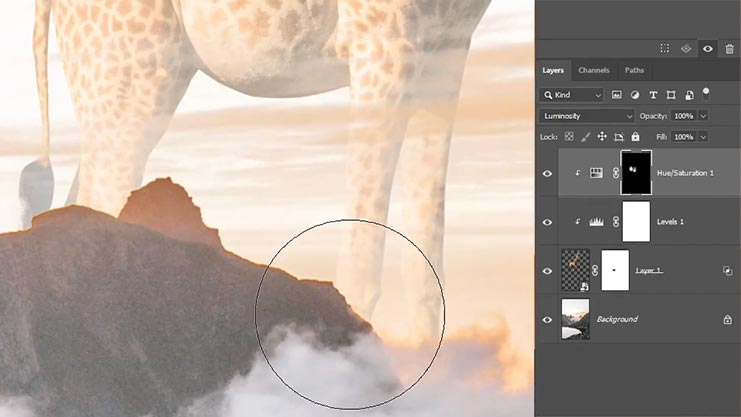
Next, add a hue saturation adj layer and create a clipping mask, increase the lightness a little bit and also change the blending for this layer to luminosity, now we don’t want this to be visible everywhere so invert the layer mask by clicking on ctrl or command + I , and then take the brush tool and make this visible on the legs by painting with white
You can also reduce the effect of the levels adj layer, by masking the top part of the subject with a big soft brush and a low flow
Step 3 – Painting Shadows and Highlights
Ok, now its time to paint some shadows and highlights, so create a curves adj layer or any of your favorite adj layers on top and clip it, increase the brightness, and then change the blending mode to luminosity, again you are going to paint this adj layer on the edges so invert the layer mask and then use the brush tool to paint some highlights on the edges of the subject
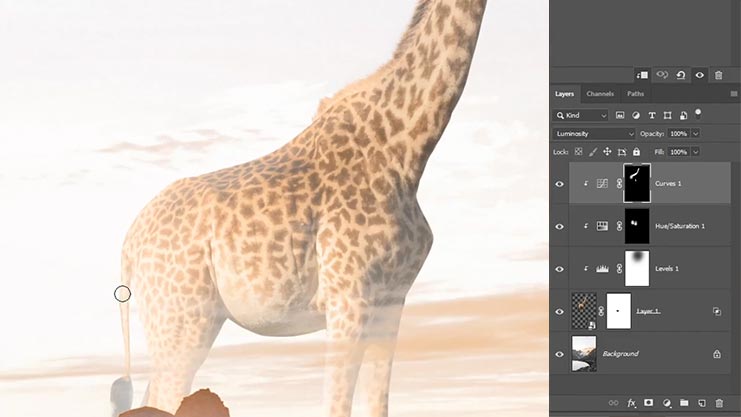
Now repeat the same thing with another curves adj layer, this time decrease the brightness and paint some shadows on the right-hand side of the subject

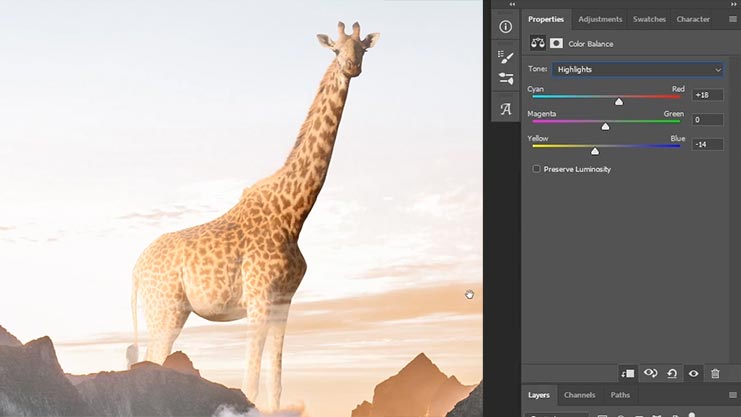
Step 4 – Matching Color
The last adj layer you are going to add to the subject is color balance, and you need to increase yellow and red in the midtones and highlights, At this point, your subject should look like this and the color and the luminosity are matching with the background
Step 5 – Adding The Foreground Image
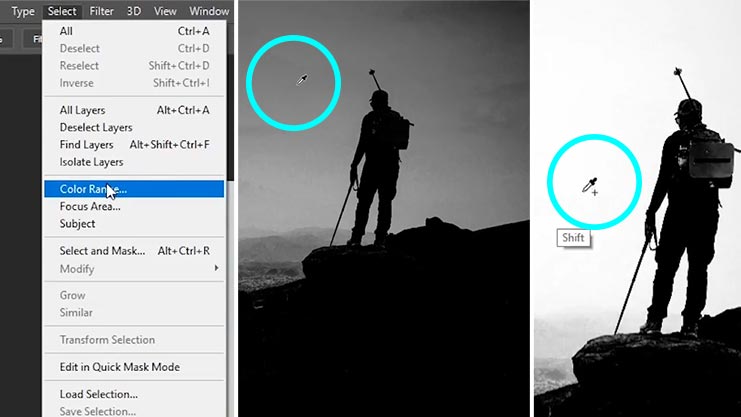
Ok let’s add the second image, we need to remove the background first, and for this image, the easiest way is to use color range, so go to select, color range and click on the background to select it, then hold shift and click to select more areas of the background, and you can also use the fuzziness slider to add more contrast, once you are done click and then add a layer mask
Now, to see the layer mask, hold alt or option and click on the thumbnail, if the layer mask needs a little bit more work, you can clean it by taking the brush tool and change the blending mode to overlay, and just paint with black on the background to completely remove it, and to enhance the subject, paint with white to include some of that detail to the selection
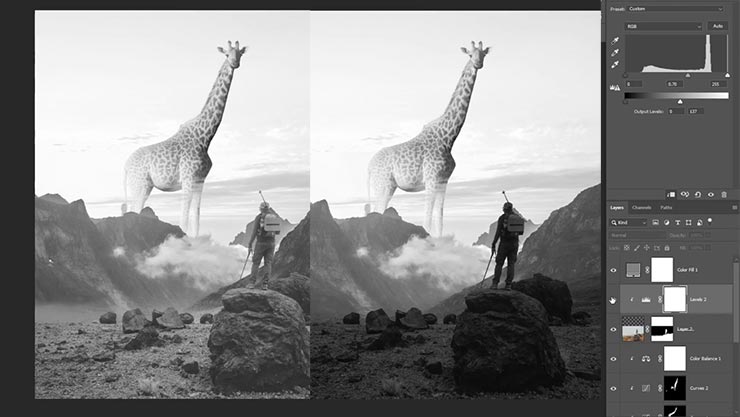
After that, import the image to the document and align it to the canvas and I’m gonna also crop the bottom part of the canvas using the Crop tool

Step 6 – Matching Luminosity
First, let’s match the luminosity by creating a levels adj layer and clipping it to the subject and darkening the image by making the whites and the midtones darker
Step 7 – Matching Color
Next, we need to match the color, so add a hue saturation adj layer and desaturate the image a little bit to match the saturation of the background, and I used a layer mask to remove that effect from the subject
Now add some color to the mountains by adding a color balance adj layer on top of the background layer and increasing yellows and the reds a little bit
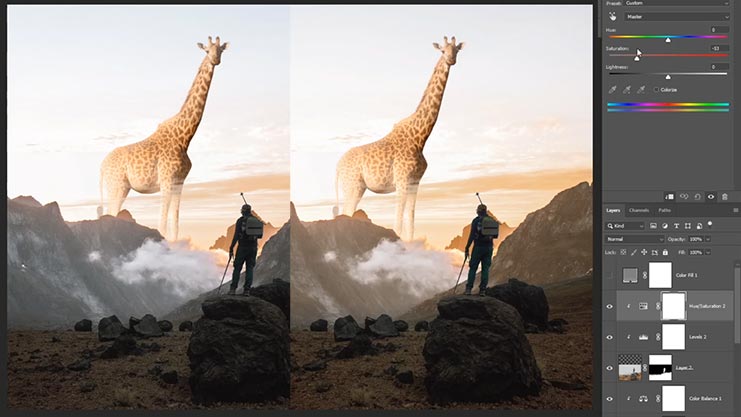
Ok next add another color balance adj layer and clip it to the subject layer and also increase yellows and the reds a little bit
the last thing I did is I applied a camera raw and to do that you need to create a stamp visible layer by clicking on ctrl + alt + shift + e, and then go to filter, camera raw
So this last step depends on your personal preference, but what I did Is I increased the contrast, vibrance, added some details, and increased red and cyan
And that’s how to combine multiple photos into one in photoshop
if you liked this tutorial and you learned something new today make sure to tell us what you think in the comments below, check out my tutorial on How to Use Original Shadows To Match Your Subject to The Background
subscribe to the youtube channel because i will be posting more compositing tutorials in the future
If you want to learn even more about compositing then make sure to enroll in my free compositing course, you will find the link in the description below, And if you wanna take your photoshop compositing skills to the next level and support the channel, you can check out my courses at academy.retutstudio.com where i go in-depth teaching advanced photoshop compositing techniques by creating practical real-world projects