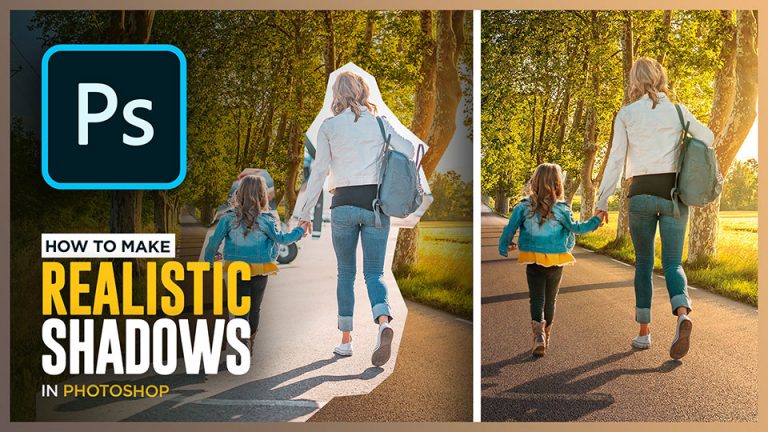
using original shadows is one of the most effective ways to create realistic composites, and in this tutorial, you will learn how to how to select shadows in photoshop to achieve a realistic composite, you are gonna also learn how to match the horizon lines of your images, how to scale your subject in perspective, and lastly, we are gonna finish the composite by matching the color and the luminosity of our subject to the background
Step 1 – Matching The Perspective
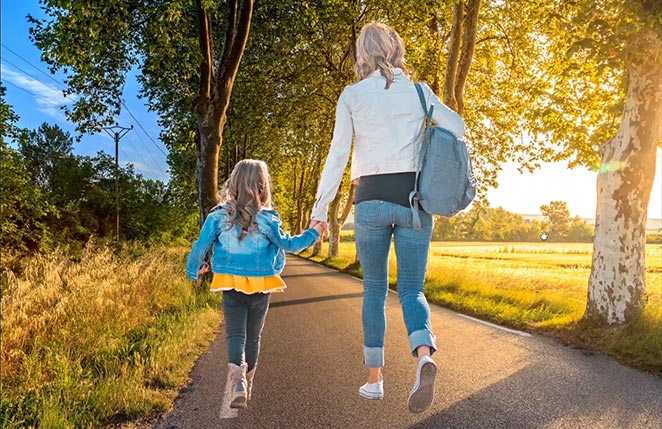
So I have my subject and my background in one document and I wanna add a shadow to my subject and match it with the background,
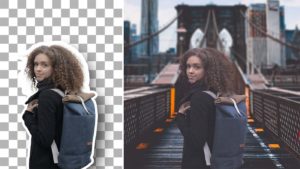
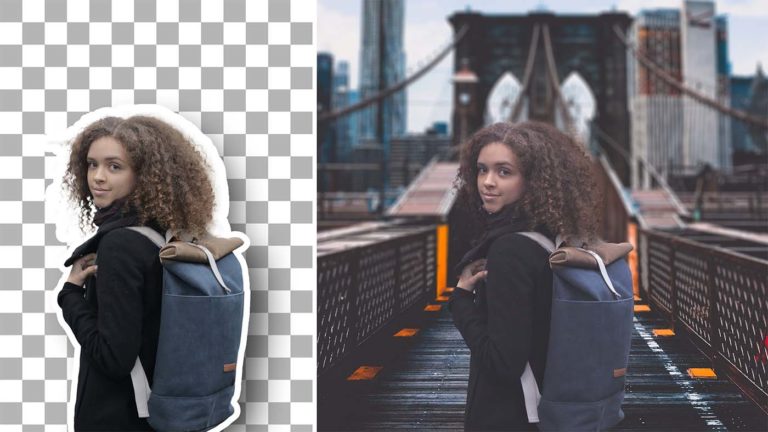
so you can see I already removed the background and created a layer mask
This is the original image and I just took the girl and her mother and extracted them from the background

So at the moment a lot of thing are not matching between the subject and the background and you can see that the light source of the background image is coming from the left, but on the subject it is the opposite, so that means we need to flip one of them
I wanna flip the background image so select the layer, hit ctrl or command + t to get the free transform and then right-click and choose flip horizontal, now the lighting is matching and it looks much better
The next thing we need to match is the perspective and the scaling because the subject is looking very big at the moment, and to properly scale the subject in perspective we need to find the horizon line first
So just by looking at the background we can tell that the horizon line is just between the trees and the mountain in the background, so im going to bring the rulers up and drag a guide there to mark it as the horizon line
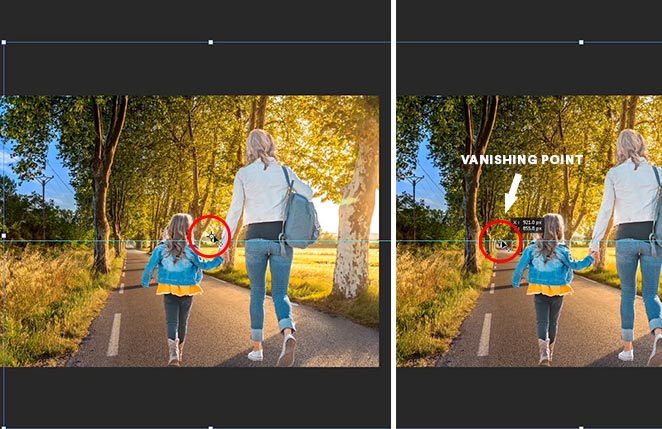
We can also get an accurate representation by looking at the vanishing point, which is the point were the road ends
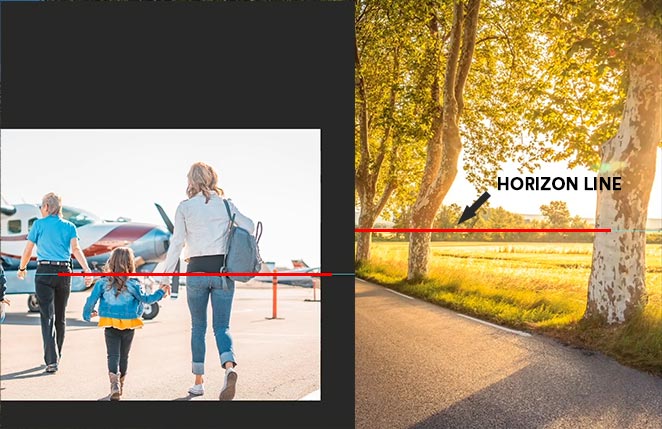
And now that we now were the horizon line is we can scale our subject based on it, so if we bring the free transform we can move the point and align it with the vanishing point
and now if we scale the image and also hold alt or option while scaling you will be abble to scale the image based on that vanishing point, we can make the subject very big or very small and the perspective will always follow the horizon line
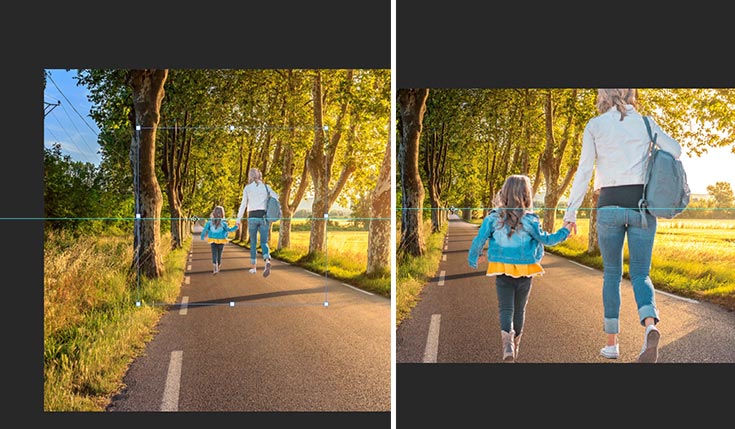
but before we scale the subject we need to find the horizon line of the subject image first and match it with the background
so we can turn off the layer mask temporarily by holding shift, and for this image the horizon line is a little bit higher and you can use the move tool to drag It a little bit down and match the two horizon lines together
Now we can turn the layer mask back on and you can see just by going that the scale is looking better now
now you can click on ctrl + t and align the point to the horizon line and scale the subject using alt
Step 2 – How To Select Shadows using Color Range
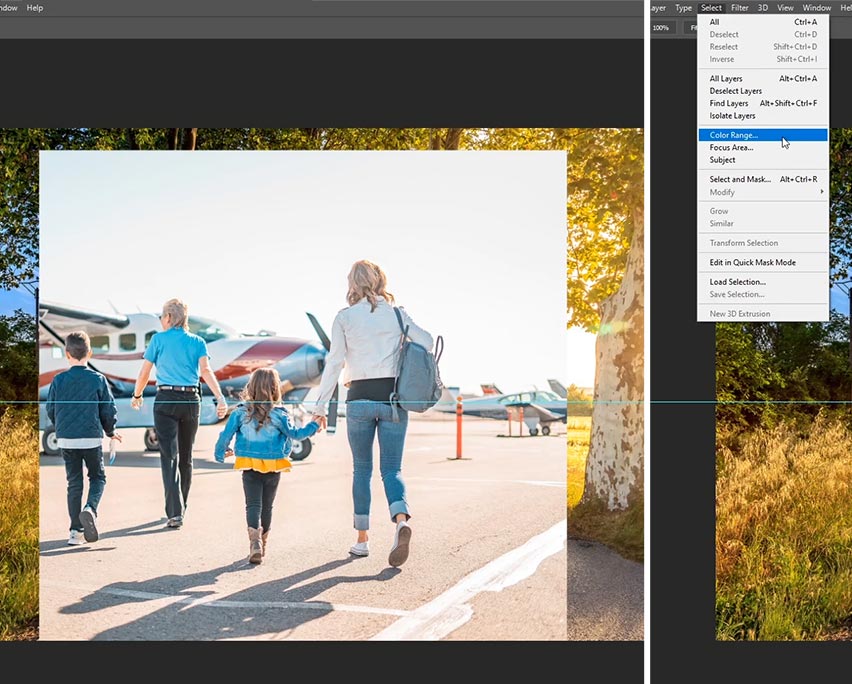
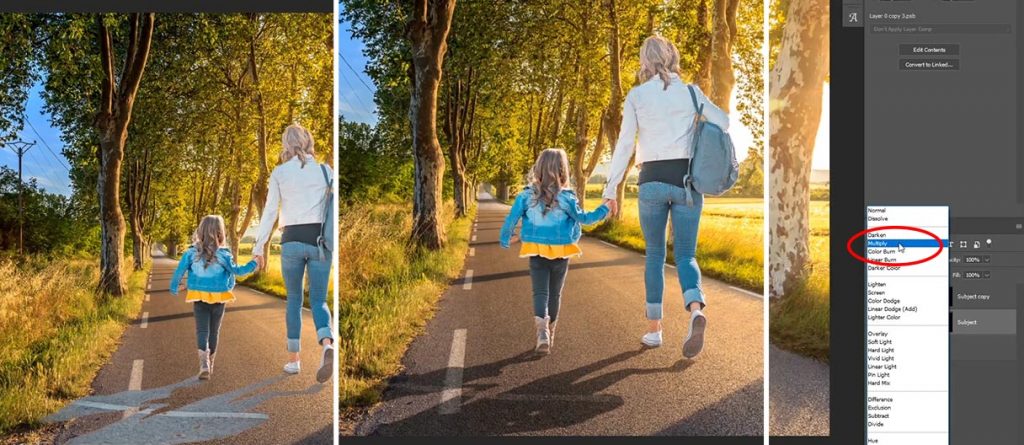
the next thing we need to do is add the shadow so turn the shadow layer back on and we need to disable the layer mask, so fill the layer mask with white
we will be using the shadow of the original so we are going to use color range to select the shadow, so you need to go to select, color range, and from here you can click on the shadow to select and by the way, if you are not seeing this black and white view, you can do that by changing the preview mode to grayscale
You have the fuzziness slider and You can use it to narrow the range of the selection, you can also hold shift and click to add more areas to the selection, you can also exclude part of the image from the selection by holding alt or option, and you need to increase the fuzziness a little bit to keep the edges of the shadow soft
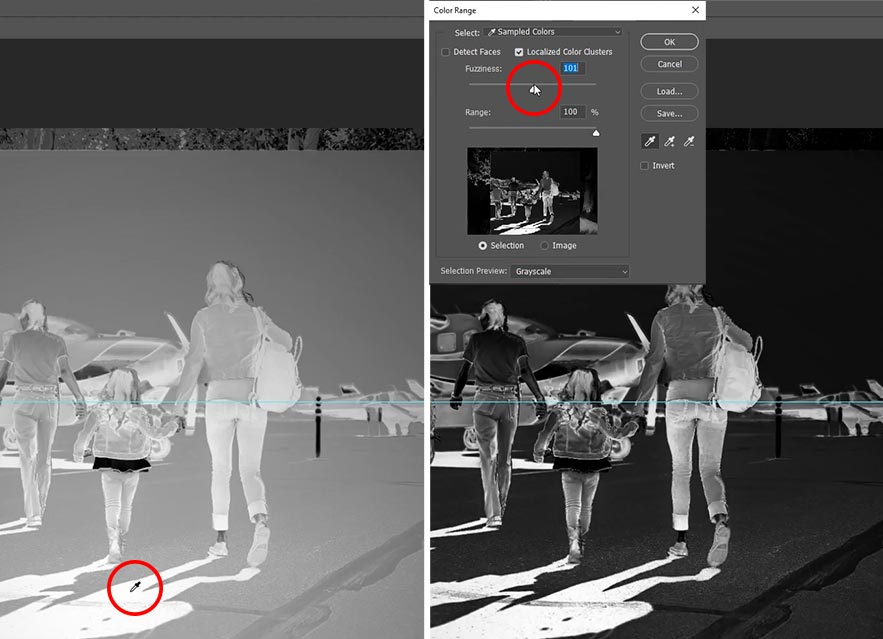
Click ok to accept the changes, now you have a selection and then what you need to do Is create a layer mask, so we are only going to need the shadow of the subject and we need to hide the rest, you can take the lasso tool then make a selection around the rest of the shadow, and then you can hide this area by filling it with black, so black is my foreground color so im gonna use the keyboard shortcut alt + backspace (cmd + delete)

then alt or option click on the layer mask to see if there is any areas we need mask and it looks we do, and for these areas you can take the brush tool and paint with black to hide it, when you get closer to the shadow you can change the blending mode of the brush to overlay, reduce the flow a little bit, and then clean the edges without worrying about the shadow been removed

Alright so now you have the shadow masked out, and at the moment its not matching with the color of the background, but you can change the blending mode to multiply and now its blending with the background,
now the color is still not quite matching and you can take the shadow of the tree as a reference, so now create a color balance adj layer then clip it to the subject using alt or option, and you just need to add more blue and cyan

Step 3 – Matching Color and Luminosity
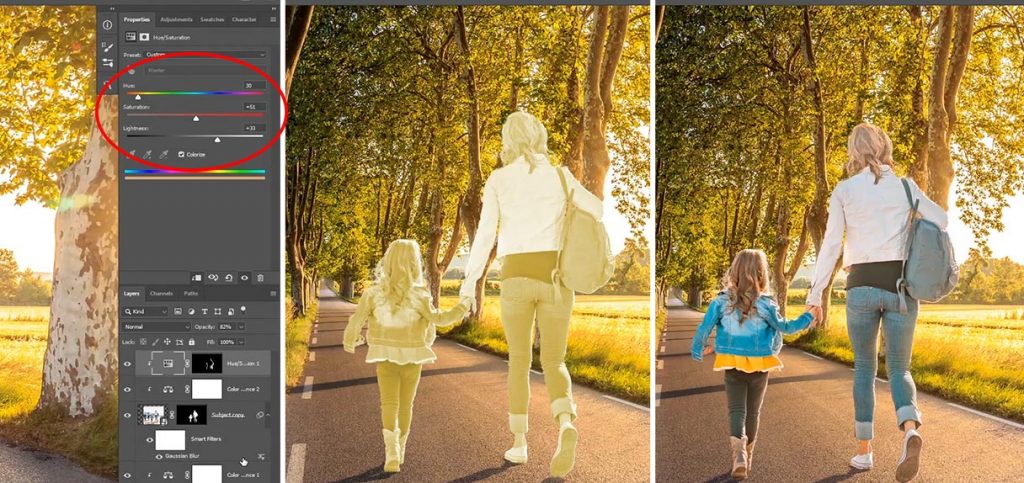
Alright so let’s match the color of the subject now to the background, create another color balance adj layer on top of the subject layer, create a clipping mask, and then add more yellow, green and red to the shadows, midtones and highlights
so what you can do next is enhance the highlights a little bit more on the subject, so create a hue saturation adj layer on top, check colorize, and then change the hue to match the color of the background and also increase the saturation and the brightness
So that’s gonna be the highlight color and we don’t want this to be visible everywhere so you need to invert the layer mask by clicking on cmd or ctrl + i, then just gonna take the brush tool, change the foreground color to white and then paint at the edges with a small brush size, to create a sort of light reflection or glow at the right side of the subject
so now we are going to add another highlight to the image, add a solid color this time, choose an orange color again, and then sample an orange color from the background,
and then change the blending mode of this layer to ether screen or soft light, I’m gonna go with screen and reduce the opacity if need to
So again you are going to fill the layer mask with black and use the brush tool with to paint the light, so reduce the flow, then take a big soft brush and paint some soft light on the top right corner from where the light is coming

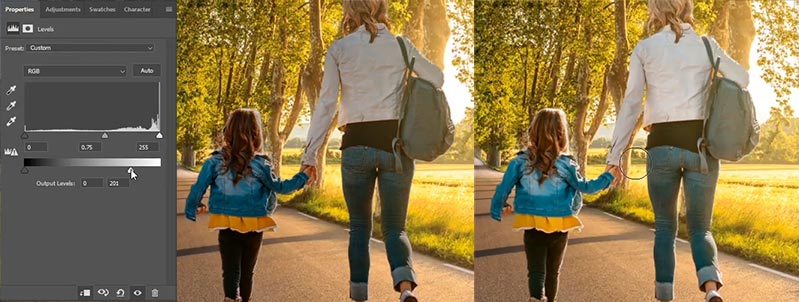
Ok now we need to match the luminosity of the subject because as you can see the light is coming from the top right and they should be a little bit darker, so create a levels adj layer on top, and make sure to clip it to the subject of course,
so to make sure this adj layer won’t affect color you need to change the blending mode to luminosity, then darken the midtones a little bit, and now it’s looking way better
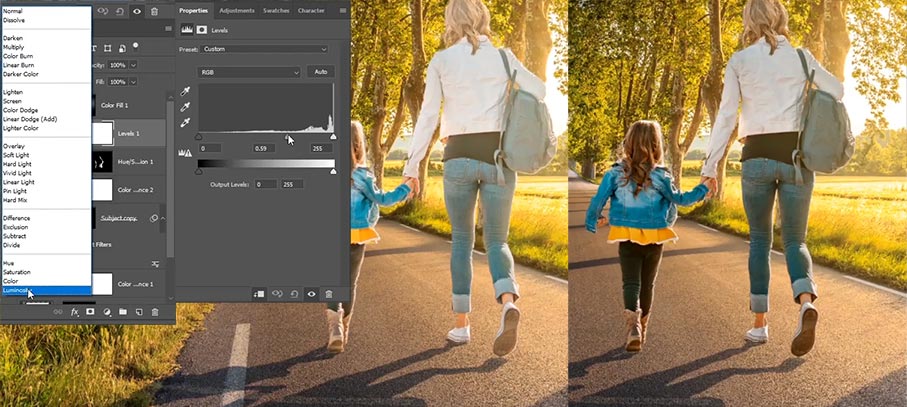
Ok we are going to add one last levels adj layer, and this time we will use this layer to paint some shadows, so you need to darken the midtones and the highlights, change the blending of this layer to luminosity as well, and fill the layer mask with black
So you are going to take the brush tool and paint with white to reveal this adj layer on the left hand side of the subject and paint some shadows
so that’s all there is to it, if you enjoyed this tutorial let me know what you think in the comments below, what’s your favorite technique you learned today, and if you like to learn even more about compositing then be sure to enroll in my free compositing course, you will find the link above
And lastly if you wanna take your photoshop compositing skills to the next level and support me, you can check out my courses here where i go in-depth teaching advanced photoshop compositing techniques by creating practical real-world projects
So thank you guys so much for reading, and be sure to also check out my in-depth tutorial about matching color between the subject and the background