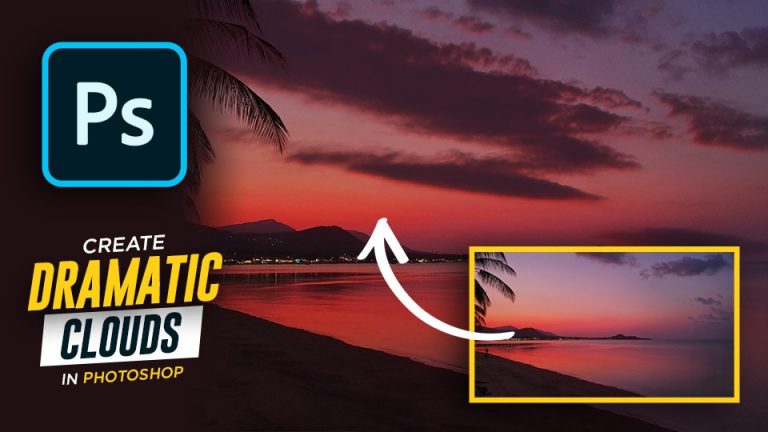
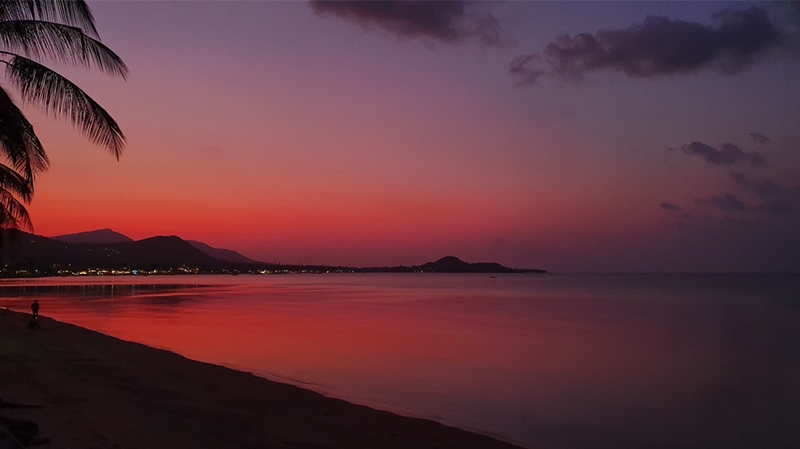
So you took some images with your camera and maybe you want to know how to color clouds in photoshop or enhance overcast photos
in this tutorial not only you are going to learn how to add clouds in Photoshop using custom brushes, but also how to change the color of clouds
you will also learn a really cool technique that i came up with to add realistic sunset highlights using only layer style
this tutorial is a part of my course that comes with the ultimate brush bundle for Photoshop and will teach you how to use the brushes to create stunning composites, this bundle has everything you need to replace skies and use them on any compositing project
the main focus of this tutorial is going be on how to create sunset effect highlights to clouds, But if you don’t have the brush bundle you can still watch my previous tutorial on how to create cloud brushes in Photoshop and follow along
it’s also important to know that this technique will only work on clouds with a transparent background, so it’s best that you use cloud brushes, or you can use cloud images and remove the background
So without any further ado, let’s get started
1 – How to Add Clouds in Photoshop using Custom Brushes
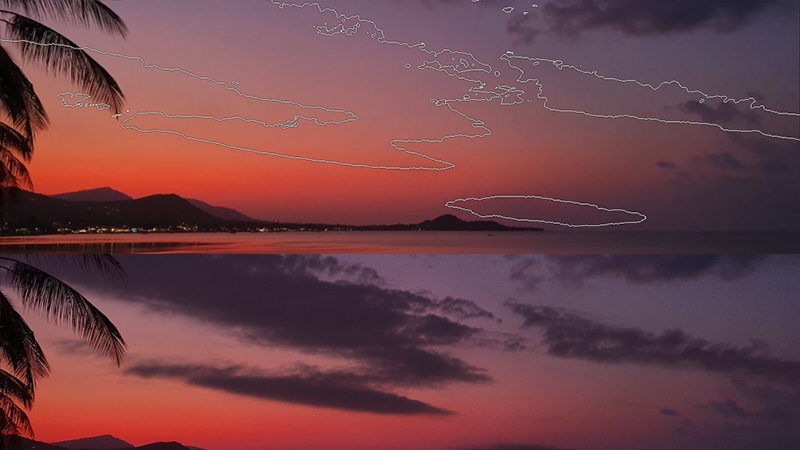
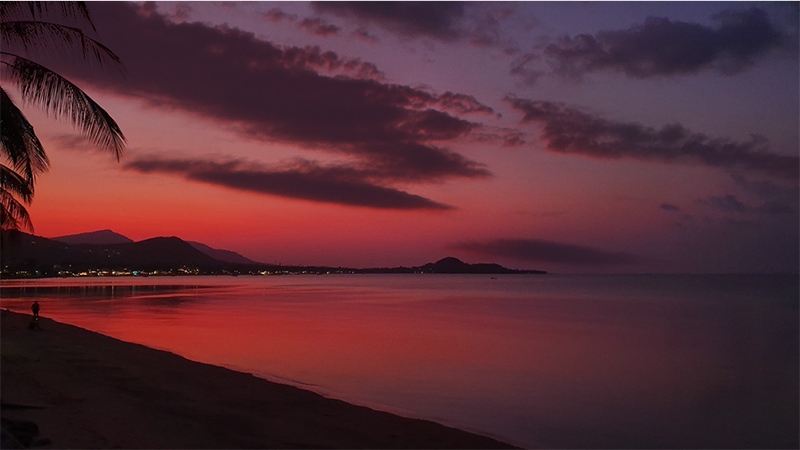
When you have the brushes installed, you can go to the brush panel and select one from the photoshop cloud brushes, So for today’s tutorial we have a low light image, so we need to choose a brush with uniform luminosity and no highlights in it
so select your brush, pick a color that matches the clouds on your image, resize the brush to cover your canvas and click once
as you can see this brush worked very well with this image, so using clouds from a sunny day, most likely is not gonna work on a low light image, so you need to keep that in mind
Another thing you can do is use a solid color to add the clouds, so add a solid color, and then invert the layer mask to hide this solid color, now you can take the brush tool and make sure your foreground color is white so you paint with white to only reveal that color in the shape of the cloud
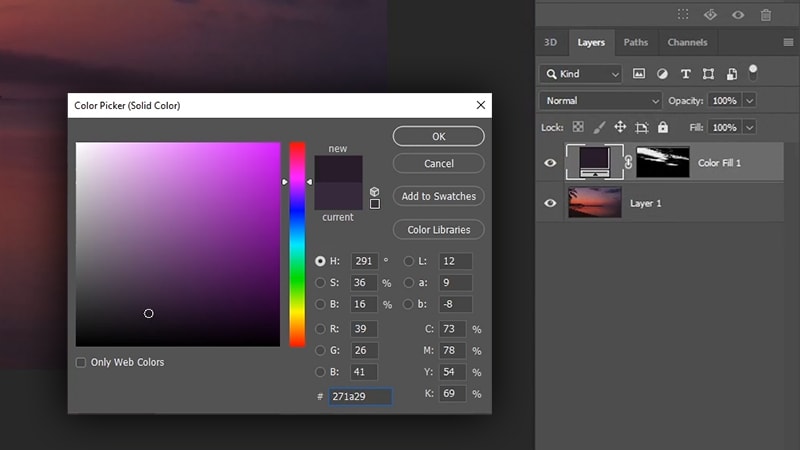
this way you can work non destructively and you can double click on the solid color and change the color to anything you want and sample the same color of the existing clouds on your image
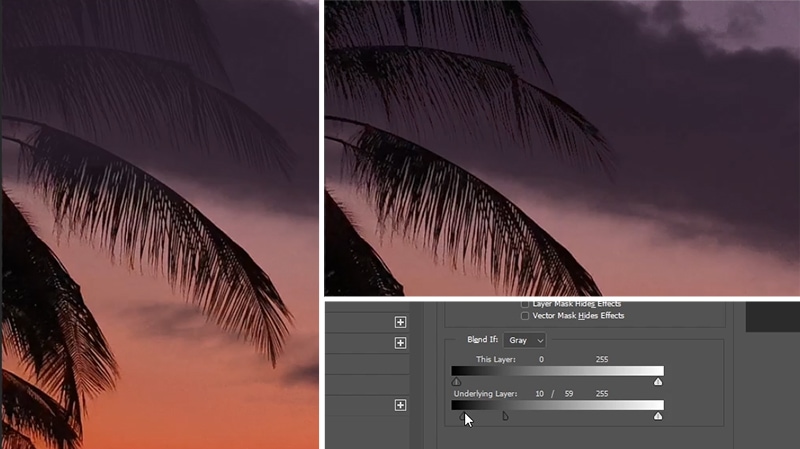
In some cases you will have to add layer masks to your sky so you don’t affect other areas with the brush, in my case, the cloud is on top of the palm tree and it’s covering it, and we can fix this very easily by double-clicking on the solid color, and in the blend if options under the underlying layer we are gonna move the slider to the right to tell photoshop to hide this cloud from the dark areas, and you can also hold alt or option to split the slider to make the transition a little bit better
2 – How to Add Sunset Highlights to Clouds Using Layer Style
And now that looks much better, so in some cases, you are gonna need to do a little bit of customization to get these brushes to work for your image and get the most out of them, and speaking of customization we can make these clouds look even better by adding some sunset highlights to them, just like in the original cloud you see here
And I’m going to show you a really cool technique to achieve that very easily, so to do this you are going to double click on the solid color again to add some layer style, and this time add a drop shadow
So we are going to use drop shadow in a different way than usual, first change the blending mode to normal, also you need to change the color and pick a bright orange color from the sunset
change the angle to top right, increase the distance a little bit, and also increase the opacity, you can also control the angle by dragging the mouse inside the canvas itself
And now you can play around with the distance and the size to achieve a bright highlight color in the bottom right corner of the clouds
if the drop shadow is peaking through and it’s changing the color of the clouds, you can fix that by changing the blending mode to overlay, and now it’s mostly visible on the edges
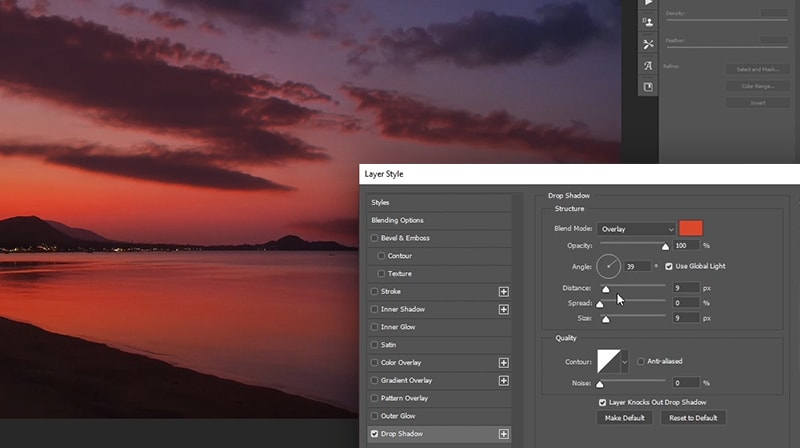
now all you need to do is change the size and the distance to get the effect that you want, if you want the highlight to be soft you can do that by increasing the size,
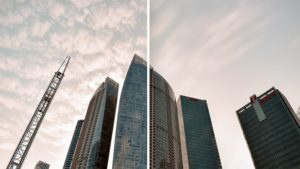
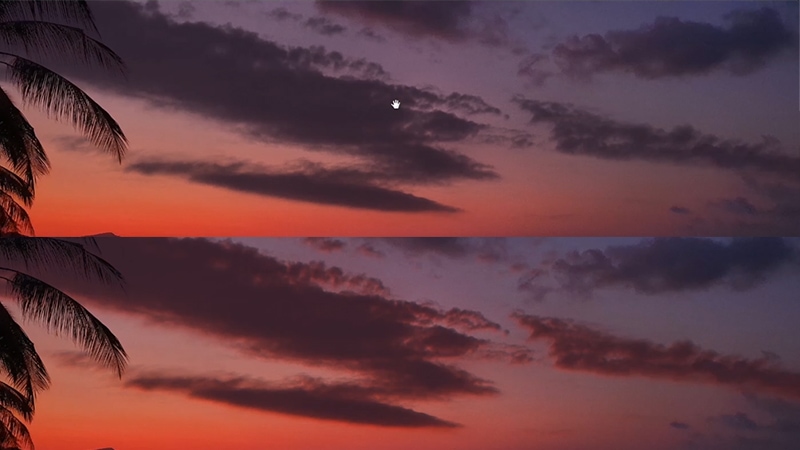
Here is a before and after the drop shadow and if the effect is a little bit strong, you can reduce the opacity to make it less visible
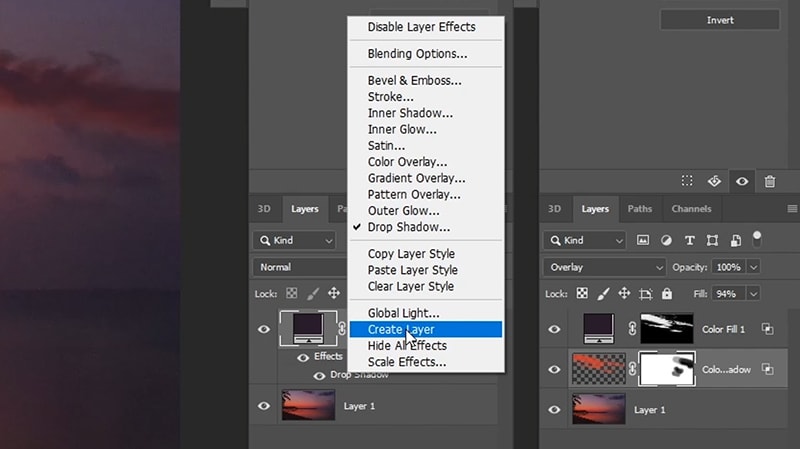
So that’s how you can drastically improve the clouds just by using layer style, now this effect is non-destructive so you can go back and change the color of the clouds and also the highlight at any time, but if you don’t like the effect of this highlight to be visible everywhere, you can separate it on its own layer by right-clicking on the layer style and click on create layer
Now the effect is on a layer by itself and all you have to do now is add a layer mask to it, and mask the areas that you don’t want it to be visible in
So i’ll just take a normal soft brush, reduce the opacity and the flow a little bit and i will mask it from the top area of the clouds
Alright so that’s how to add dramatic clouds to a sky using custom brushes and layer style, if you are new here, this website is all about photoshop and compositing so make sure to enroll in my free photoshop compositing course, subscribe to my youtube channel so you don’t miss out on new tutorials,
Let us know what you think in the comments below, i’ll be happy to answer any of your questions