One of the best ways to add stars to your images in photoshop in by using custom brushes and manually paint them,
And in this tutorial not only you will learn how to add stars to sky in photoshop from scratch but also I will show you how to make a star brush preset that you can use in the future
Step 1 – Creating The Brush Preset
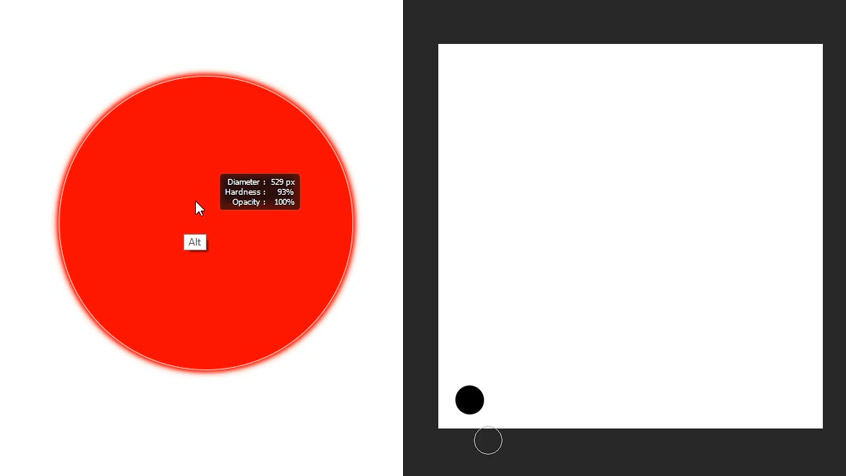
So to create the brush start by creating a new 1000px by 1000px document, and fill the background with white, then what you are going to do is take the brush tool, and reduce the hardness to about 90% to soften it a little bit so you don’t get hard-edged stars and they look a little bit more realistic
take a small brush a click once and add a dot at the bottom right corner, this will be the shape used in the brush to paint the stars
but if you look at some reference images you will see that stars have different and random shapes, not a perfect circle, so we need to recreate that inside the brush, you can simply do that by painting at the edges of the dot with the brush tool just to change its shape a little bit
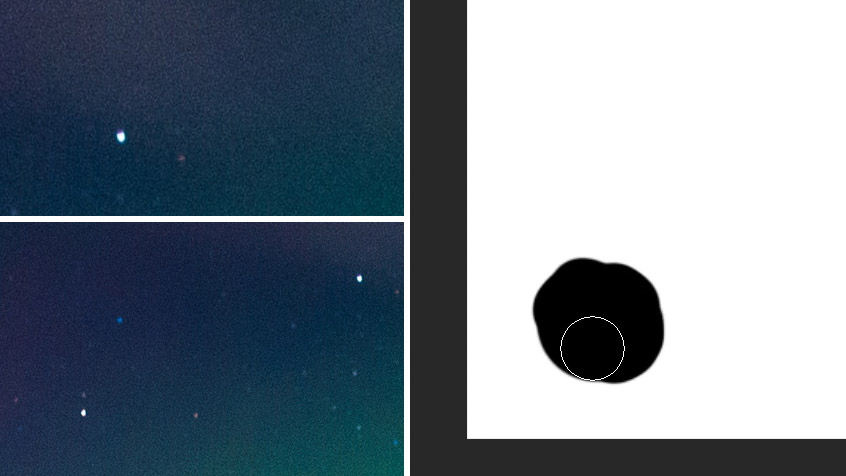
Now you are going to do that again in the top right corner this time use a smaller brush size to make a smaller dot and change it’s shape again, ok once you do that you are going to turn it into a brush, make sure the background is white and your brush shape is black whenever you are creating a brush preset, now go to edit, define brush preset and rename your brush, once you turn it into a brush it will be automatically selected and it will look like this for the moment when you paint with it

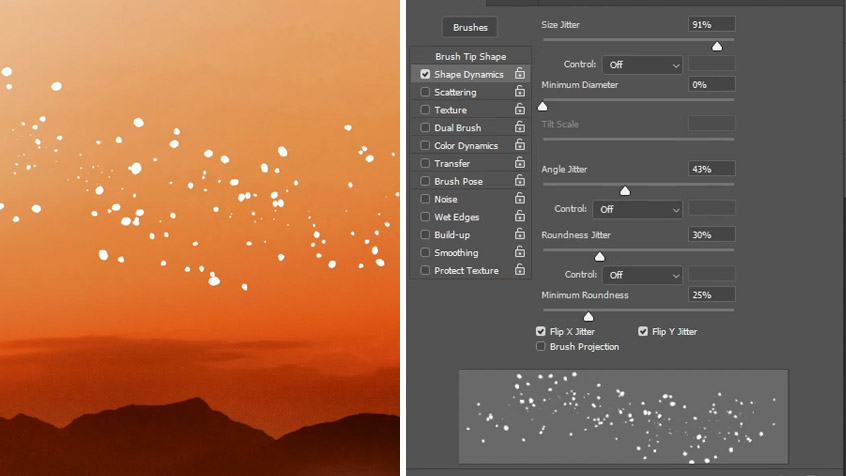
So now you need to modify some brush settings to get this to look like realistic stars, so open up the brush settings tab and start by checking shape dynamics and increase the size jitter, this will add variations in brush size, and with the minimum diameter slider you can control how small or big the single star can be
Next, increase the angle jitter to make sure to rotate the stars and change their angle to look a little bit more random, and you can also increase the roundness jitter and check the flip x and y jitter checkboxes
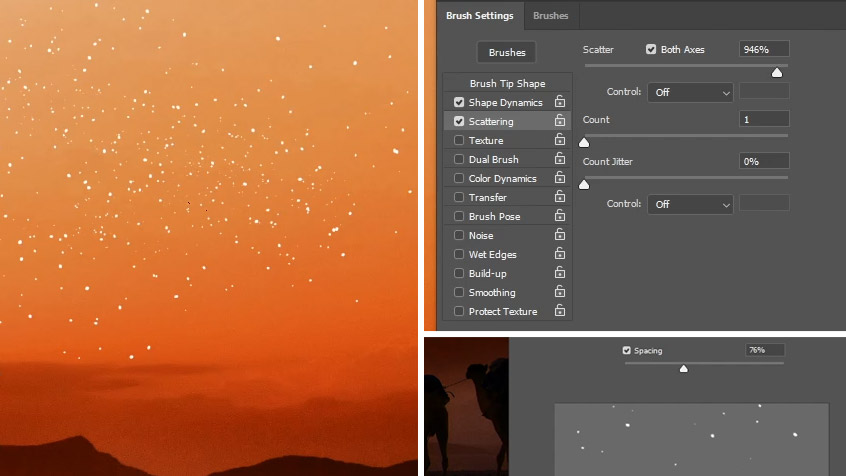
So at this point, your brush should start to look close to something like stars, but we can make it even better by checking the next option which is scattering, now increase the scatter to scatter the stars and add more space between them and also make sure to check “both axes”
And that will make the brush look like this, if you want more spacing between the stars, you can click on brush tip shape and increase the spacing using the spacing slider at the bottom
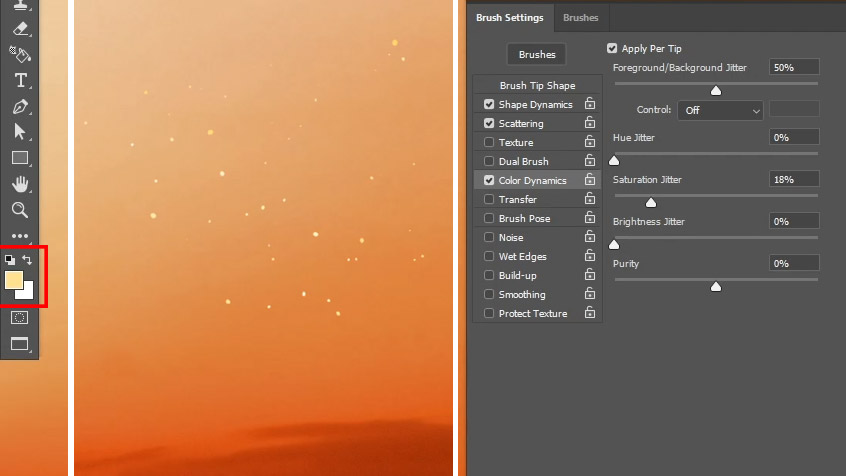
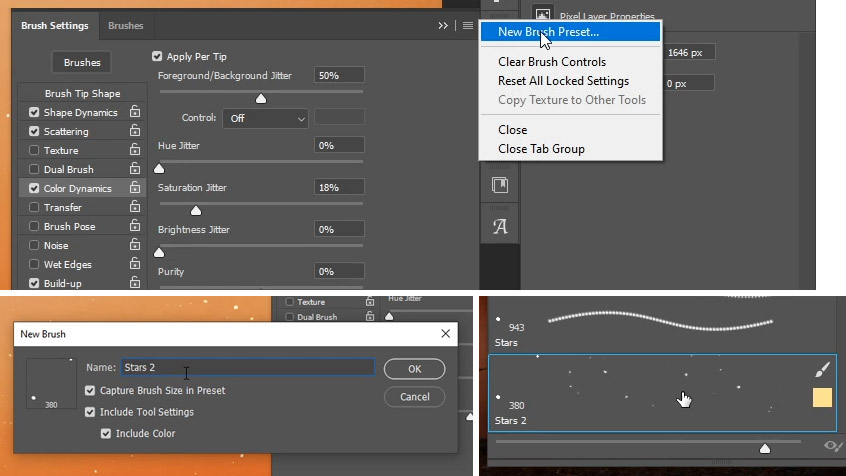
next, you can check color dynamics to add color to the stars, and this step is optional whether you wanna check it or not but if you take a look at the reference image again, you will see that some of the stars have some of the color of the sky and we can recreate that with color dynamics
you can control the intensity of the color with the “Foreground/Background jitter” slider and you also need to check “apply per tip” to apply the color to the individual star, next leave the hue and the brightness jitter to 0 and change the saturation slider to your liking
so to see the effect of color dynamics on the brush you need to change the color of the foreground and background colors to a slightly different color from the sky, in this case, i can change the color of the foreground to a bright orange color and the background to white, and as you can see when painting with the brush we have some stars that have the same color of the foreground
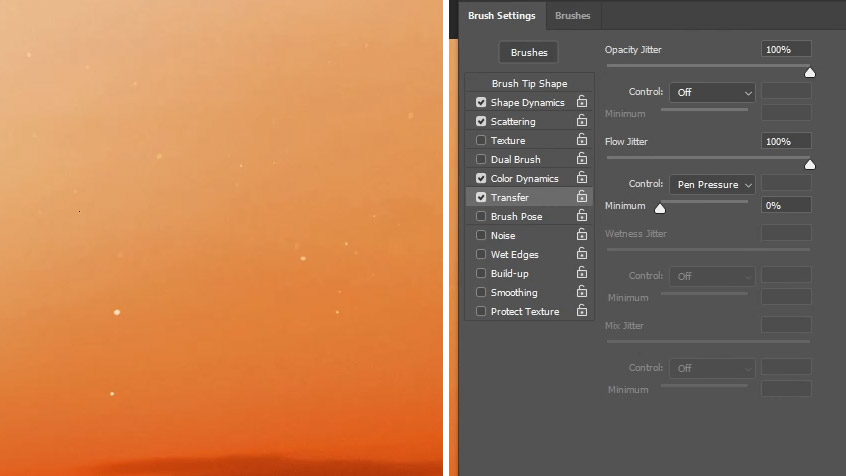
the next option that you can check is “transfer” and you can increase the opacity and the flow jitter to your liking, this will allow you to paint stars with different opacity levels to create the illusion of distance between the stars but in this case, I already added color dynamics and if I add transfer it will become a lot less visible
So lastly you can check build-up, and this option will allow to press and hold the mouse and it will continue adding stars and slowly building up
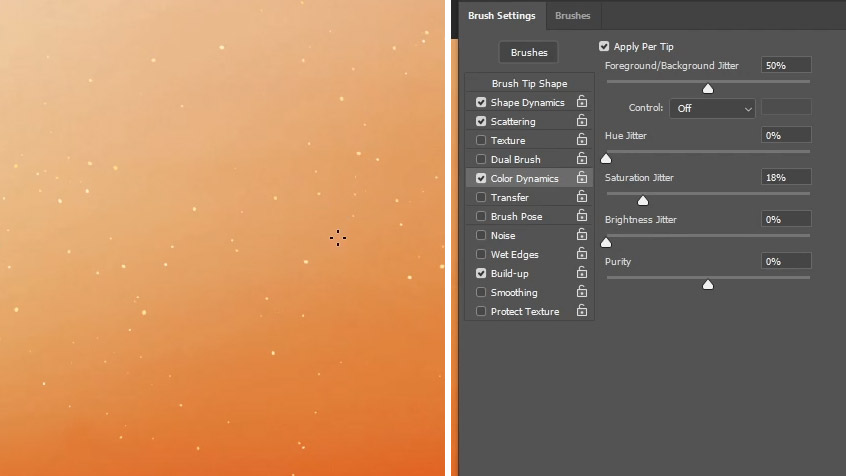
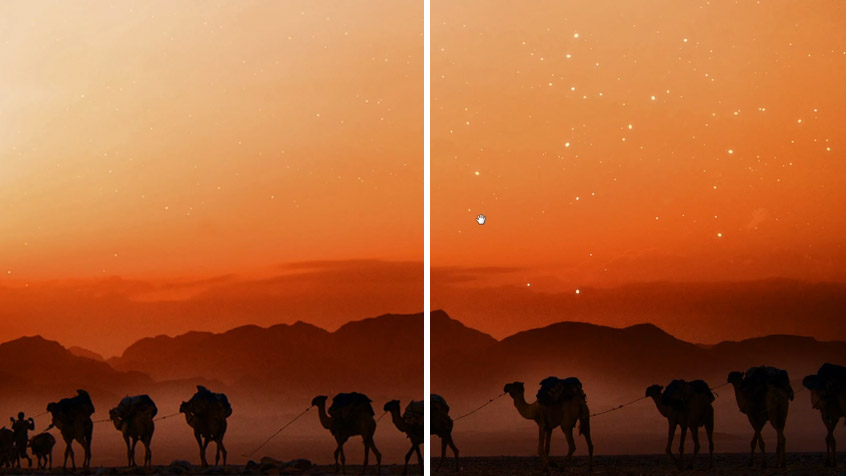
Step 2 – Painting The Stars
Ok so now you can start adding stars to the sky now and I like to add them in multiple levels, so you can start painting on a new layer with a very small brush size to create the stars that are further away in the distance and then add another layer and paint with a bigger brush size to create the ones that are closer
So now that you created the brush, you can also convert it to a brush preset that you can use it in the future by clicking on the brush setting menu in the top right corner and then choose “new brush preset”, in this menu, you can choose to capture, the brush size, the tool settings and also the color of the foreground and once you choose this brush again it will remember all the settings you saved
Alright so that’s how to add stars to sky in Photoshop and how to create a realistic star brush out of it and convert it to a brush preset if you enjoyed this tutorial make sure to leave a comment below letting me know what you think, and subscribe to my Youtube channel
If you want to learn even more about compositing, then make sure to enroll in my compositing course, and also check out my courses at the RetutStudio academy, every purchase you make there help me create free content for you here so thank you for your support
You can also check out my previous tutorial on how to mask fur in photoshop by creating a custom fur brush
So that’s it for me today and I’ll see you in the next tutorial