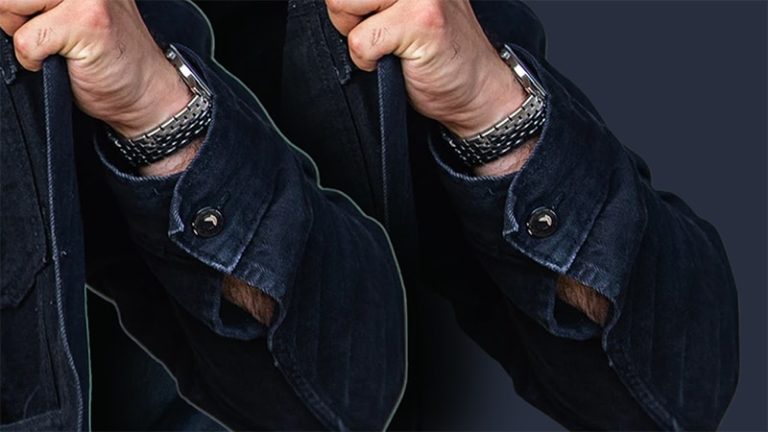
If you deal with background removal and masking in Photoshop, then this definitely happened to you,
You are trying to quickly remove the background using something like the “quick selection tool” or “select subject”, and once you have a selection and you add a layer mask, you end up with horrible looking edge halo because of the fringing
And it ruins your composite because it looks bad especially when you add a darker background.
The good news is, you won’t struggle with this issue ever again because In this tutorial, you will learn how to remove Edge halo in Photoshop ( also known as edge fringes) using different methods.
this tutorial is going to be all about removing Edge fringes, so with all the techniques that you are going to learn today you will be able to remove edge halo even if one method did not work
And each of these methods will come in handy, Depending on the image you’re trying to mask.
Before we begin, I encourage you to download the project files and follow along, you will learn better by practicing and you will remember these techniques in the future
Ok, let’s start with the first method
1 – how to remove edge halo using the “shift edge” slider in the select and mask panel
I have the first example image and I already removed the background using the select subject button, and then I used the refine edge brush to mask the hair.
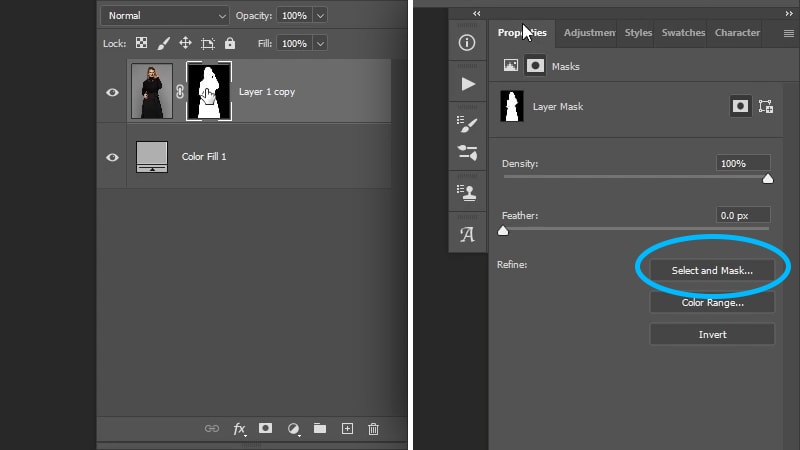
I also created a layer mask, and if you are like me and always work with layer masks, you can still access the select and mask panel, first, you need to make sure that the layer mask is selected. And then go to the properties panel, and click on the “select and mask” button.
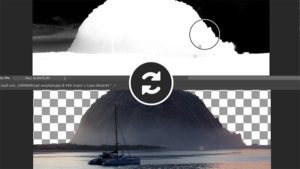
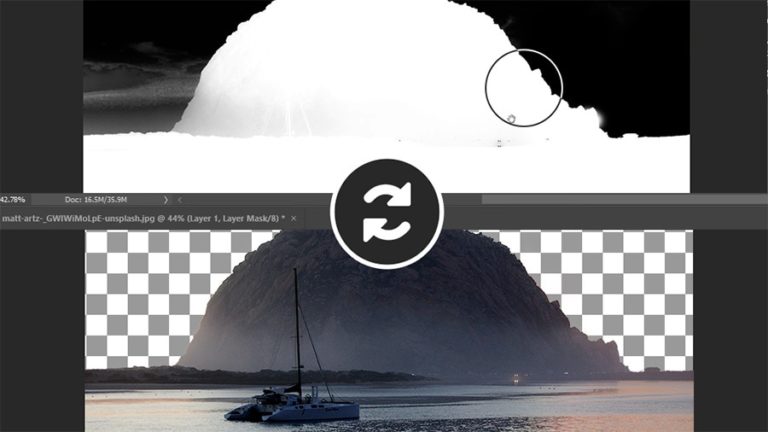
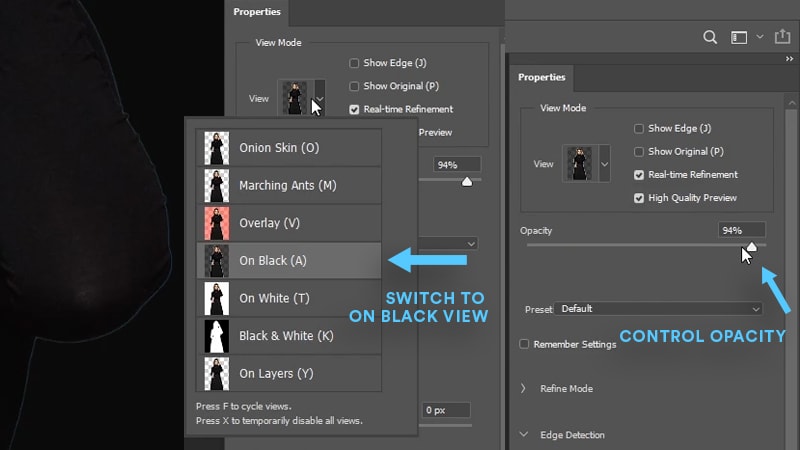
to see the edge halo better switch to the “on black” view from the view mode at the top, you can also control the opacity of the backdrop using the opacity slider.
Now, to remove the fringing, you can use the “shift edge” slider to shift the edge inside by dragging it to the left and get rid of that fringing.
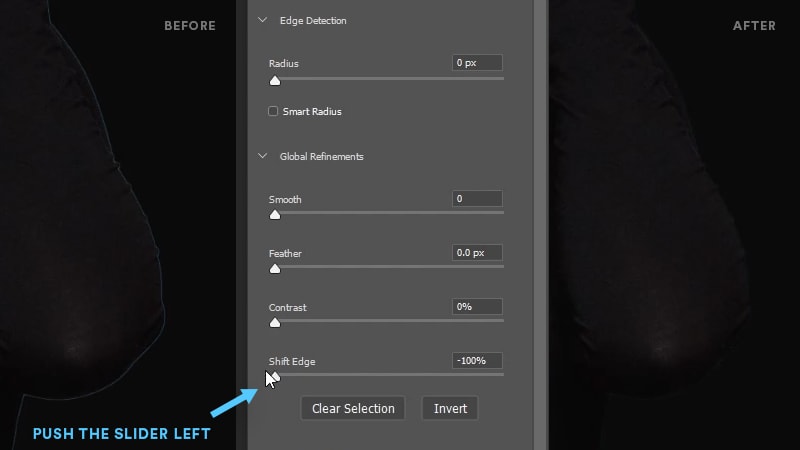
So this worked really good, and it got rid of that fringing, But if we take a look at the hair, you’ll see that it completely destroyed the edges of the hair. And this will happen to you if you have a complex layer mask, So we’re going to need to do some workaround to avoid this problem.
If this is not the case for you and it fixed your image, good for you, all you have to do is change the output mode to layer mask and click ok.
For everyone else, you are going to click on cancel for now, And what you need to do is duplicate the layer by clicking on ctrl/cmd + J , then turn off the original layer, And in the copied layer, again, you’re going to click on the layer mask, click on the select and mask button, and use the shift edge slider again to get rid of the fringing, Once you’re happy with that, you’re going to make sure the output is set to layer mask and then click Ok.
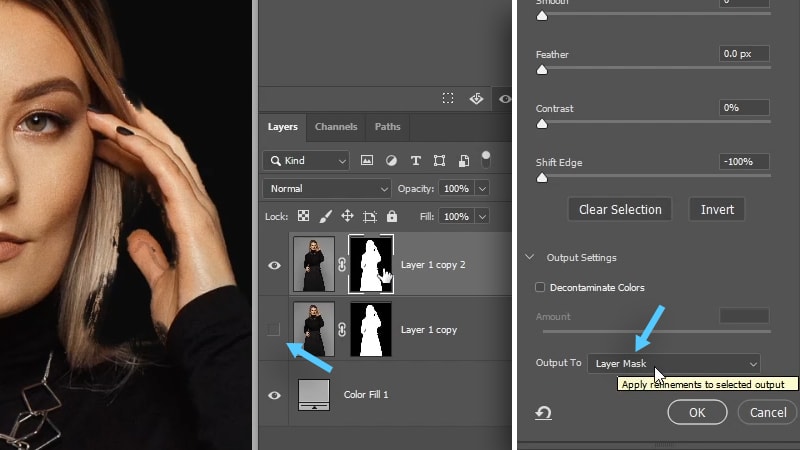
Now you can add a solid color adj layer and change the color to black so you can see the edges a little bit better.
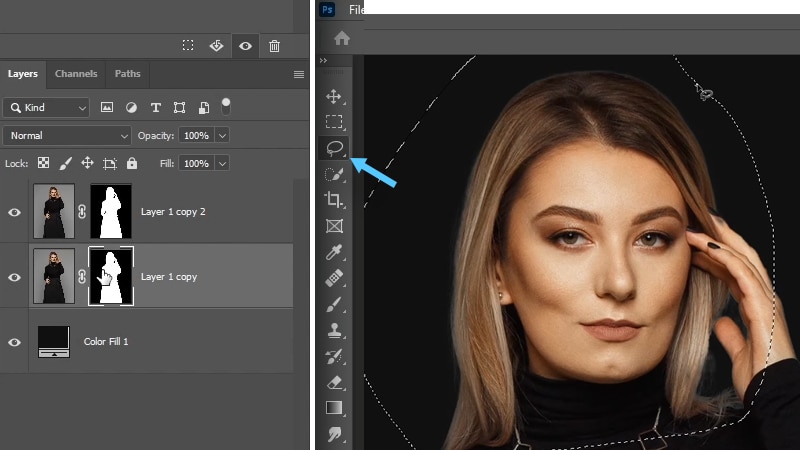
And now what we need to do is restore that hair from the original layer.
So what you need to do is select the layer mask of the original layer, and then take the “lasso tool” L, and use it to make a selection around the hair, in this case, we need to restore the original mask of the hair
we actually need to select everything but the hair to fill it with black and hide, so click on crtl + shift + i to invert the selection, and then fill the selection with black, So black in my case is my background color, So I’m going to click on ctrl + backspace, then, click on ctrl/cmd + D to deselect.
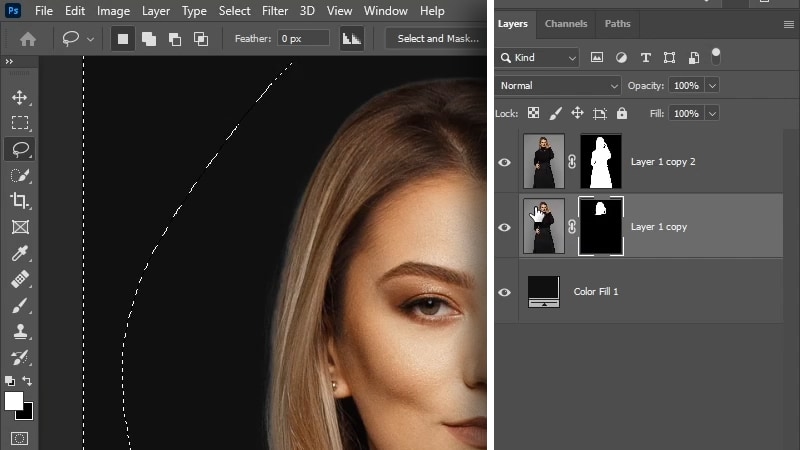
If you did everything correctly, you have the fringing removed and you also have the layer mask of that hair intact.
So this is an easy way to quickly remove the edge fringing using the select and mask panel, now I’m going to show you now a slightly different technique to remove fringing.
2 – Using The “contract Selection” Method To Remove Edge Halo
Sometime the Shift edge slider doesn’t make much of a difference and won’t get the job, so this method will allow you to control how many pixels you want to remove from the edge
on our next example, we have a different image.
And this time we have a simpler layer mask and we also have some infringing that we need to remove.
So once you have a layer mask active, what you’re going to do is load it as a selection by ctrl/cmd clicking on the layer mask thumbnail,
Once you have the selection active, go to select > modify > contract.
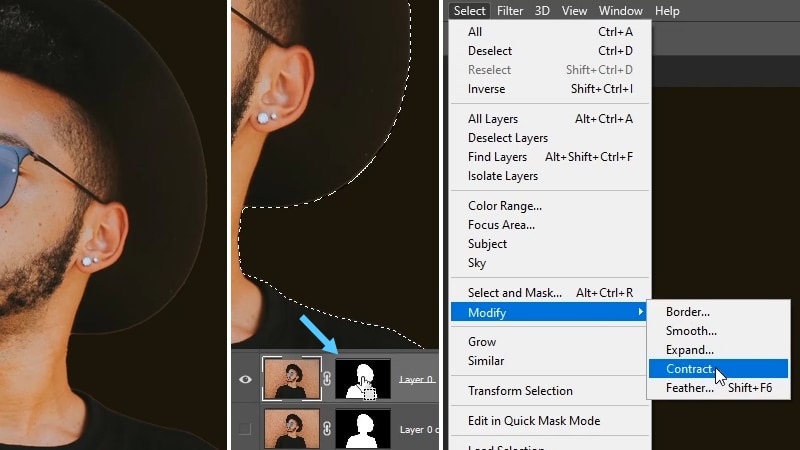
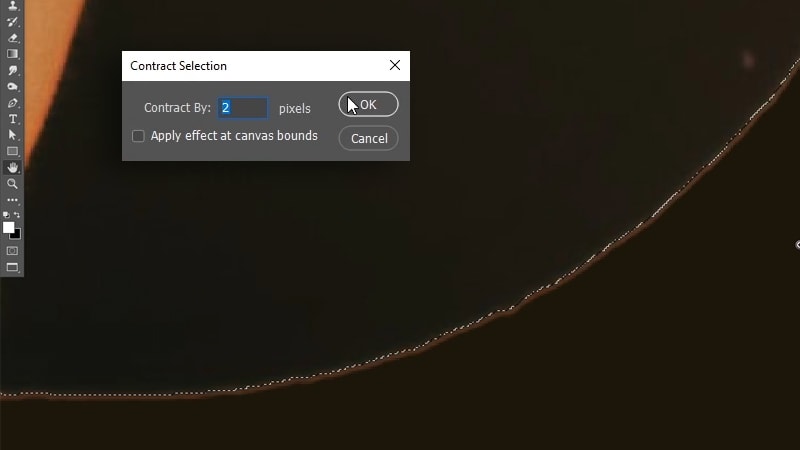
So for this image, I’m going to contract the selection by 2 pixels, and I’m going to click. Ok.
And now if you zoom in, you will see that the selection is pushed inside by 2 pixels, And right now the subject is selected and we need the opposite, so again, we’re going to need to invert the selection by clicking on ctrl + shift + i,
and now We have everything selected, but the subject, and also there are two pixels selected of the subject, and that is the fringing that we need to remove.
now you can hide the selection to see a little bit better, by clicking on ctrl + h, And now you need to fill the background and also those 2 pixels with black to hide it, So using the shortcuts, if your background color is black, click on ctrl + backspace, if it’s the opposite, click on alt + b space or option + delete
and as you can see by removing those two pixels, we got rid of that fringing and now we have a much better layer mask.
So this technique worked very well in this image because we have a simple layer mask and the fringing is all over the edges, But in some cases, you may want to remove fringing from certain areas and not the whole image. So in that case, I’m going to quickly show you how you can do that.
Doing this is very simple, just like we did before, you need to contract the selection by the amount you need, then invert the selection (so you have the background and the fringing selected), and now instead of filling the background with black, you’re going to take the brush tool, make sure the Layer Mask is selected and also the foreground color is black
now, click on ctrl + H again to hide the selection so you can see the edges a little bit better, and then you’re going to simply use the brush tool and paint on any areas that you want to remove the fringing from.
And as you can see, we can easily use the brush tool to remove that fringing from only certain areas.

3 – Using The “Minimum Filter” To Remove Edge Halo
This is another technique that evolves using the minimum filter, and will also allow you to choose how much you want to contract the layer mask and where using selections
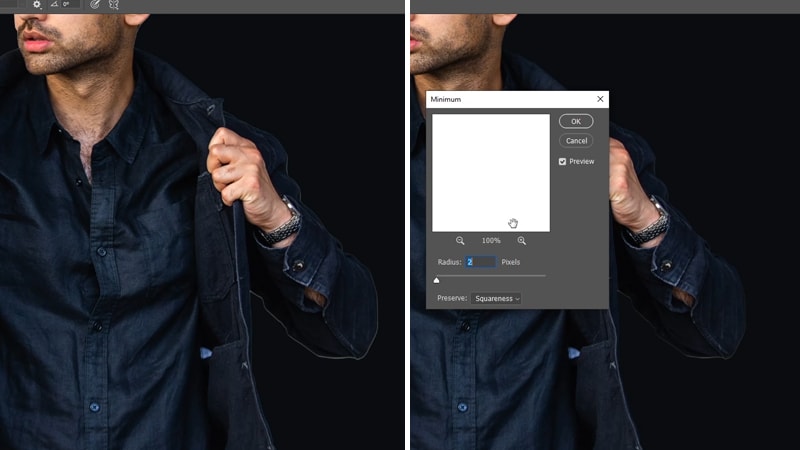
So to to remove fringing using this method, you’ll need to have your layer mask selected first, Then go to filter > other > minimum.
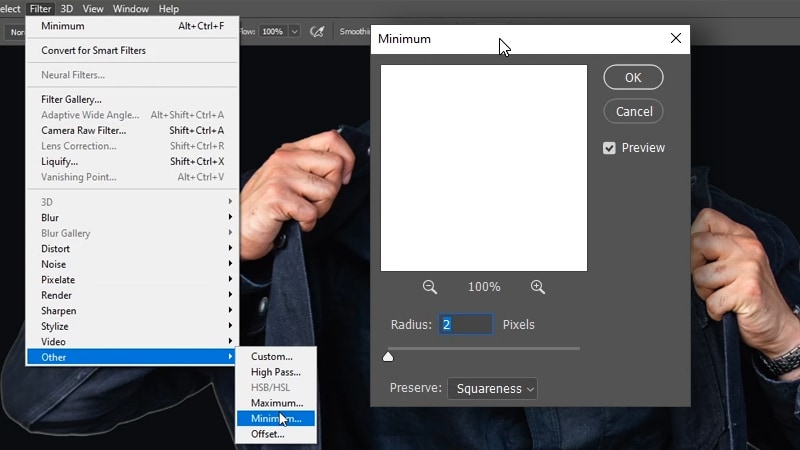
So basically what this filter’s going to do is push the edges of your layer mask inside, therefore it’s going to remove the fringing from the edges.
much like using the contract selection, but using this filter, you get to see the change with live preview, and you can use the preview checkbox to see the before and after.
So for this image, I started with a 2px radius, this worked well in some areas, but in other areas, we still have fringes that didn’t go away, so click ok to accept the changes for now
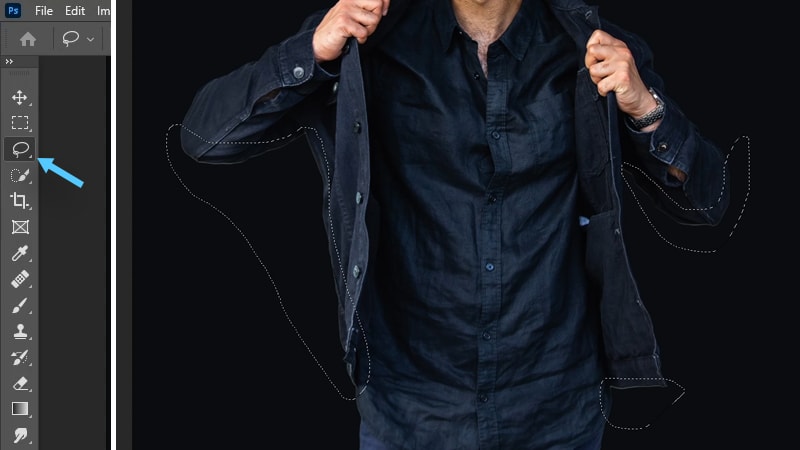
Now we need to further remove the fringing from more areas, so we can use this filter again selectively, you can take the lasso tool by click on S , And make a selection around all the areas that has the fringing
Tip:
Using selection tools, if you want to add to a selection, you can hold shift, and if you want to delete from a selection, use alt or optn
Once you have all fringing areas selected, you can apply the filter again, and you can use the keyboard shortcut ctrl + alt + F to apply the last filter (which is the minimum filter), and you can also do it multiple times until you get rid of all the fringing.
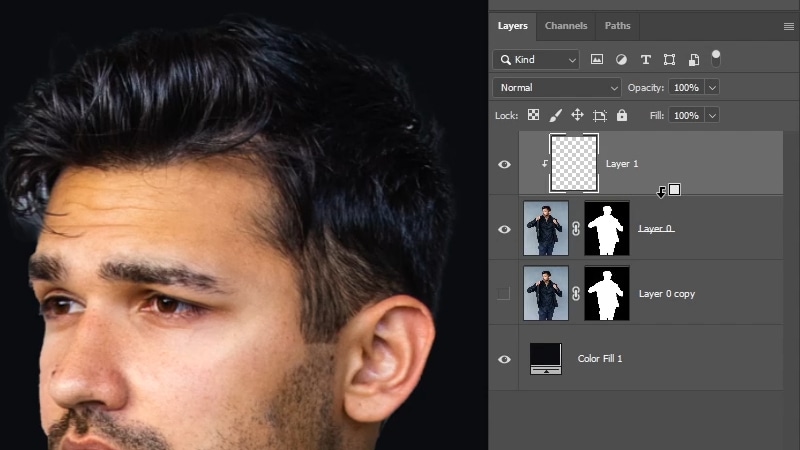
now click on ctrl + D to deselect, and we pretty much removed the fringes everywhere, except for a small area of the hair that I left on purpose, And in that case, we can easily fix that using the clone stamp tool.
Here is what to do to remove fringing from hair
You’re going to add the new layer on top, and then add a clipping mask using ctrl + alt + G or cmd + optn + G
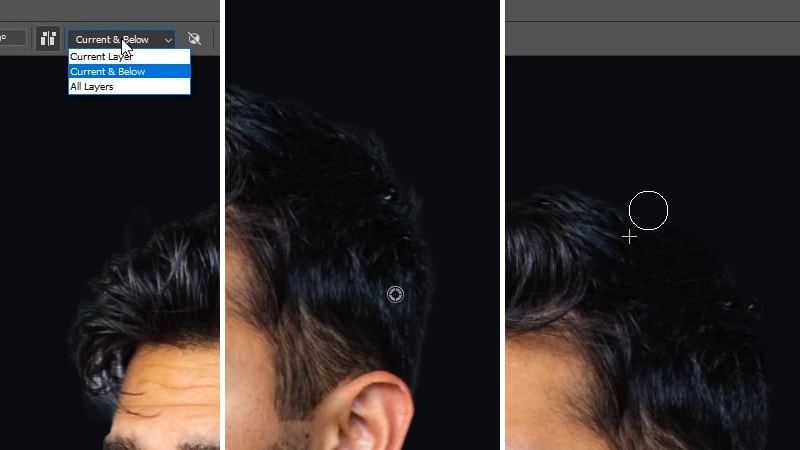
So everything we paint inside the clipped layer will only be visible inside the selection and won’t exceed the layer mask boundaries, So now you can click on s to take the clone stamp tool, make sure that the clone stamp tool settings is set to “current and below”, and then you’re going to use alt / option To sample from inside the hair and paint on the edges. And as you can see, this will remove any fringes from the hair.
And now you can add any background that we want and the edges will still look very good and darker or lighter backgrounds.
So that’s how to remove fringing from your images in Photoshop. If you enjoyed this tutorial, let me know what you think in the comments below
make sure to visit these tutorials that will show you How to replace complex skies in Photoshop and the best way to mask fur in Photoshop
Other than that, I hope you guys enjoy this tutorial. Thank you guys so much for watching and I’ll see you in my next tutorial. ✌