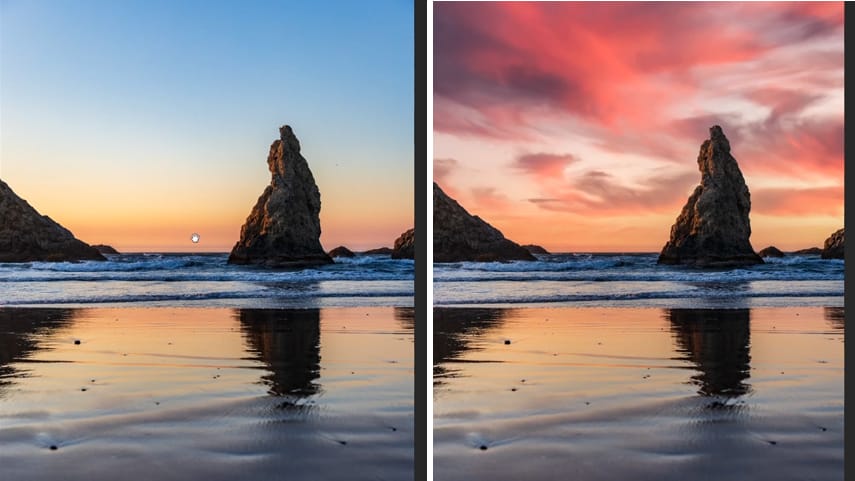
Replacing a sky in Photoshop requires making selections and masking skills, But this may no longer be the case, thanks to the new sky replacement tool that came up with Photoshop 2021
If you are tired of manually making selections to replace a sky then stay tuned, because sky replacement in photoshop 2021 is now easier then ever, in this tutorial you will learn all about this new tool that will help you replace your sky with almost one click
I’m gonna show you how it works, we will test the new sky replacement tool in Photoshop in different images scenarios, and also you will learn how to create sky reflections to get your sky replacement to look realistic.
so this new tool is available under edit > Sky Replacement, once you click on that, Photoshop is gonna automatically analyze your image, creates a layer mask, and replaces the sky for you.

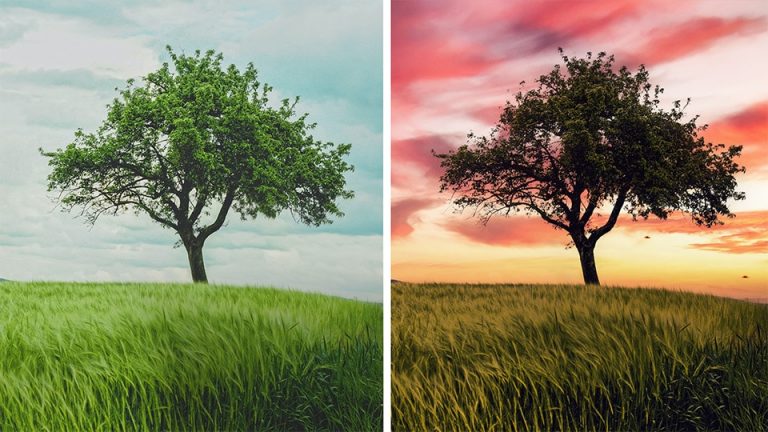
And just like that as you can see we were able to easily replace the sky with almost one click.
So this tool uses adobe’s artificial intelligence known as adobe sensei, it’s the same algorithm used in the “select and mask” panel and it’s gotten really good in the past few updates, i think this tool is going to be very useful for a lot of people and will help them save a lot of time, even for an advanced user like me I can see myself using this tool in the future a lot.
1 – Exploring The Settings For The Sky Replacement Tool in Photoshop
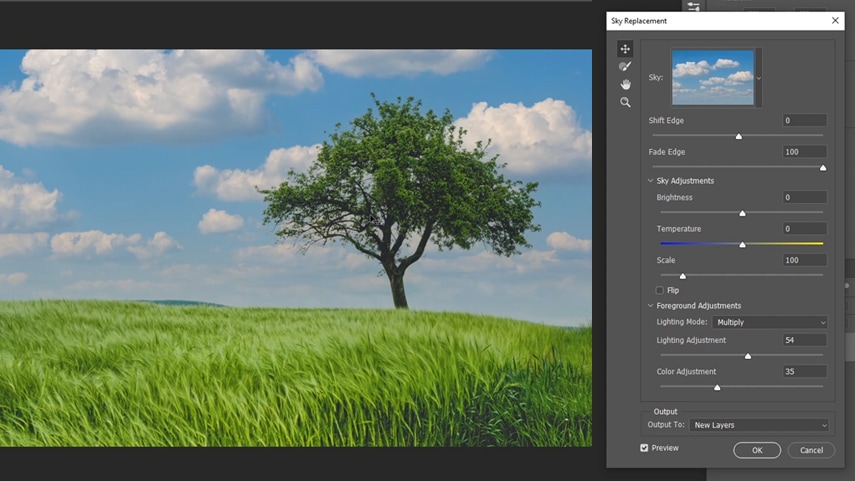
you have a couple of options to tweak that came with the sky replacement tool in Photoshop to help you blend your sky better with your image, First, you can change the sky image by choosing from 3 different folders, you have the “blue skies” folder for images with the daylight situation, a “spectacular” folder, and also a “sunsets” folder.
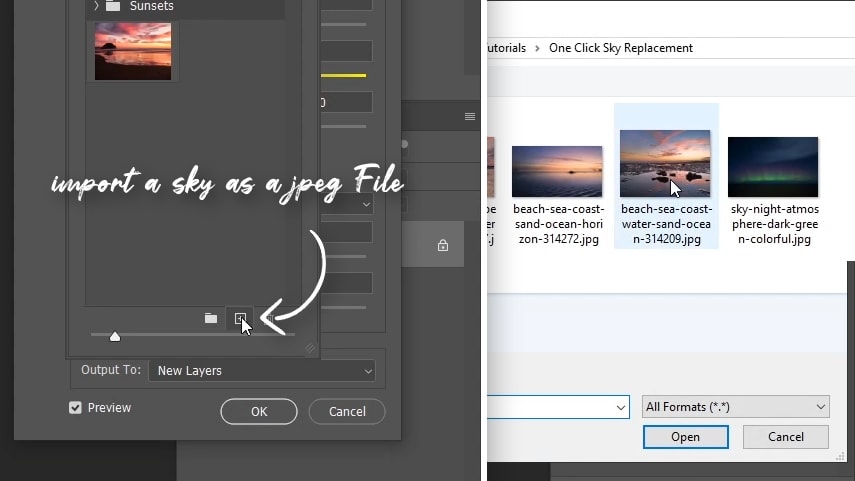
You can also import your own skies and you can do that in two different ways first you can click on the gear icon ⚙ and select “import skies”,
Photoshop now supports a new “.sky” extension which means that you can import or export your own Skies packs as a preset.
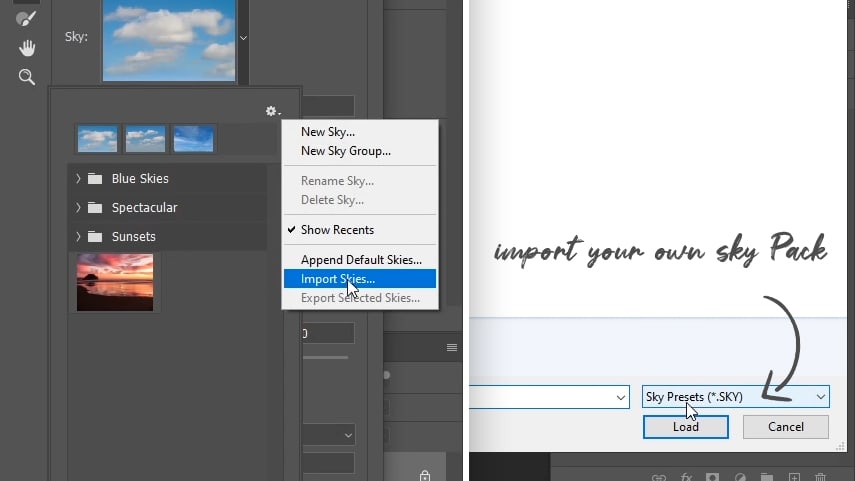
And the second way is that you can import your own sky as a JPEG file by clicking on the plus icon plus, then you can import your own sky.
You can also rename the sky and click okay, and it’s going to be imported at the bottom, and you can use it as your own sky replacement.
Download My Sky Replacement pack For Free
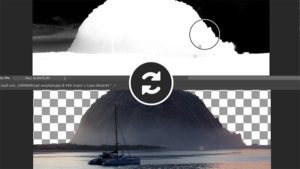
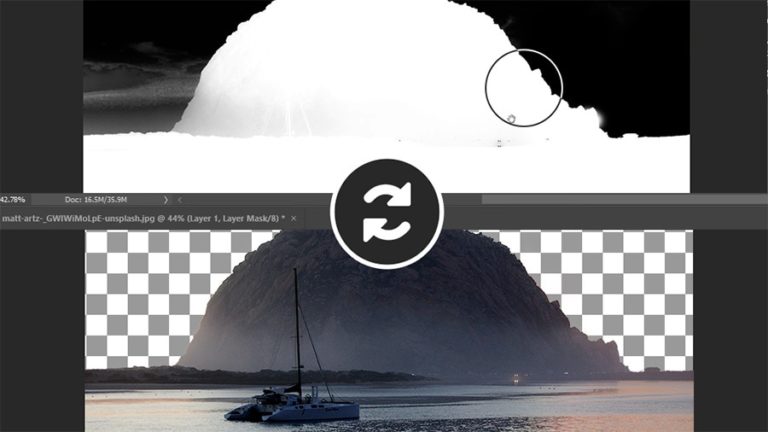
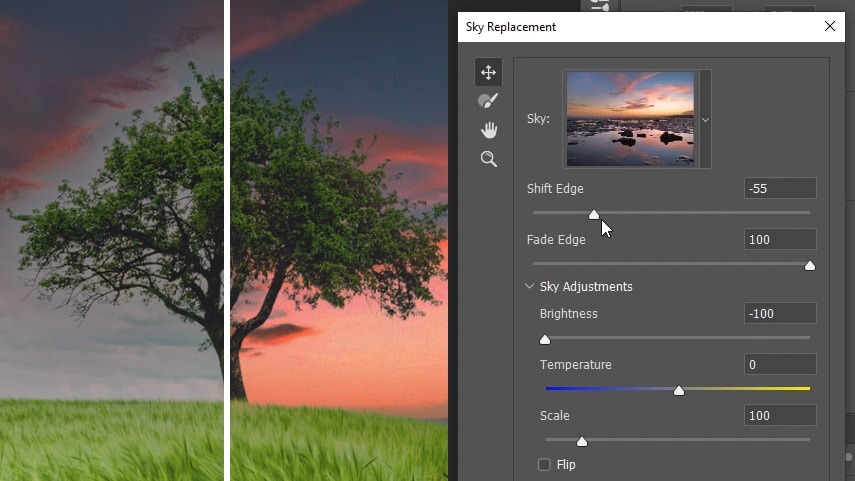
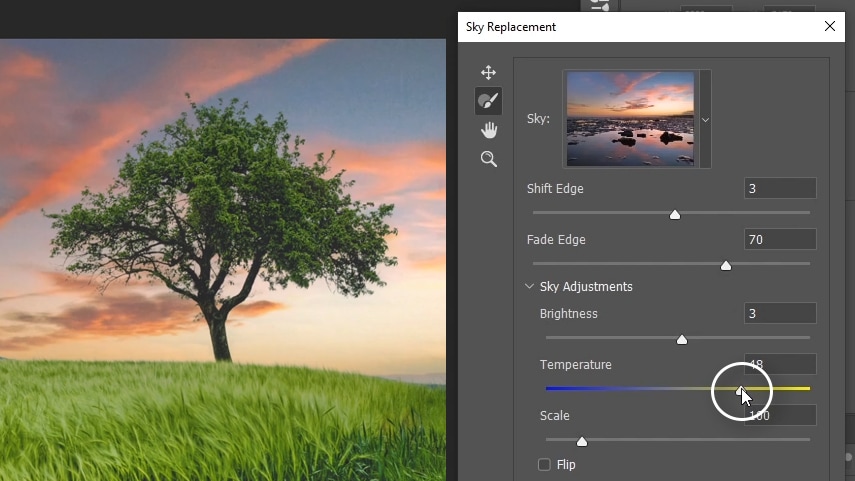
Okay, we have more options to tweak, the first one is shift edge, and as the name implies this will allow you to shift the edge inside or outside the selection And remove any fringes from the edges.
You also have the refine edge brush and this works just like the select and mask refine edge brush and removes any fringes, in this case, we don’t really need to use it because Photoshop did an amazing job on selecting the edges and most of the time it will automatically choose the best options for you.

next, you have the “fade edge” slider, and this slider will fade the edges on the horizon line and that’s going to help you blend the edges a little bit better.
in this case, I will increase the brightness, then shift the edge inside, And then fade the edge to blend it with the new Sky.
next, you have the “temperature” slider, and using this slider, you can make the sky warmer or cooler, in this case, I’m going to make the image a little bit warmer, and now that looks a little bit better.
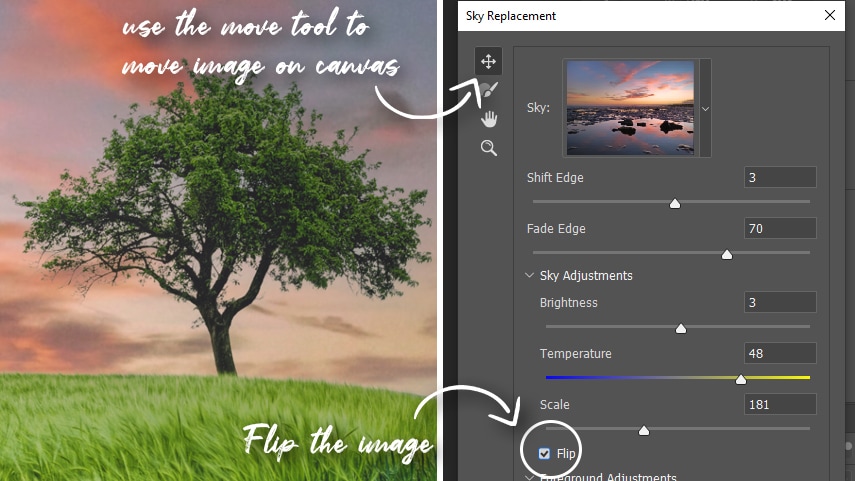
you can also scale your sky and match it with the horizon line And you can use the move tool and move the sky to get it to match with the canvas.
there is also the “flip” checkbox and you can use it to flip the image and match the light direction, in this case, we want the light direction to be coming from the right side.
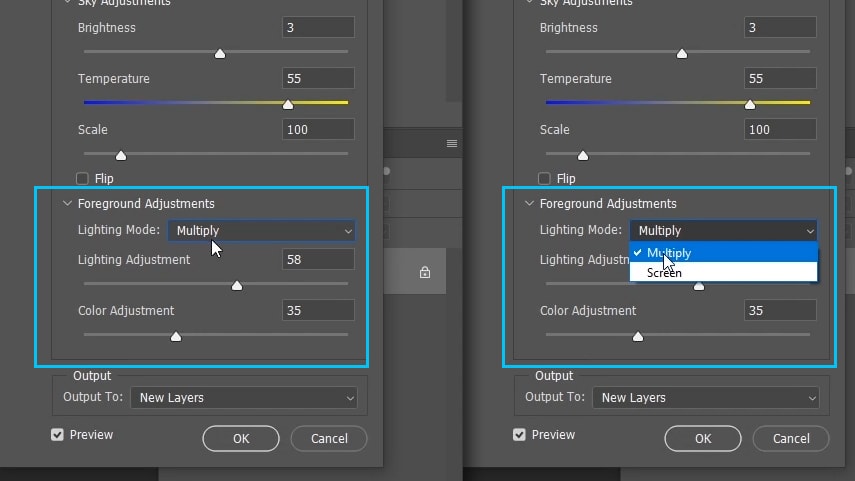
you also have more options at the bottom for the foreground adjustments to help you match the foreground to the sky.
first, there is the “lighting mode”, you have two options, either screen or multiply, in this case, multiply works better.
You have the “lighting adjustments” which will make your image lighter or darker
And lastly, you have the “color adjustments”, And this also will change the color of your foreground (Photoshop will also try to match the color tone of the foreground with the sky automatically whenever you move the sky)
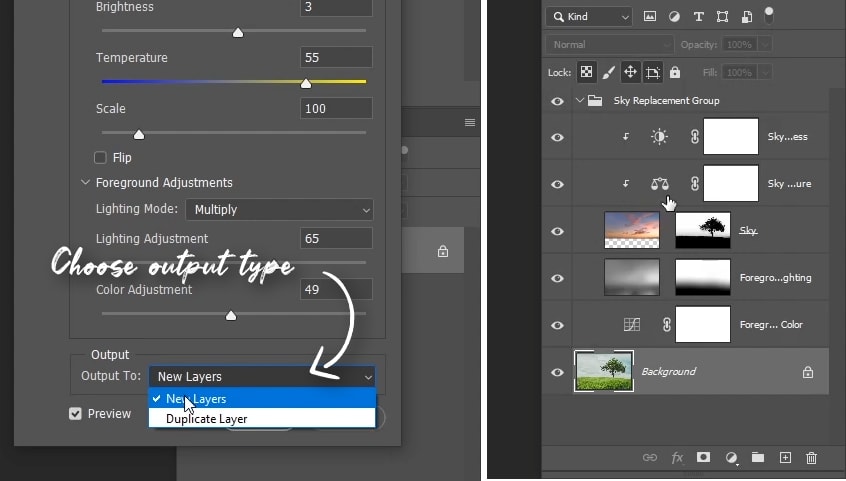
once you’re happy with the settings, you can choose the output options, you can either duplicate the layer or output to new layers.
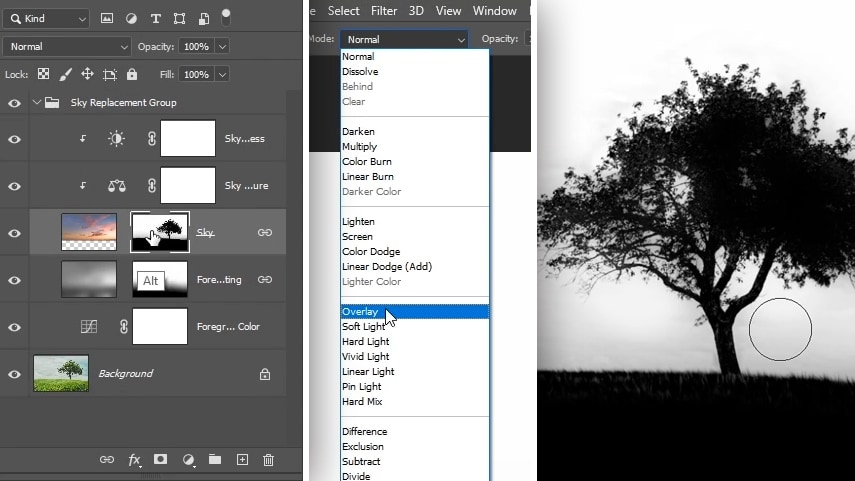
and what I really like about this tool is that it is non-destructive, if you choose “new layers” from the drop-down and click ok, You will see that it automatically creates the masks and the adjustment layers needed to replace the sky and that means that you also have control over the generated layer masks and adjustment layers and you can further modify them.
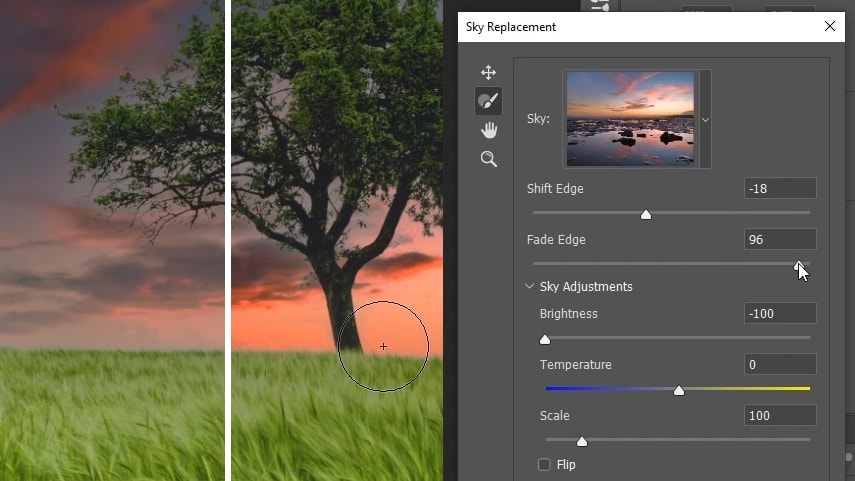
So in this case, if you want to refine the layer mask further and remove some fringes, you can take the brush tool, then change the blending mode to overlay and now using a low flow and capacity, you can paint on the edges to further enhance the layer mask and remove any fringes.
and the overlay brush will only remove the fringes, it will not affect areas that are 100% black
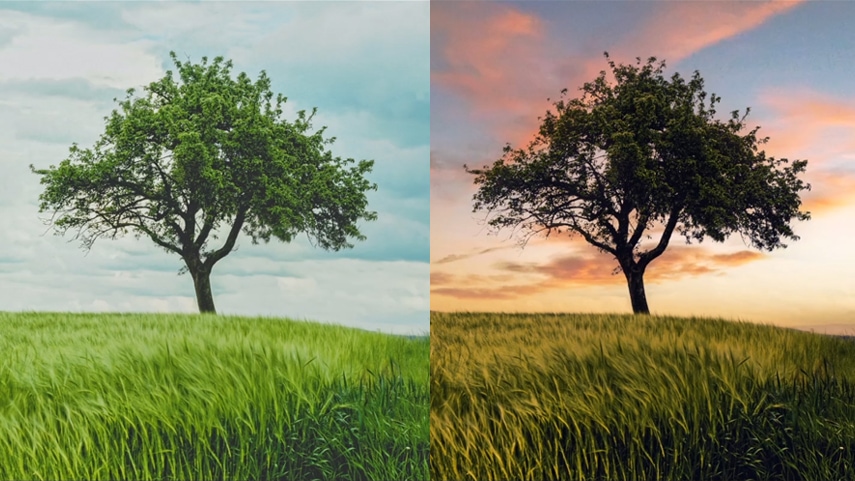
ok, so for this image I want to create a sunset scene and make my foreground a little bit darker.
I can do this very fast and easy with the color lookup adjustment layer, And then from the presets, choose the “late sunset” preset.
then reduce the opacity to 60% To get a realistic effect, after that, you can make the foreground a little bit darker with a level adjustment layer.
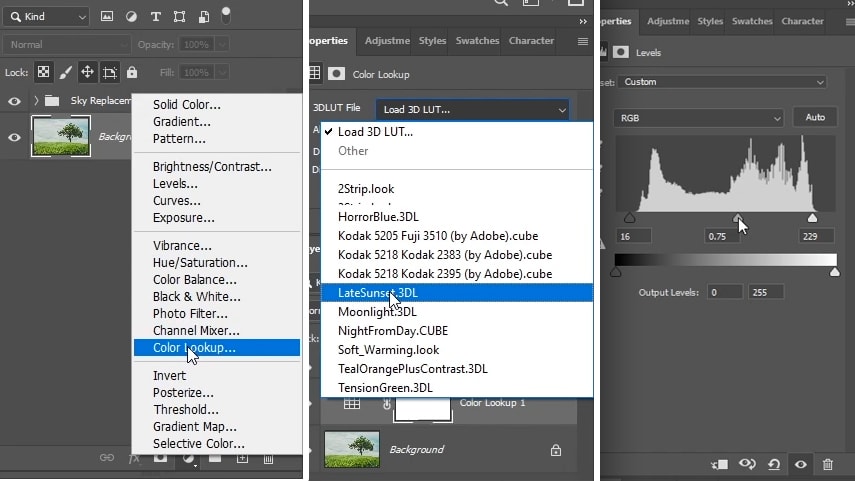
and as you can see with just a couple of clicks we were able to take the image from daylight to late sunset.
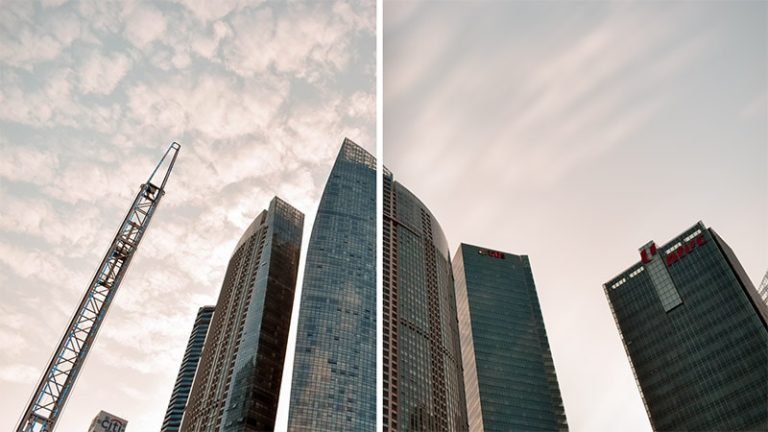
Okay, so let’s try this tool on a bit more complicated image.
you know what to do, go to edit > Sky replacement, And as you can see, again Photoshop did a really good job on selecting those edges.
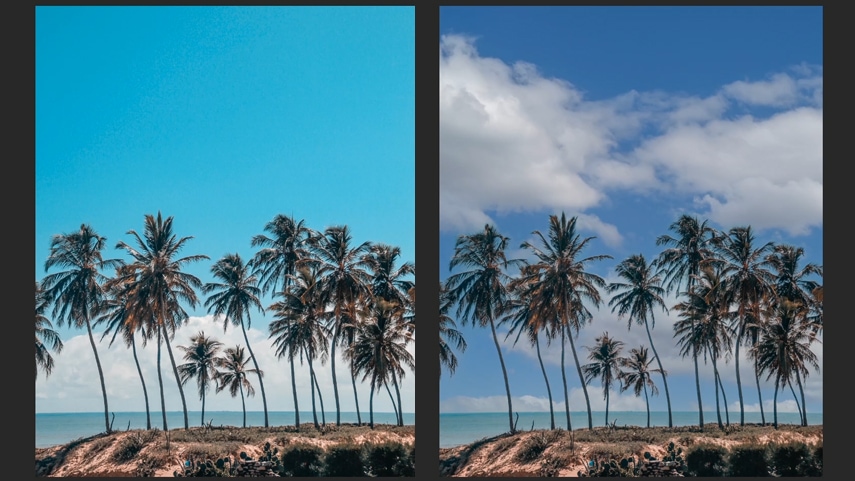
now we just need to do a few changes to match the light and color, by increasing the brightness and the temperature to match the original image.
then using the “shift edge” slider to remove any fringes on the edges of the palm trees
And as you can see It was really easy to do for this image as well.

And again if there’s any fringes or areas that did not get selected well, you can also click on your layer mask and take your brush tool and paint with an overlay brush on any areas that you want to restore, in this case, we can paint with black on the palm trees to restore them.
2 – How To Replace a Sky with Water Reflections
so now you know how this tool works, I want to mention one thing about this tool and it’s probably a downside is that it will not replace reflections for you, you’re gonna need to do the work on that part yourself. and let me show you how to do that in my next example, in this example we have an image of a beach on the sunset.
let’s first replace the sky on this one and import a similar sunset sky
we need to match the light direction, in this case, it’s coming from the left
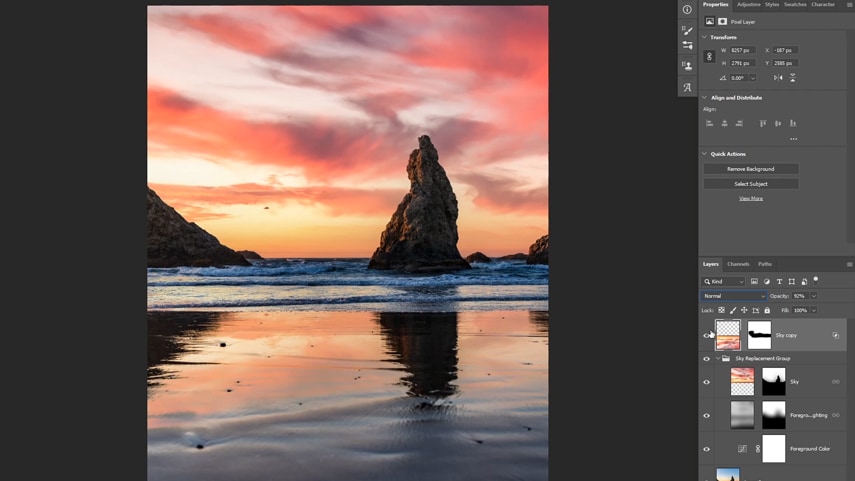
And as you can see, it automatically creates a clean layer mask and added the group with the layer mask needed for us.
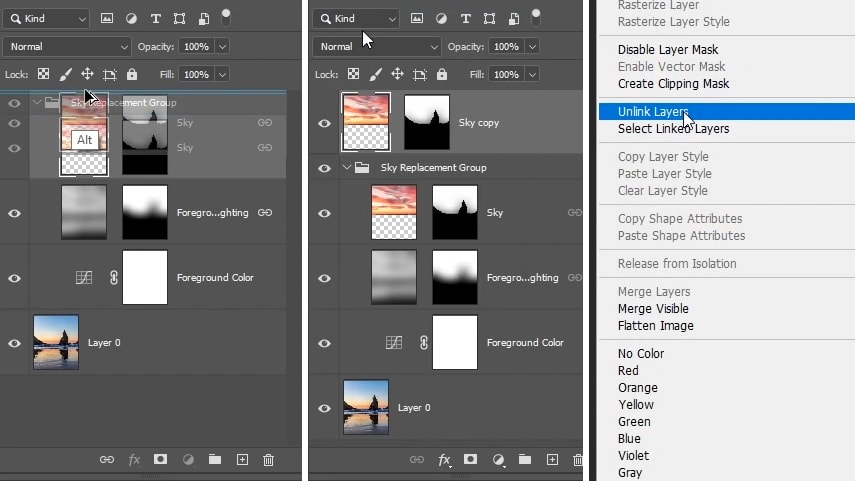
now we need the reflection of the sky to be visible at the bottom area in order for this to look realistic, so what you can do is duplicate the sky layer at the top using alt or option
then right-click on the sky copy layer and choose “unlink layers”, then disable the layer mask by shift-clicking on it
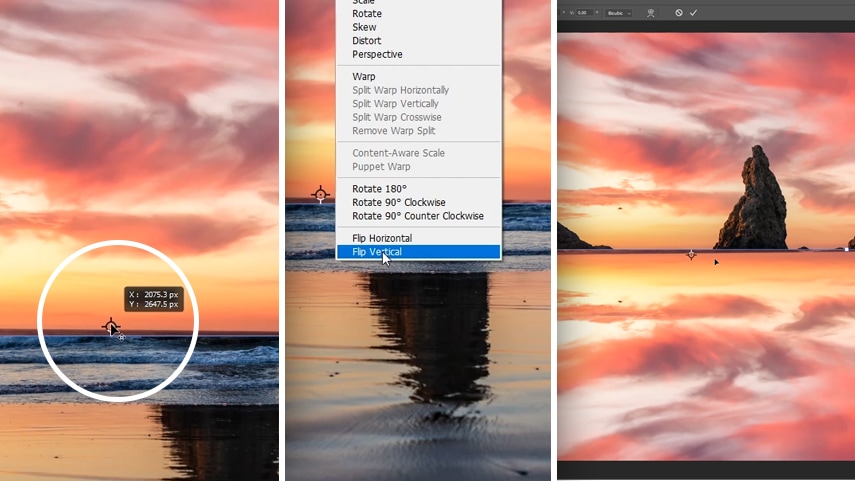
now click on control/cmd + T to transform the sky and move the anchor point to the bottom, then right-click and choose “flip vertical”.
so now we need the sky to be only visible on the light areas of the reflection, we can do this with “Blend if”, to do this, you’re going to double click on the sky layer, And then in the “underlying layer” options, We can make the reflection not visible in the dark areas by dragging the left slider to the right.
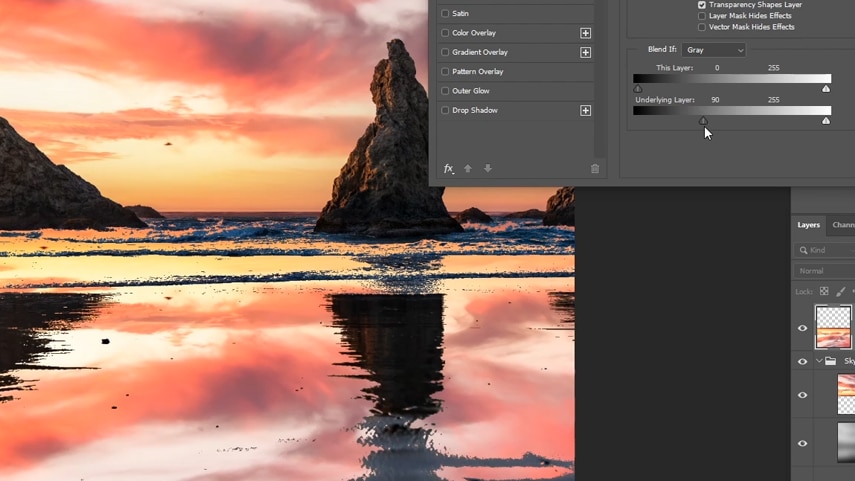
now, to make the transition smoother, hold alt or option to split the slider and make a transition To make it look realistic and click ok.
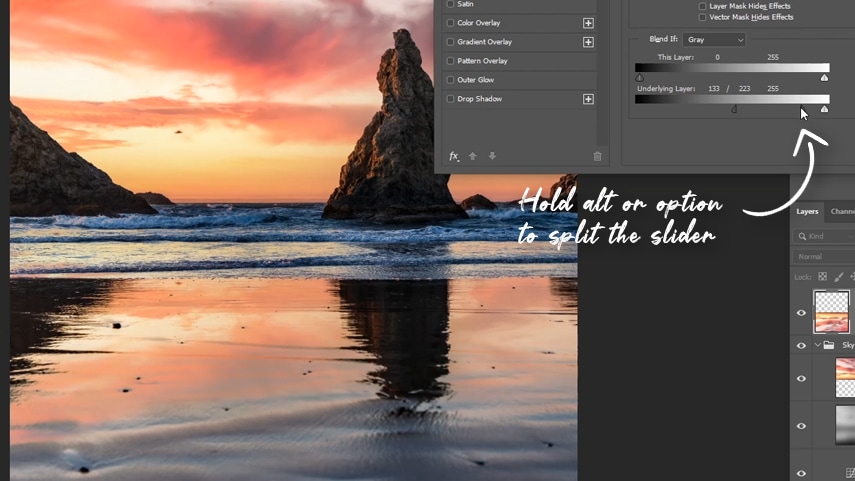
you can also change the blending mode to darken or multiply to blend the sky a little bit better with the foreground, and also reduce the opacity of the reflection a little bit.
And as you can see now, that looks like a realistic reflection.
aaaand that’s it!
that’s how to use the new sky replacement tool in Photoshop and also how to create reflections.
I hope you enjoyed this tutorial, if you did make sure to leave a comment down below and let me know what you think about this tool
you can also subscribe to my Youtube channel
if you want to go a bit more advanced on selections and Sky replacement, I have my previous tutorial on advanced sky replacement techniques that you can watch next
other than that I hope you guys enjoyed this tutorial thank you guys so much for Reading and I’ll see you in the next tutorial. ✌